ONERECOVERY helps you recover over 1000 types and formats of lost and deleted files in just three simple steps within minutes. It supports data recovery from laptops, Recycle Bin/trash, internal hard drives, external storage media, and even crashed computers.
Try It Free
ONERECOVERY User Guide
Get Started
Brief Introduction
Download/Install/Update
Register And Recover Data
Data Recovery
Recover from Computer
Recover from Emptied Recycle Bin
Recover from External Devices
Crashed Computer Recovery
Photo/Video Recovery
Corrupted File Repair
AI Photo Repair
Get started
Brief Introduction
Brief Introduction
For many individuals, experiencing data loss is a commonplace occurrence. ONERECOVERY offers a comprehensive solution, capable of retrieving over 1,000 file types and formats from a wide array of storage mediums. These include Windows, Mac, hard drives, emptied Recycle Bin, external storage devices, and even crashed computers.
Furthermore, the Enhanced Recovery function is specifically designed for the retrieval of lost videos, encompassing deeply concealed and high-resolution 4K/8K videos. Through its patented video recovery technology, ONERECOVERY can autonomously scan, compile, and synchronize video fragments, ensuring the complete restoration and playability of your video files.
Overall Features
ONERECOVERY boasts a large global user base. Let's take a closer look at this software and understand why it has earned the trust and love of global users.
Recover an extensive array of data types and formats, surpassing 1,000 variations, including documents, photos, audio files, videos, emails, and a diverse range of other file types.
Retrieve data from over 2,000 storage devices including SSDs, HDDs, external hard drives, USB flash drives, SD cards, CF cards, digital cameras, drones, action cameras, camcorders, audio recorders, music players, and more.
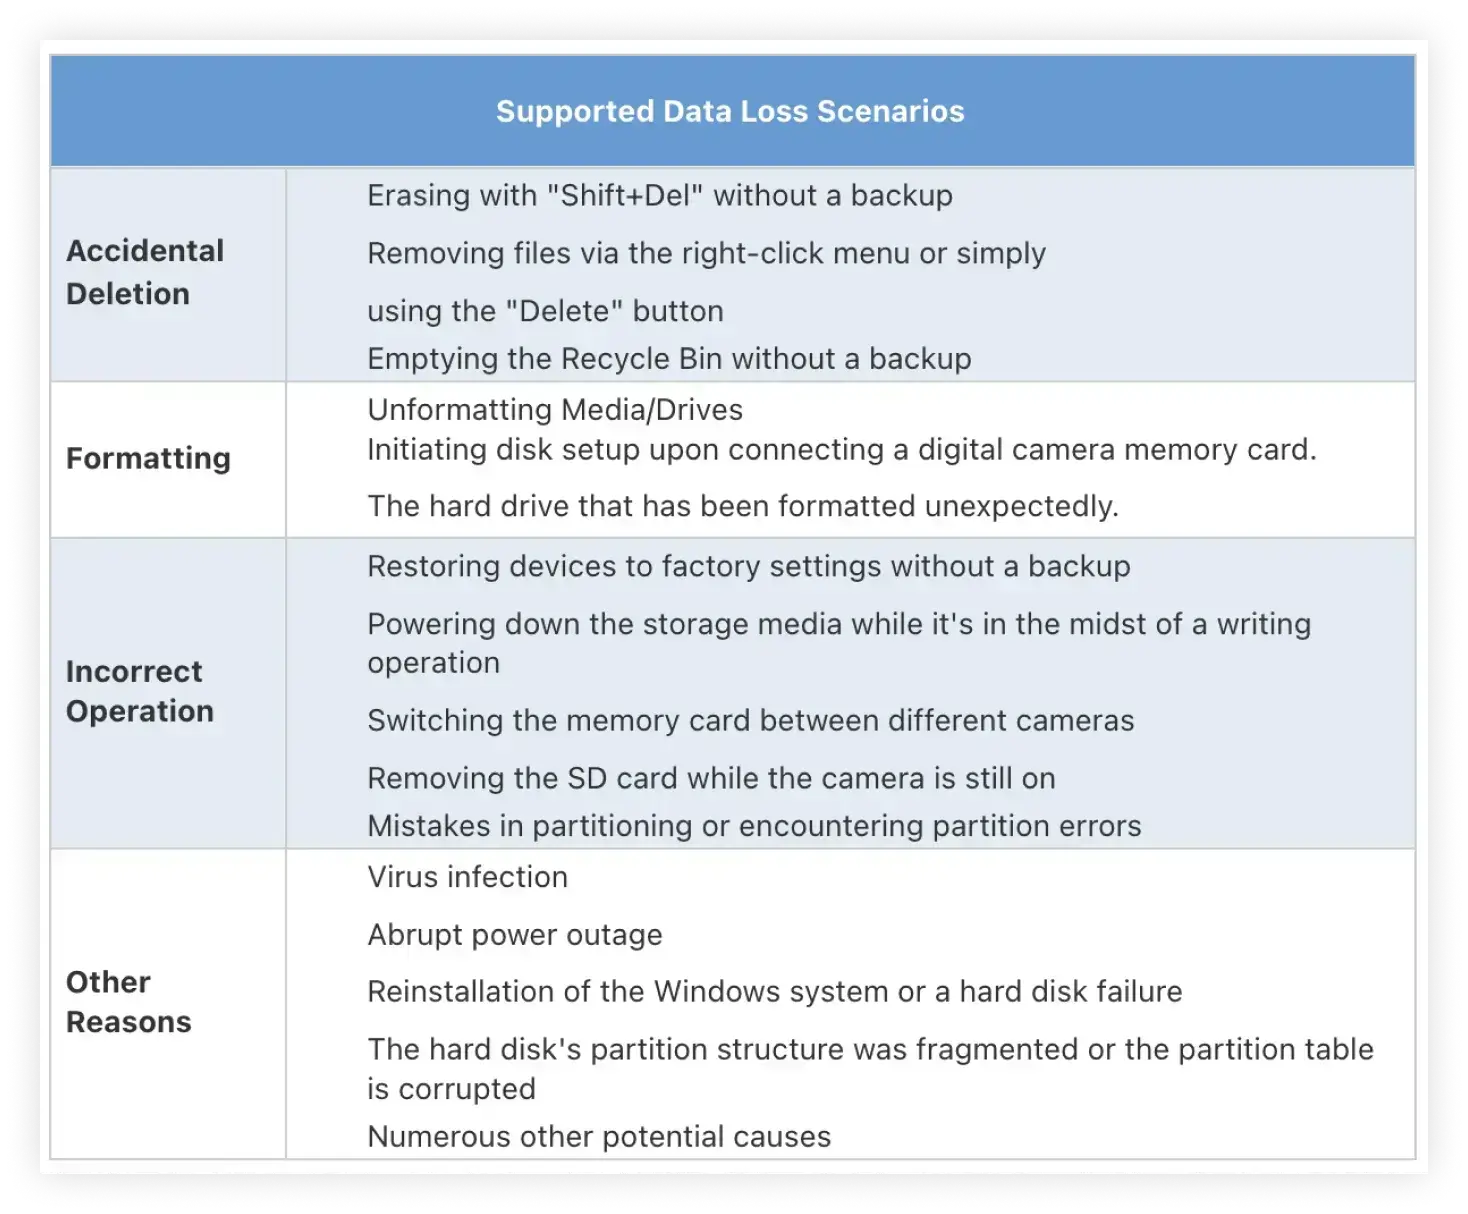
Available for over 500 scenarios involving data loss, including accidental deletion, formatting, virus attacks, system crashes, disk damage, improper operations, and more.
Recover individual files, multiple files, and entire folders.
Able to scan on an entire disk or a designated file pathway.
Deep and efficient scans for all lost data utilizing advanced algorithms.
Offer previews and thumbnails for files prior to initiating the recovery process.
ONERECOVERY offers outstanding search and filtering capabilities, allowing for precise identification of lost data.
A scanning progress bar that displays the remaining scanning time, the quantity of located files, and the examined hard drive sectors.
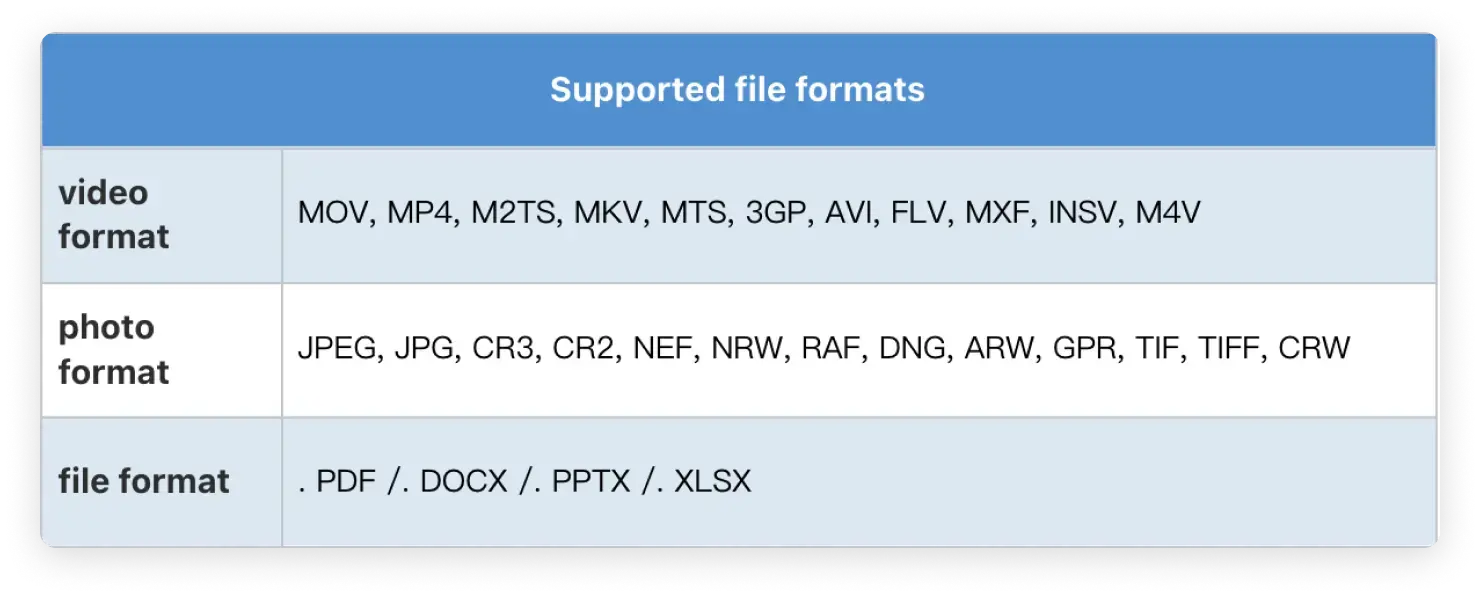
Efficiently restore a wide range of videos that are currently inaccessible or afflicted with corruption, breakage, or damage. This includes files in MOV, MP4, M2TS, MKV, MTS, 3GP, AVI, FLV, MXF, KLV, INSV, M4V, WMV, MPEG, ASF formats.
User-friendly interface and straightforward recovery procedure.
Provide compatibility for computer screens with various resolutions (100%, 125%, 150%).
Compatible with Windows versions 11/10/8.1/8/7/Vista, as well as Windows Server editions 2022/2019/2016/2012/2008/2003, and Mac operating systems from macOS X 10.10 to macOS 13 Ventura.
Capable of functioning with a wide range of file systems including NTFS, FAT32, FAT16, exFAT, ReFS, APFS, encrypted APFS, HFS+, encrypted HFS, HFSX, RAW, RAID, EXT2, EXT3, EXT4, BTRFS, JFS, and more.
Get Started
How To Download/Install/Update ONERECOVERY for Windows
The download and installation of ONERECOVERY for Windows are simple and easy. Get the simple steps here.
01
System Requirements
If you want to install and run ONERECOVERY for Windows, the essential minimum specifications are outlined below:
Operating Systems: Windows 11/10/8.1/8/7/Vista, Windows Server 2022/2019/2016/2012/2008/2003
RAM: 2 GB minimum (4 GB recommended)
CPU: 1Ghz or above (32bit or 64bit)
Hard Disk Space: 150MB minimum space for installing
02
Download ONERECOVERY for Your Device
ONERECOVERY is available in both Windows and Mac editions. Depending on your requirements, select the appropriate version and click the button below to initiate the software download.
03
Install ONERECOVERY for Windows
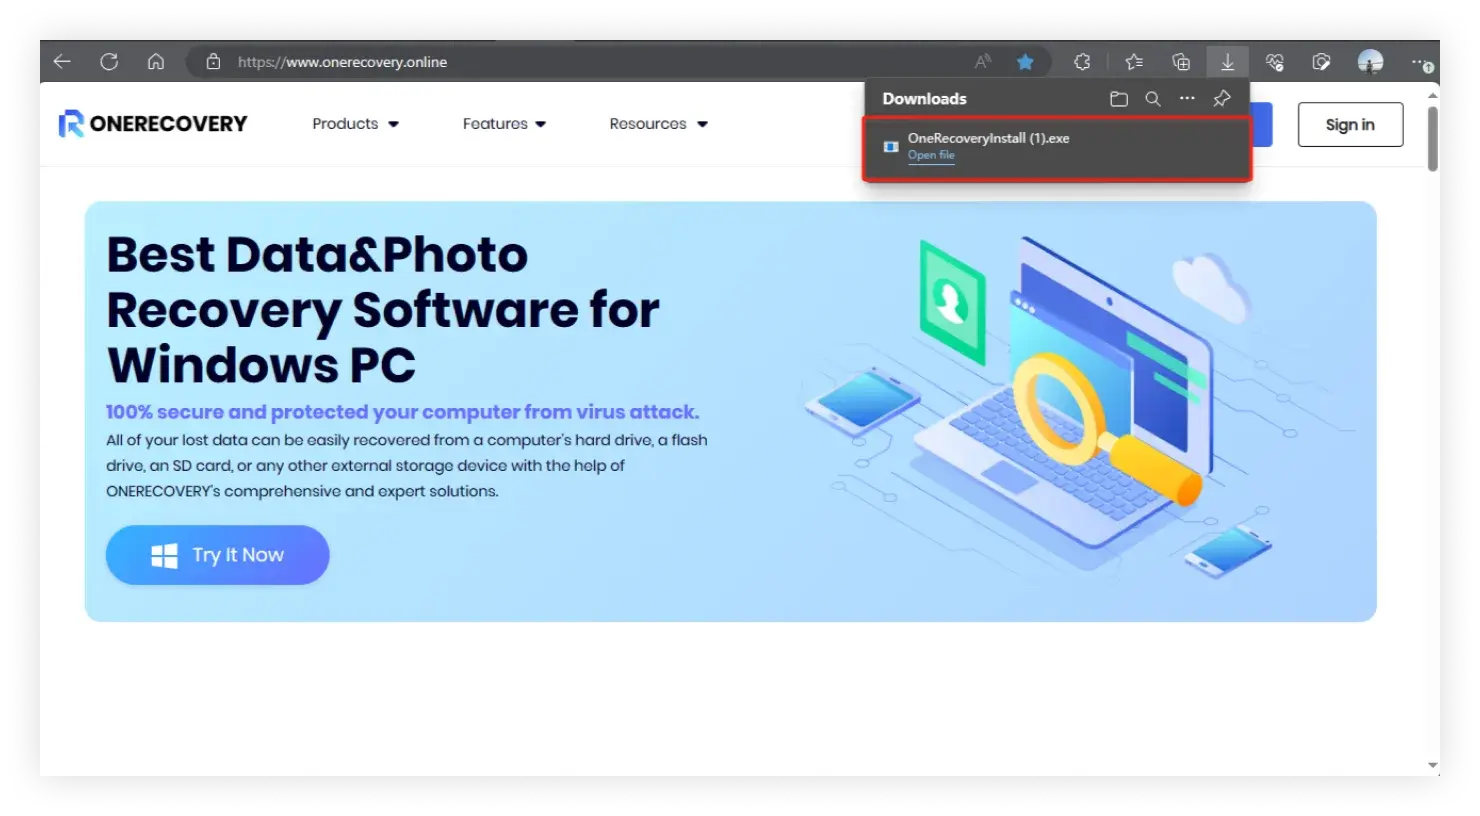
Step 1
Double-click the “ONERECOVERYDownloader.exe” file in your downloaded folder.
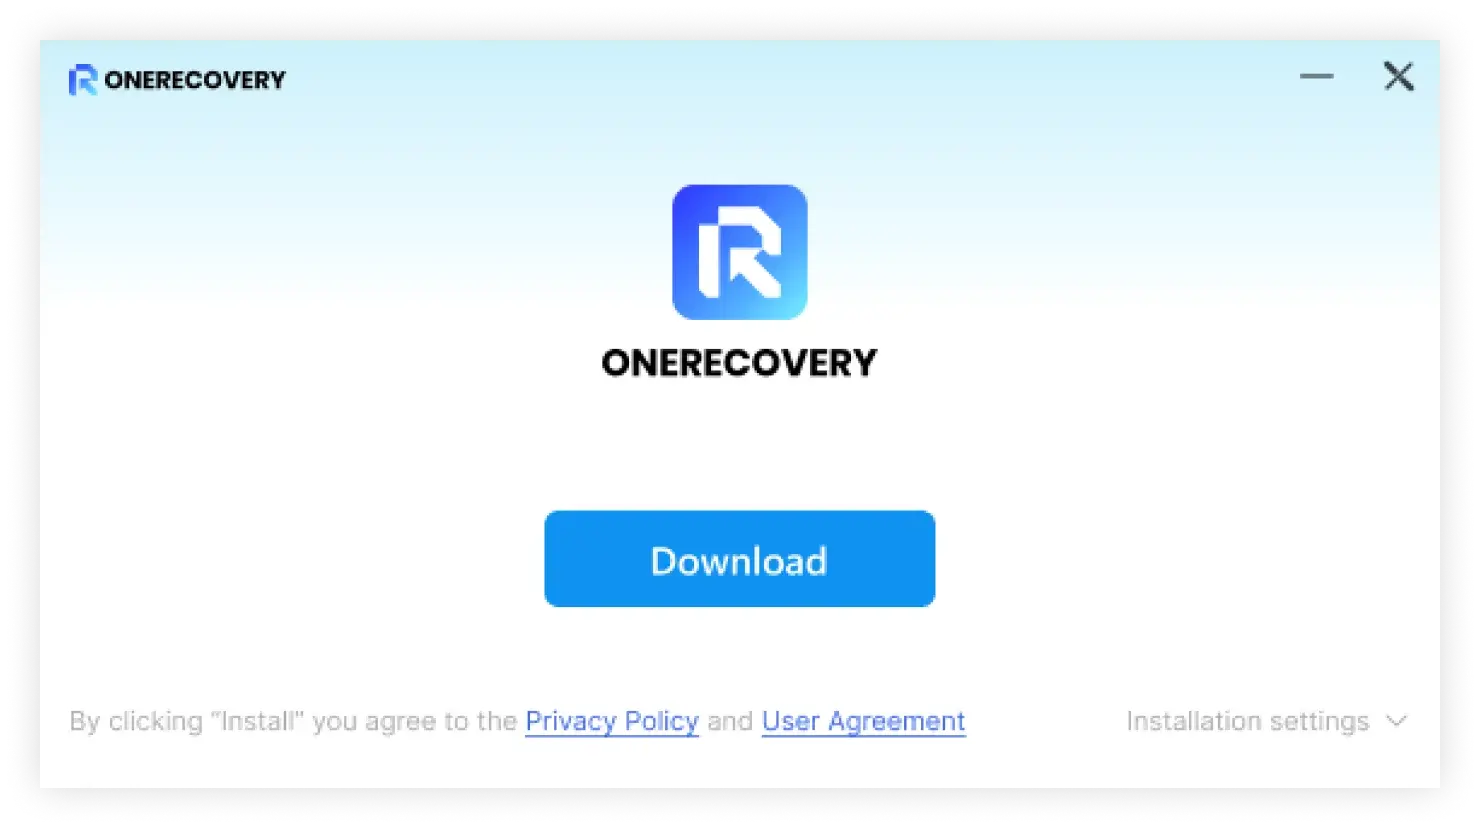
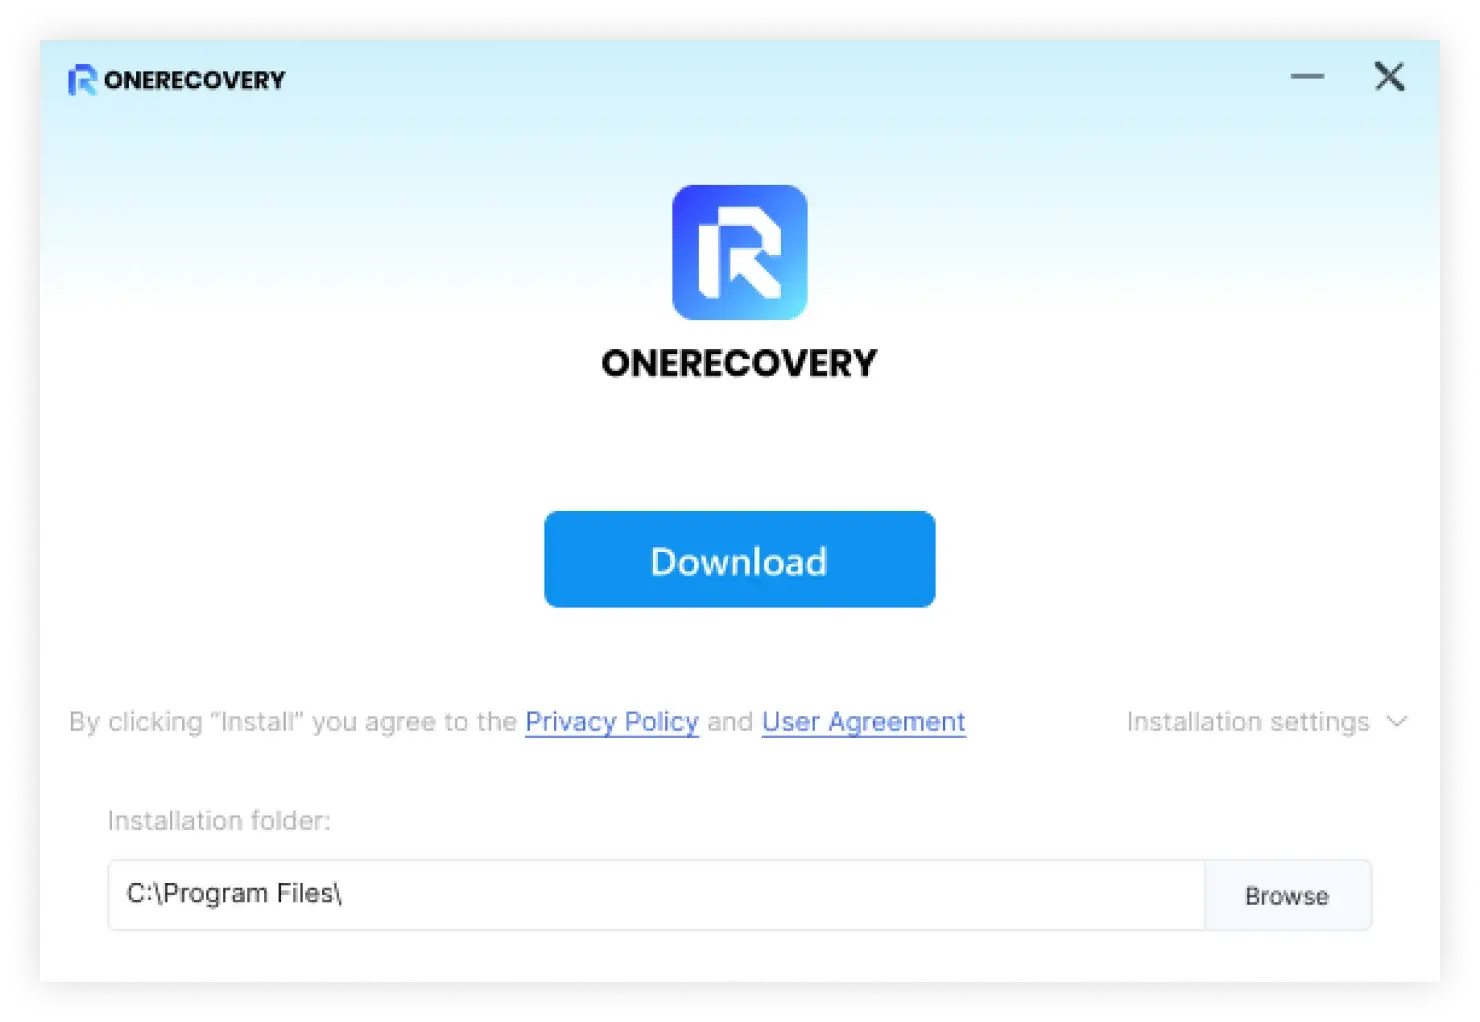
Step 2
A prompt will pop up, requesting confirmation for the installation. Select "Download". Alternatively, you may choose "Installation settings" to pick your desired destination.
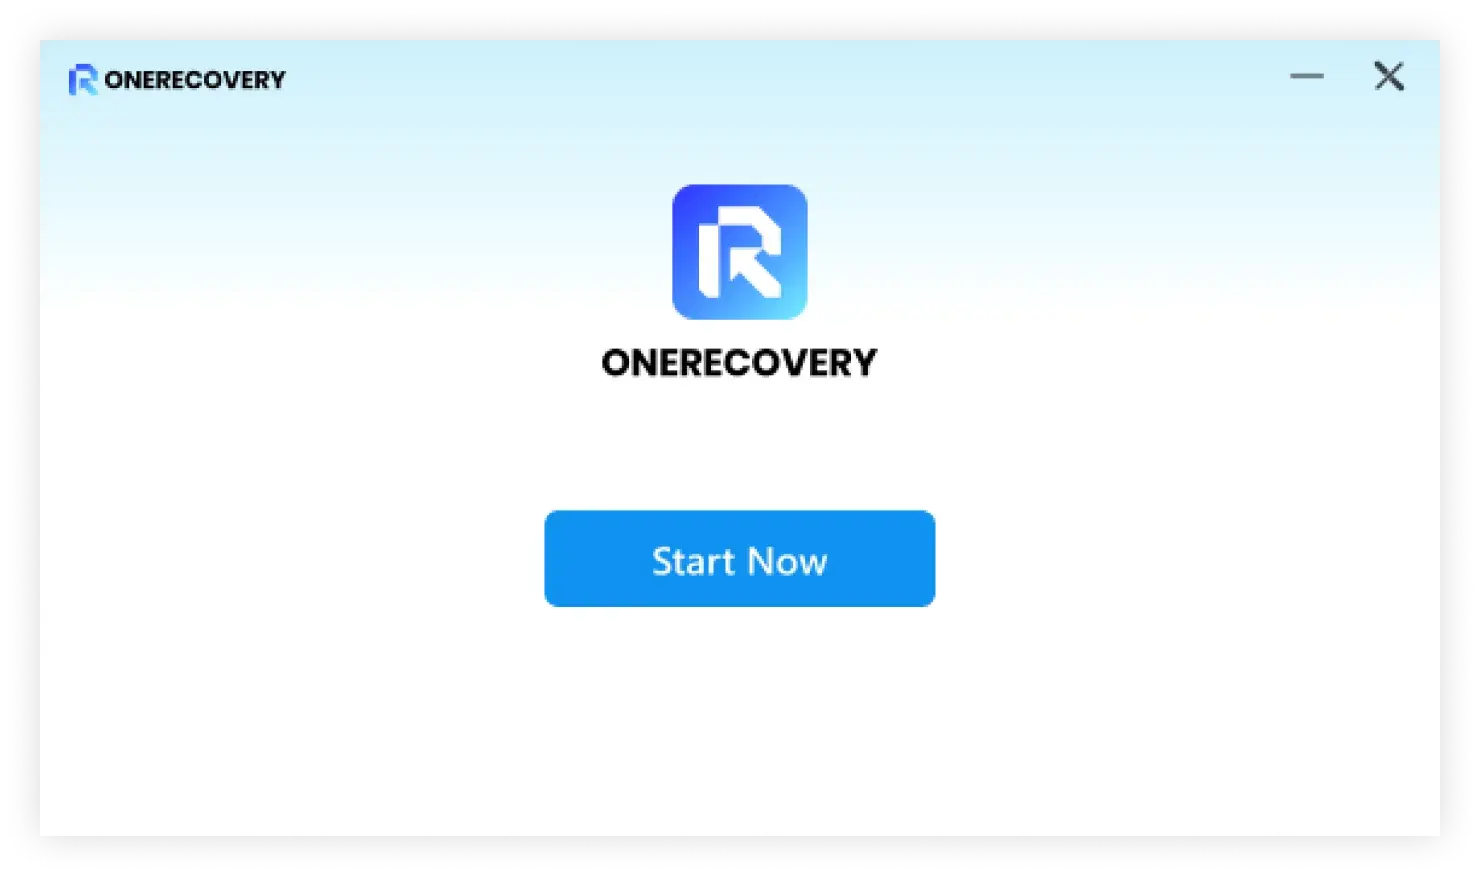
Step 3
Please be patient for a few minutes, and a concluding dialog box will emerge. You'll be able to promptly start the recovery process on your Windows computer using ONERECOVERY.
Note: To initiate ONERECOVERY Data Recovery, just double-click the "ONERECOVERY" icon on your Desktop.
04
Update ONERECOVERY for Windows
Users who purchase ONERECOVERY Lifetime Plan will receive complimentary updates throughout the duration of their plan. If you have an active Internet connection, ONERECOVERY can be updated automatically. Alternatively, you can manually update by following the steps below.
Step 1
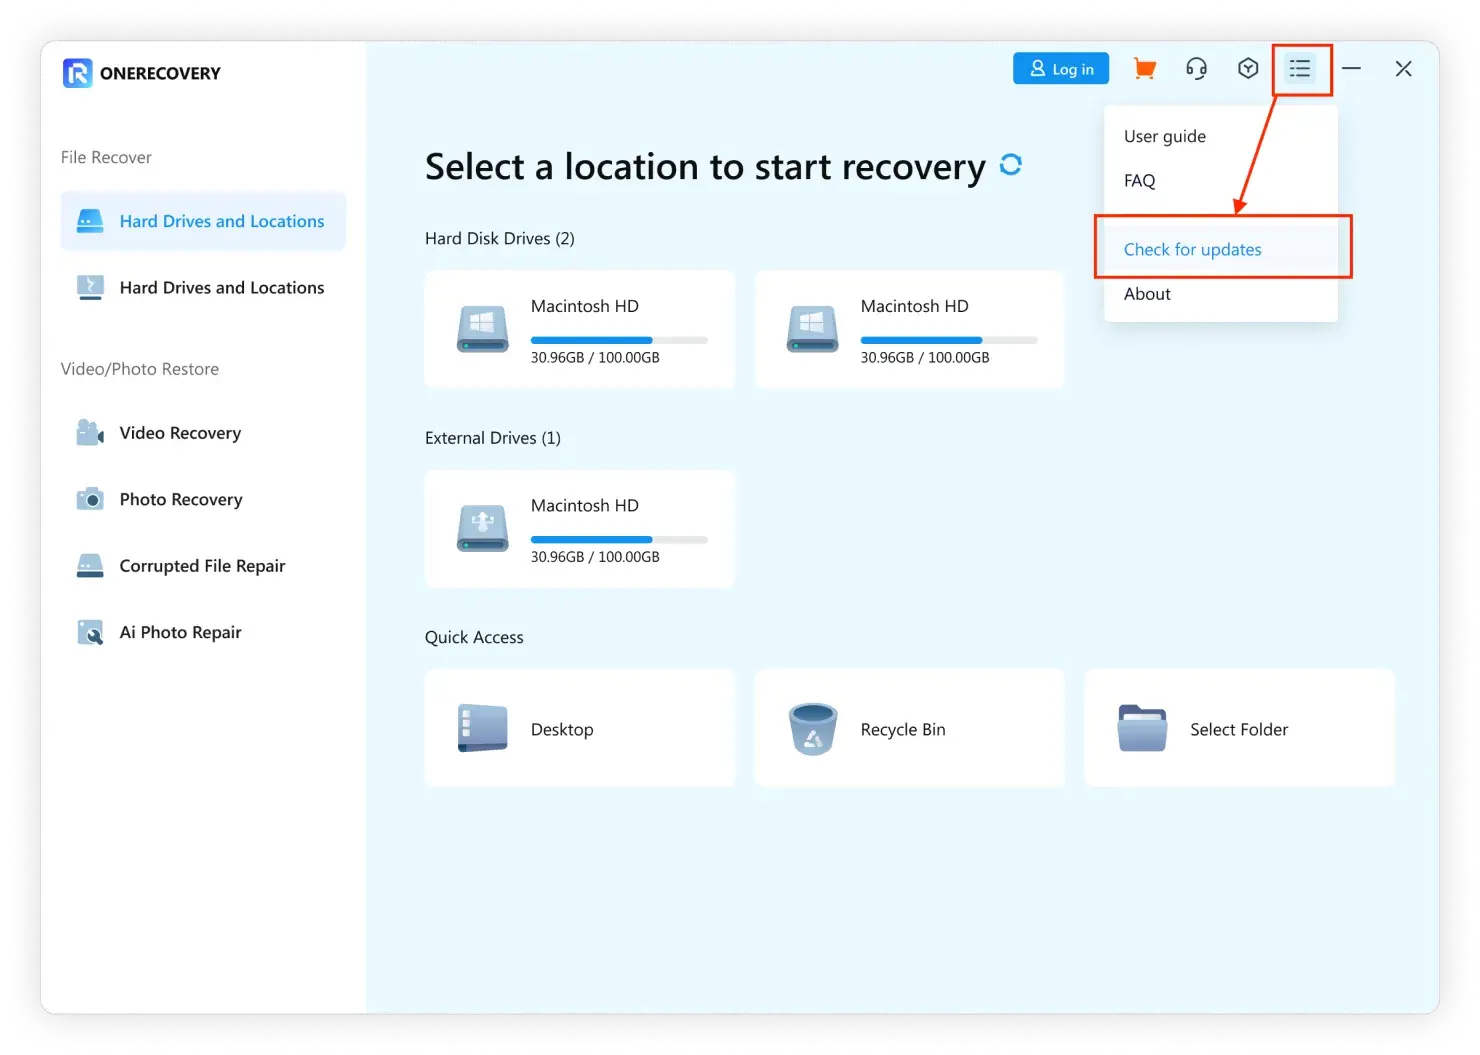
Launch ONERECOVERY for Windows.
Step 2
Click the "Menu" button on the top right corner. Then, choose “Check for Updates” from the drop-down menu.
Step 3
Confirm the update to the latest version.
Get Started
01
Register ONERECOVERY
ONERECOVERY provides a complimentary option to scan and preview data located on your computer or storage devices. However, if you wish to retrieve and store the lost or deleted files, kindly proceed to register and upgrade your ONERECOVERY version.
If you're a new user, please refer to the steps below to create a new account.
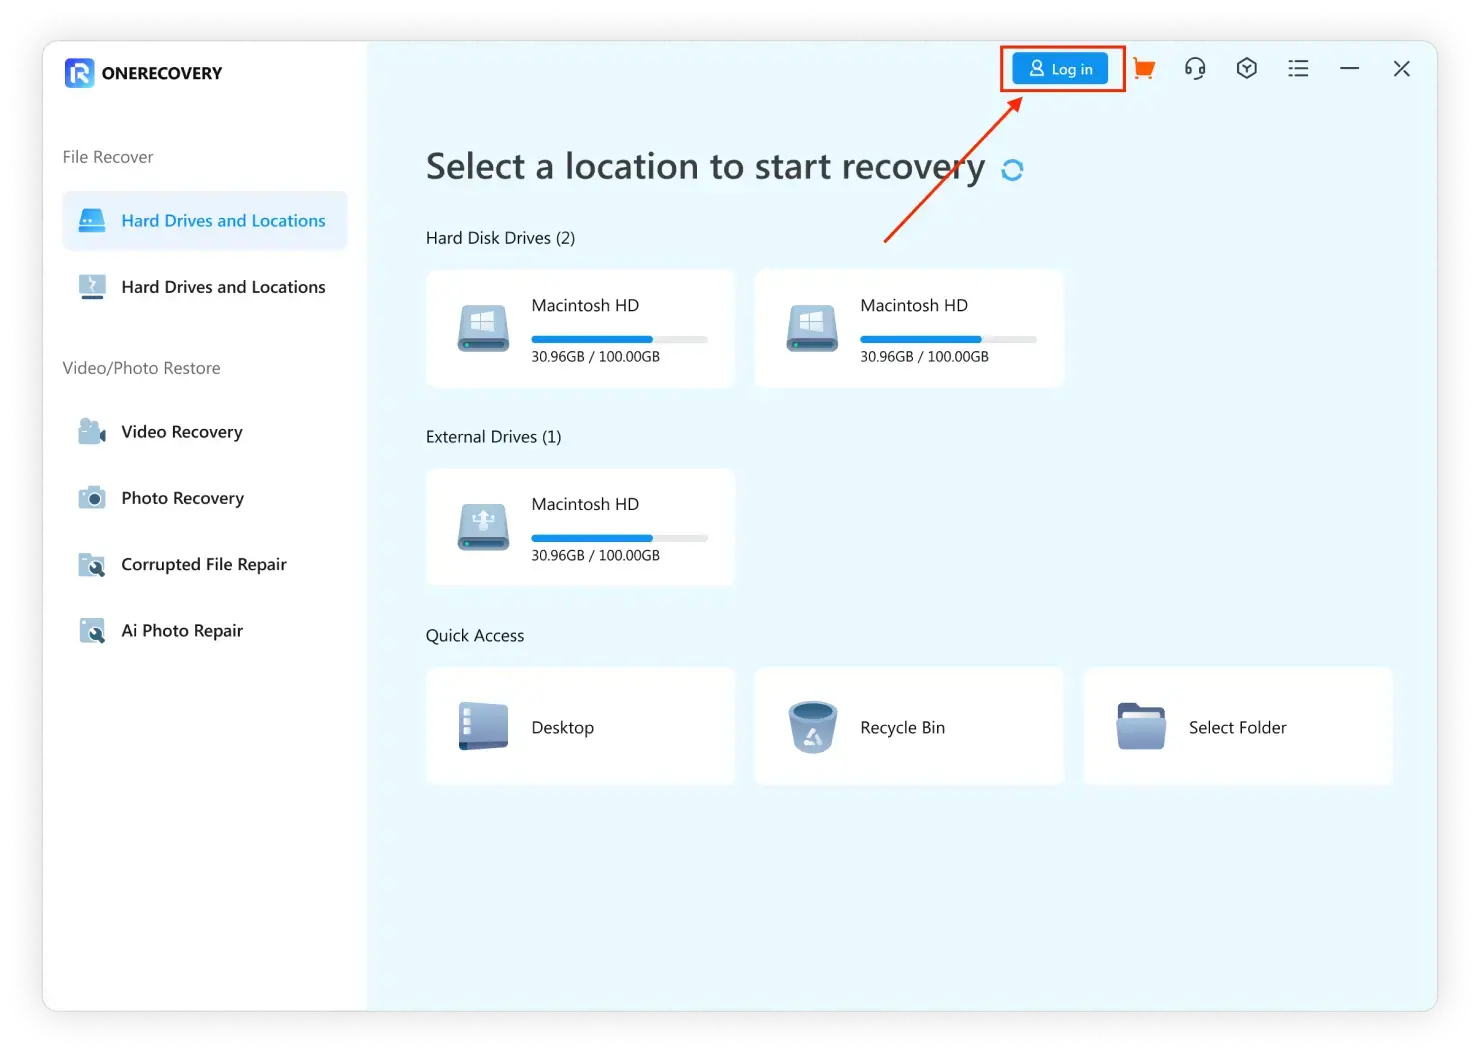
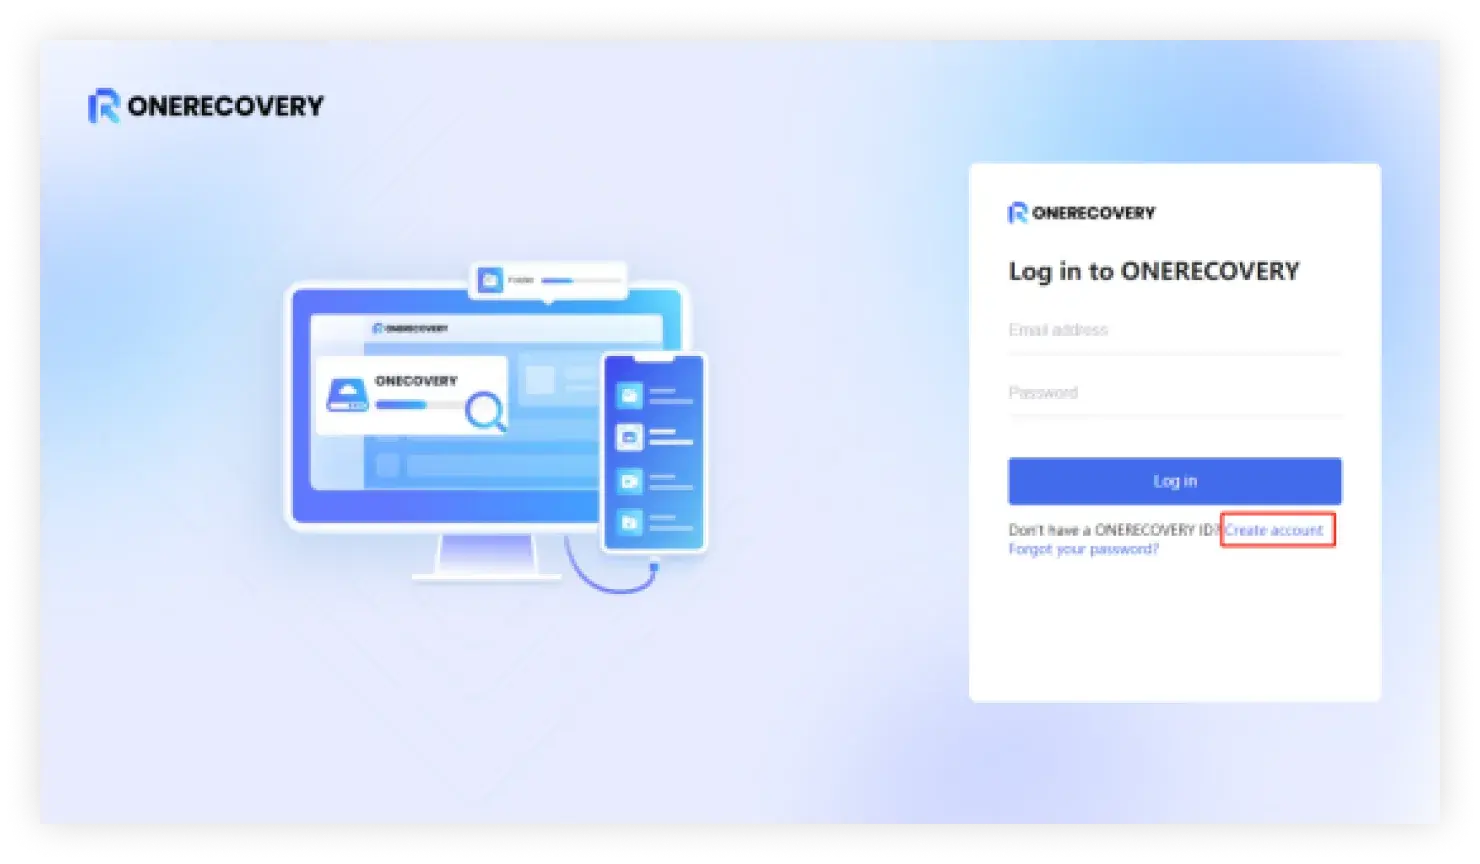
Step 1
Click Log in > Create an account to go to the registering page.
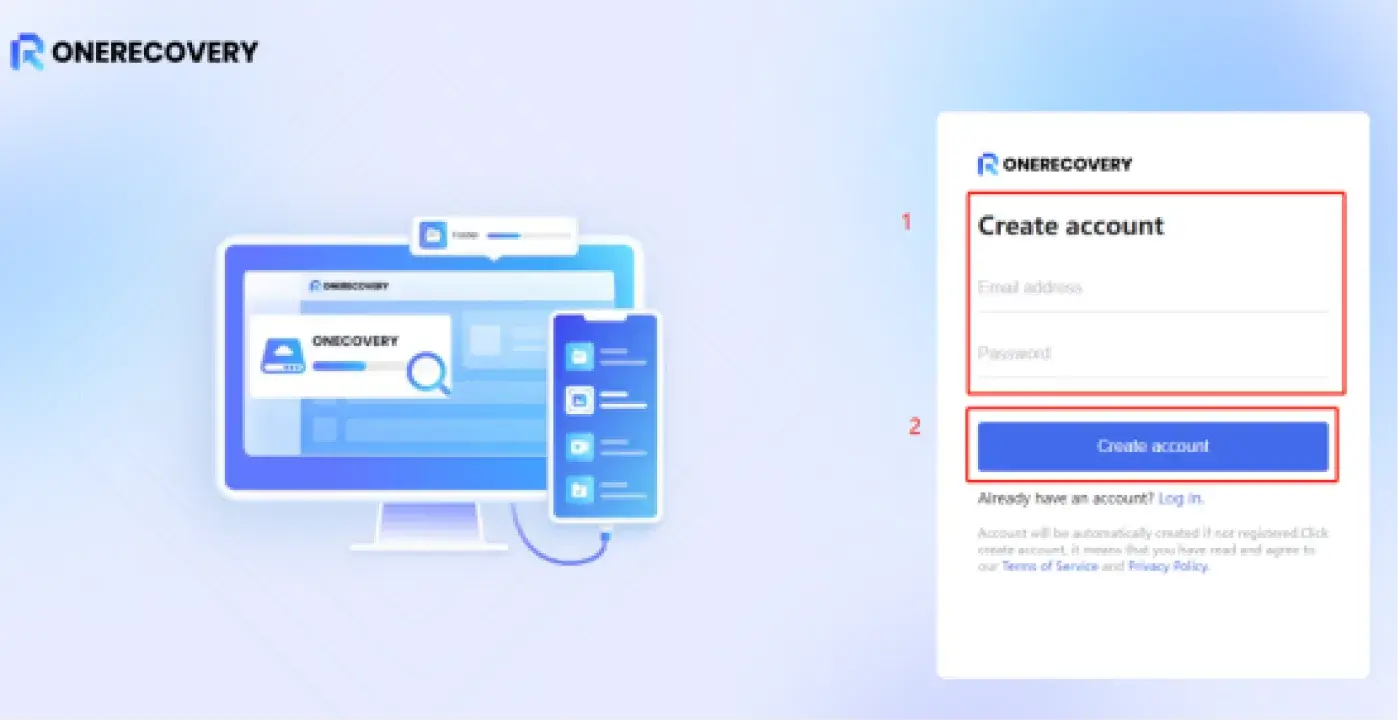
Step 2
Input your email and password. After that, click "Create Account" to finish the registration process.
02
Purchase ONERECOVERY
ONERECOVERY Data Recovery offers an official online store tailored to your needs. You can access this page directly from the software through various methods.
Way 1
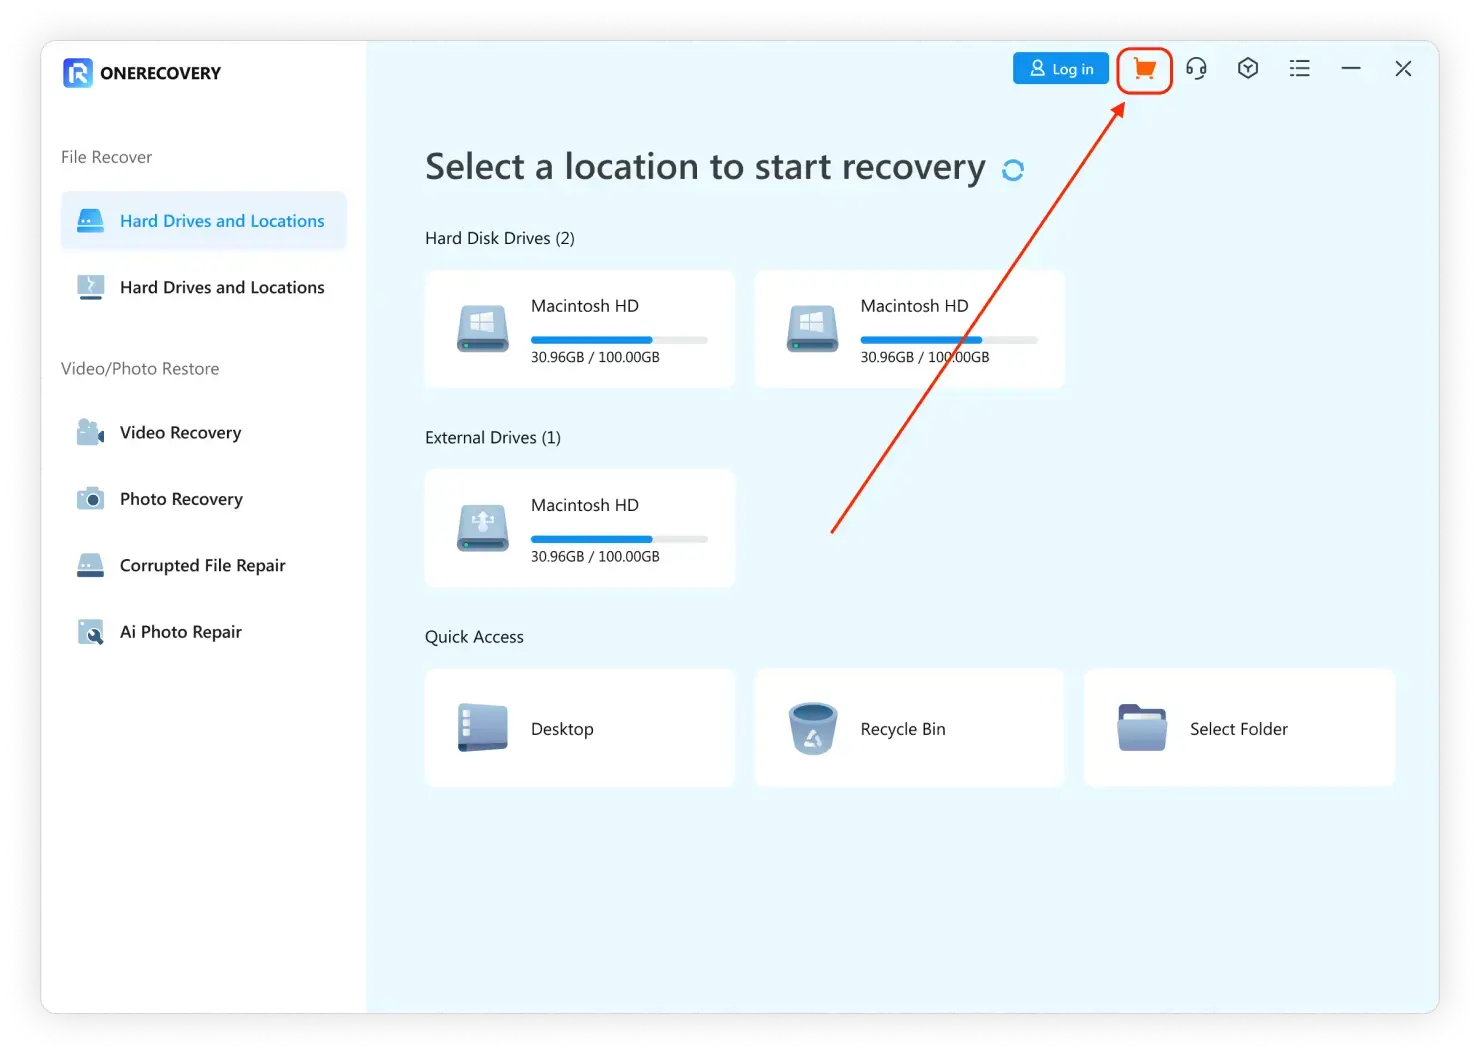
If you haven’t logged into your ONERECOVERY account, you can click the Cart icon on the top right corner to view the pricing and plan.
Way 2
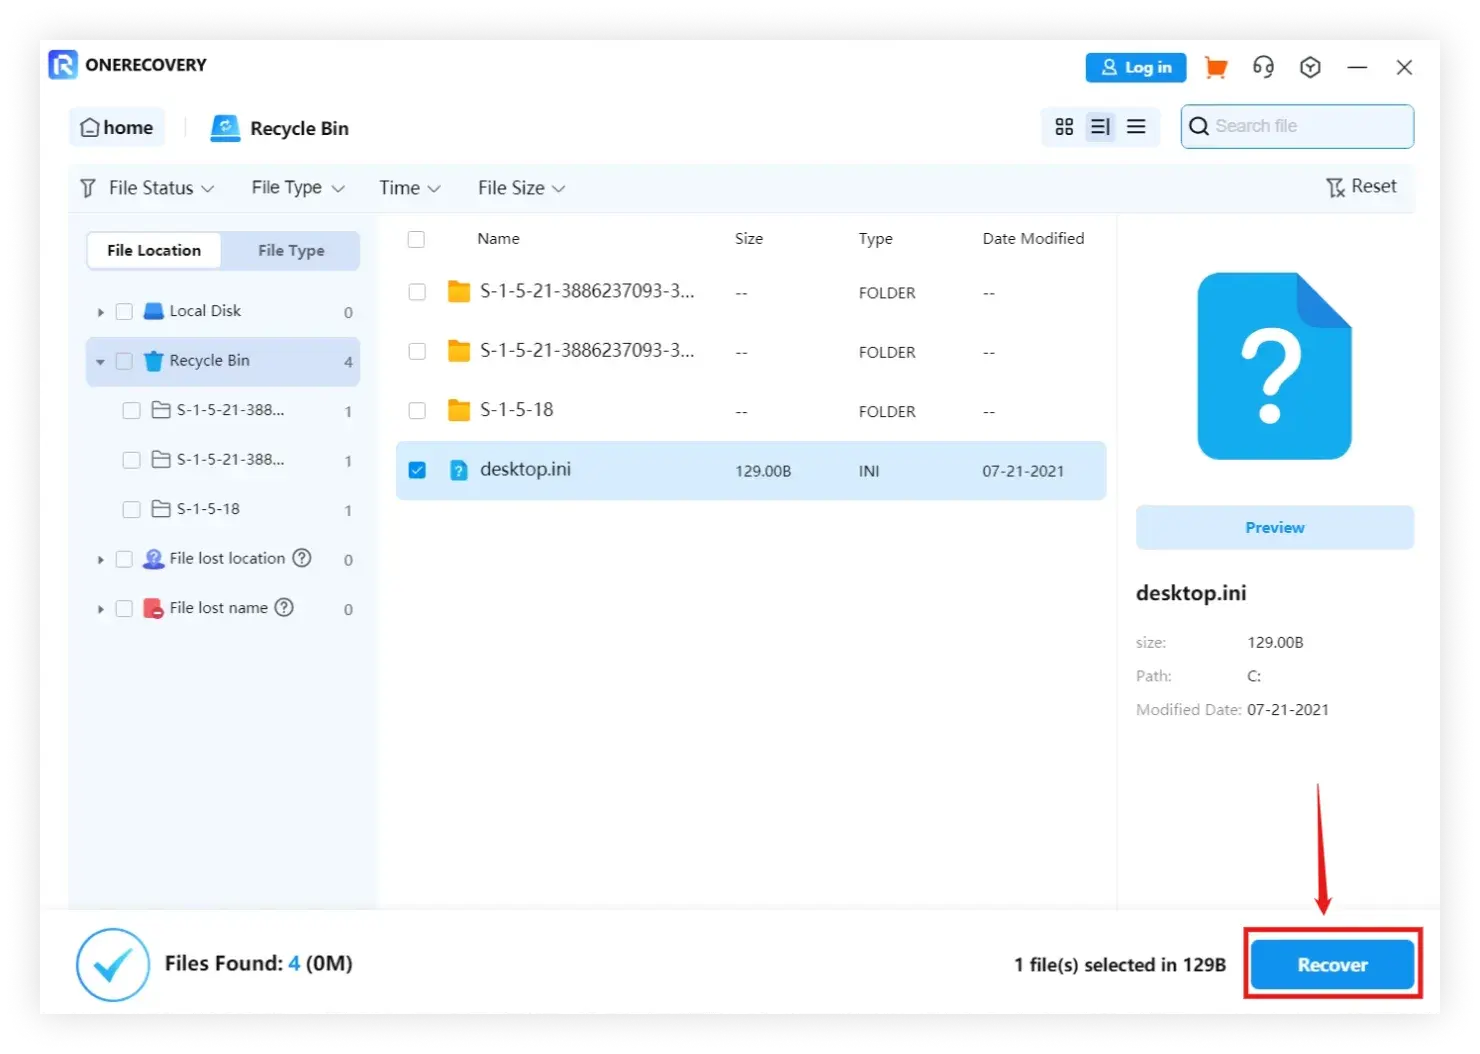
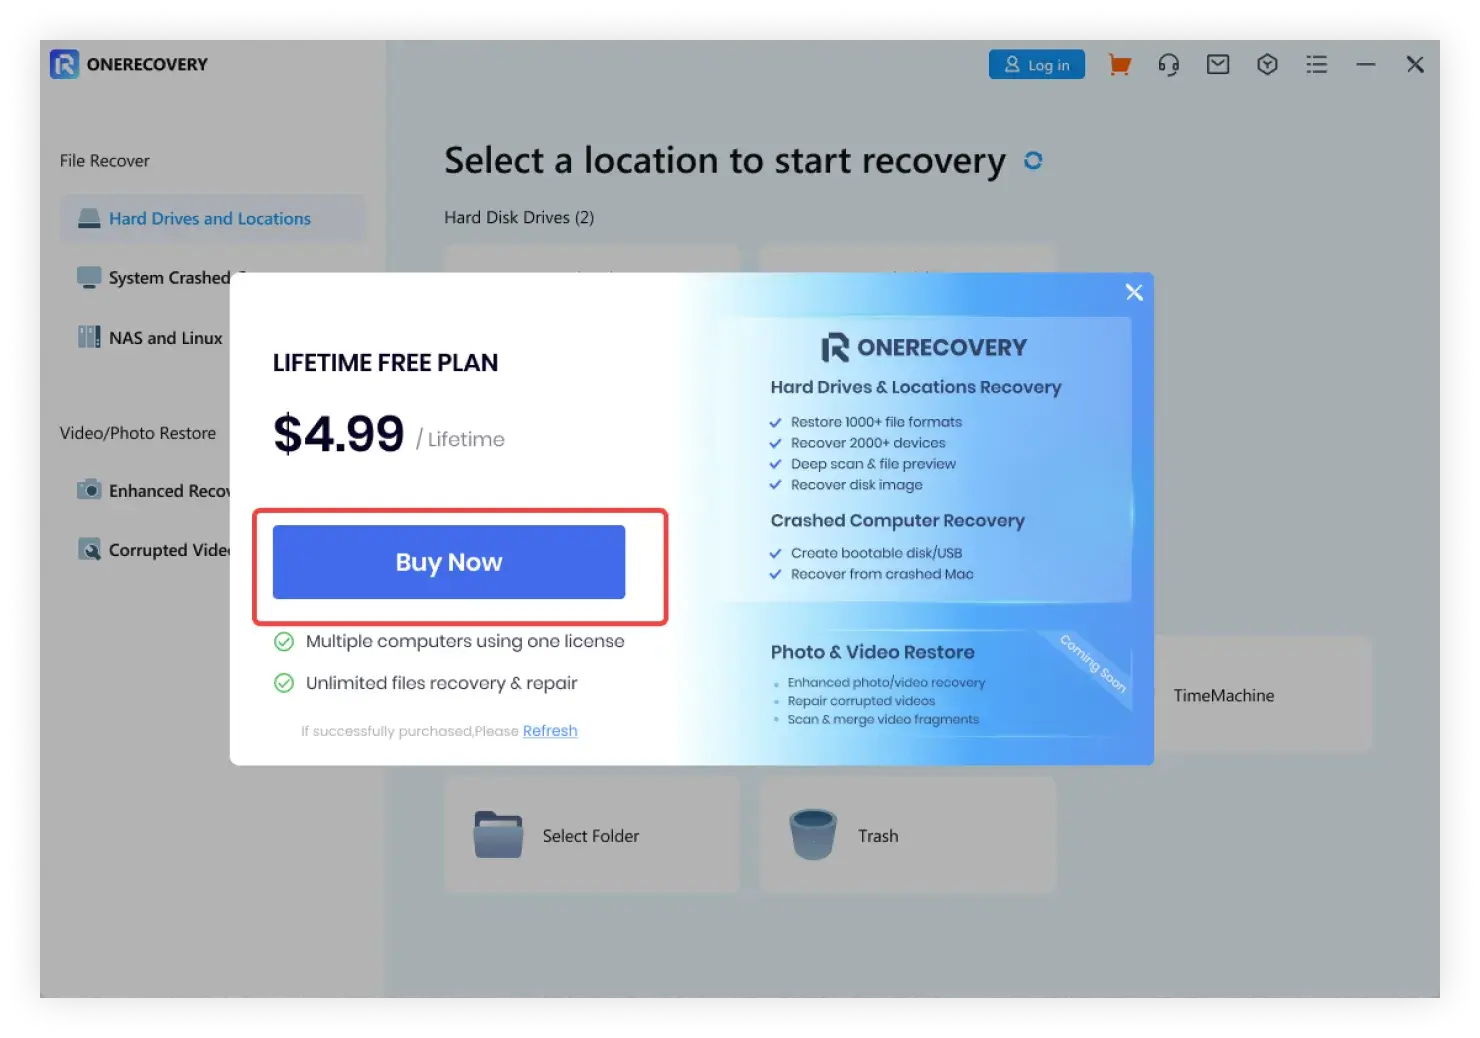
After completing the scan and locating your desired files, simply click the "Recover" button to securely save them. If you haven't obtained a license, a window will pop up. Here, you can purchase the LifeTime Plan and proceed by clicking "Buy Now" to review the details.
Data Recovery
Recover from Computer
Recover Files from Windows Computer
ONERECOVERY may have updated its user interface, but the data recovery procedure remains unchanged. To retrieve data from a computer, adhere to the following three steps:
Select a location
Quick & deep scan
Preview & recover
Step 1
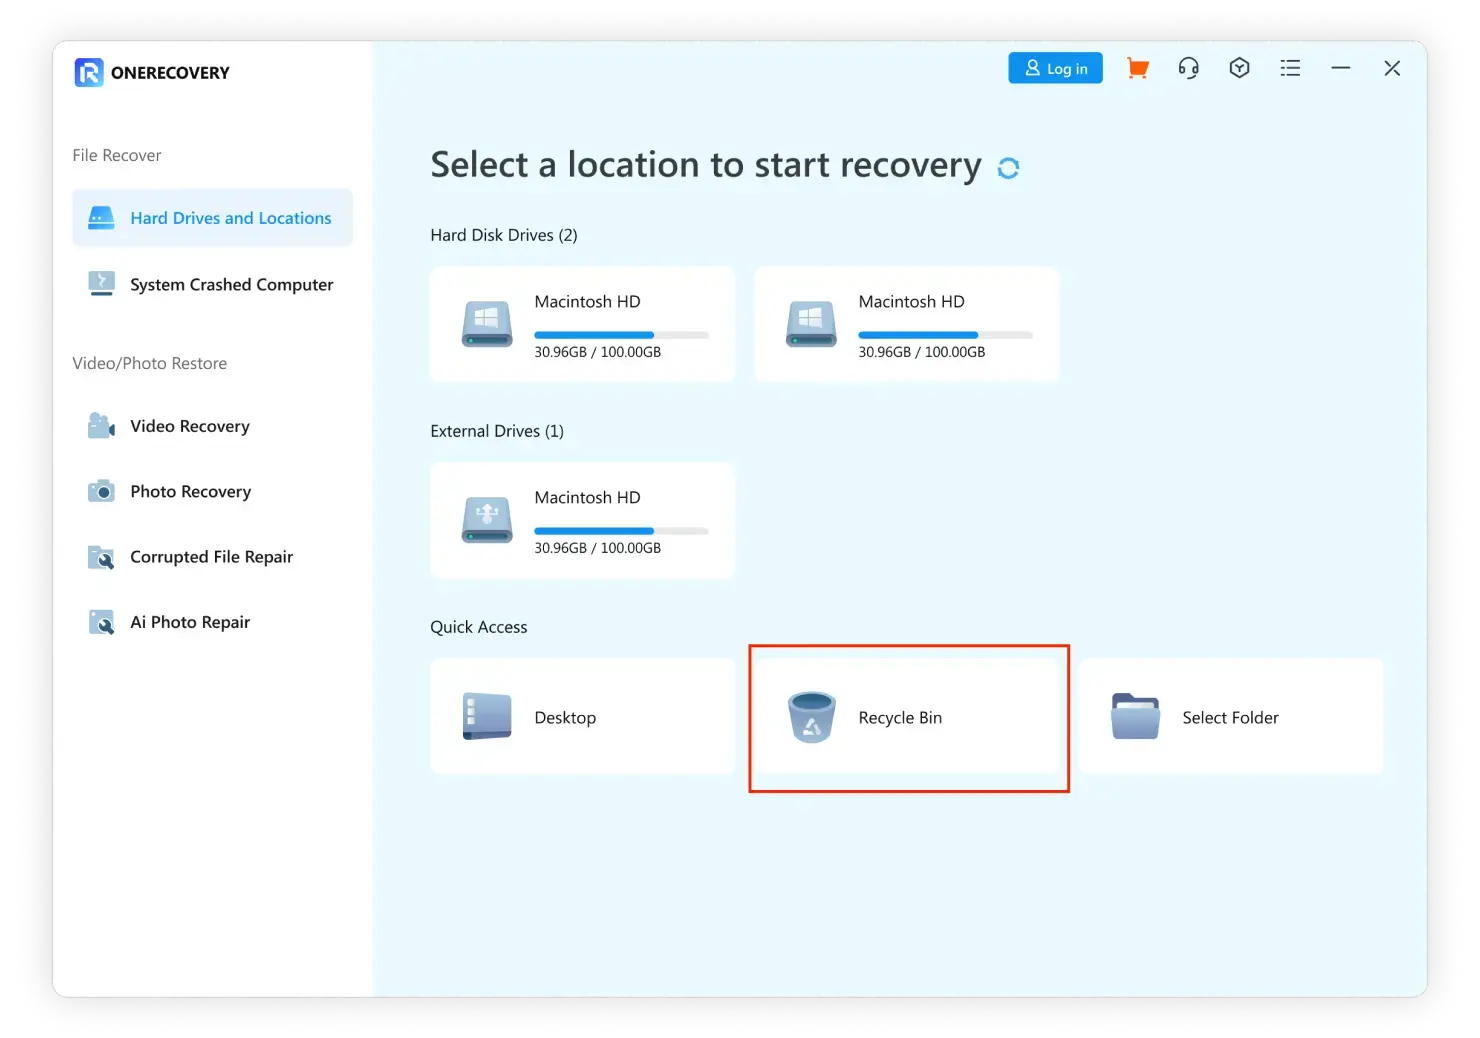
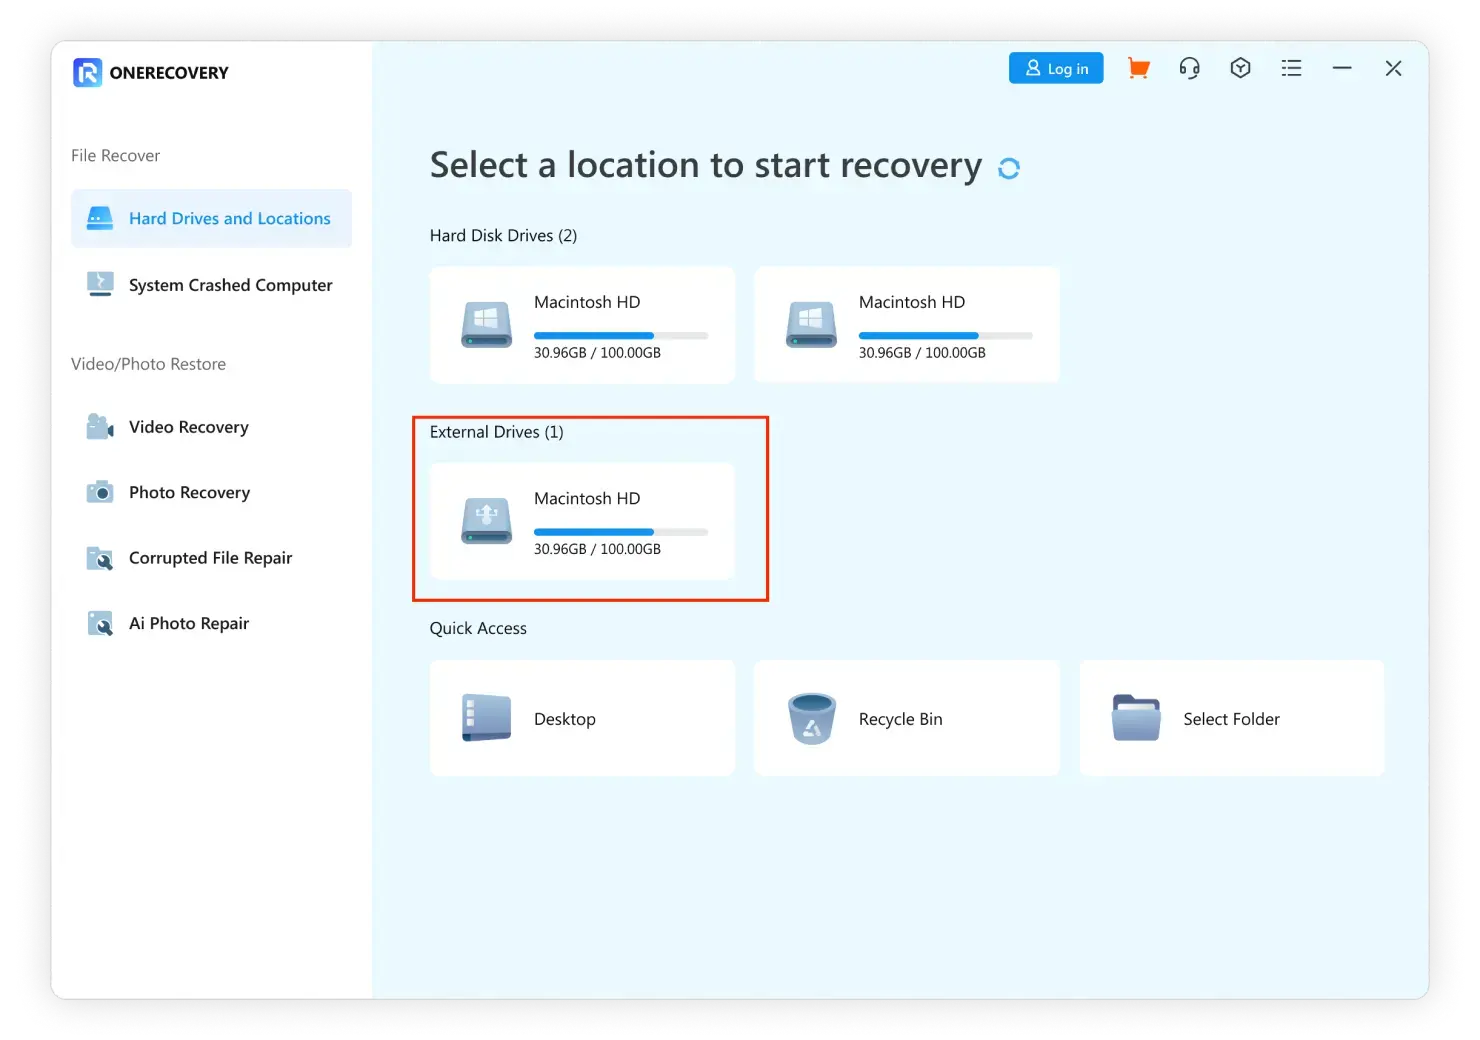
Select a Location
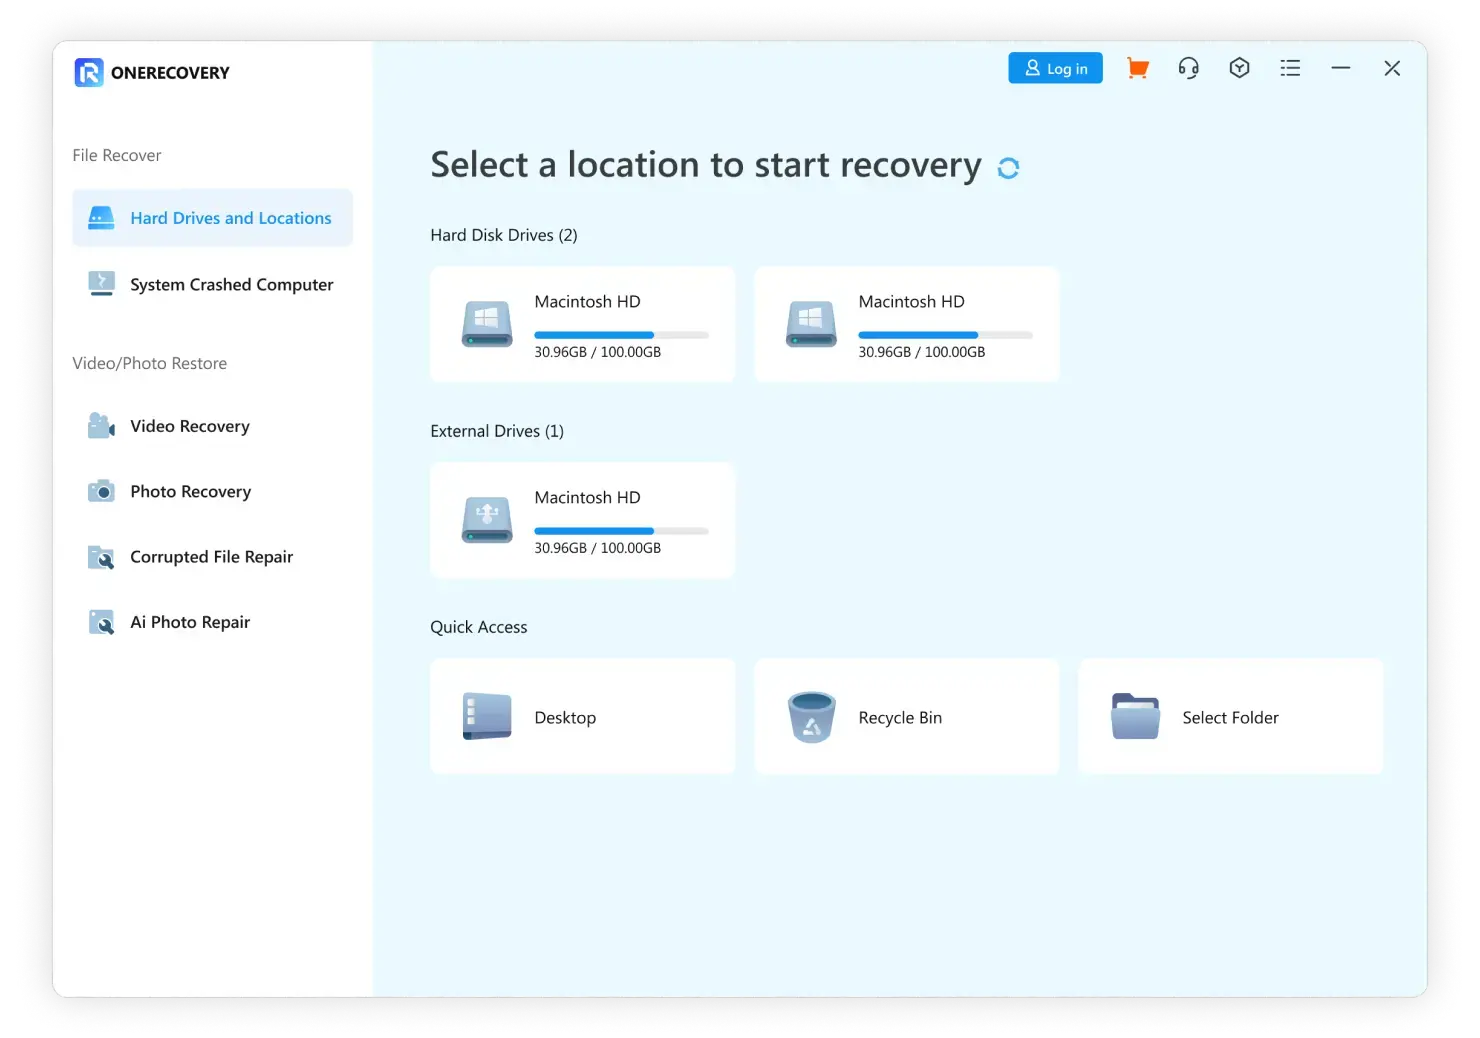
To retrieve lost data on a computer, one must first choose the location where the data got lost. When initiating the program, the primary interface will display "Hard Drives and Locations" on the left-hand side. To proceed, select a hard disk from the "Hard Disk Drives" section or Desktop from the "Quick Access" section.
Once you have selected the desired location, you can begin the scanning process.
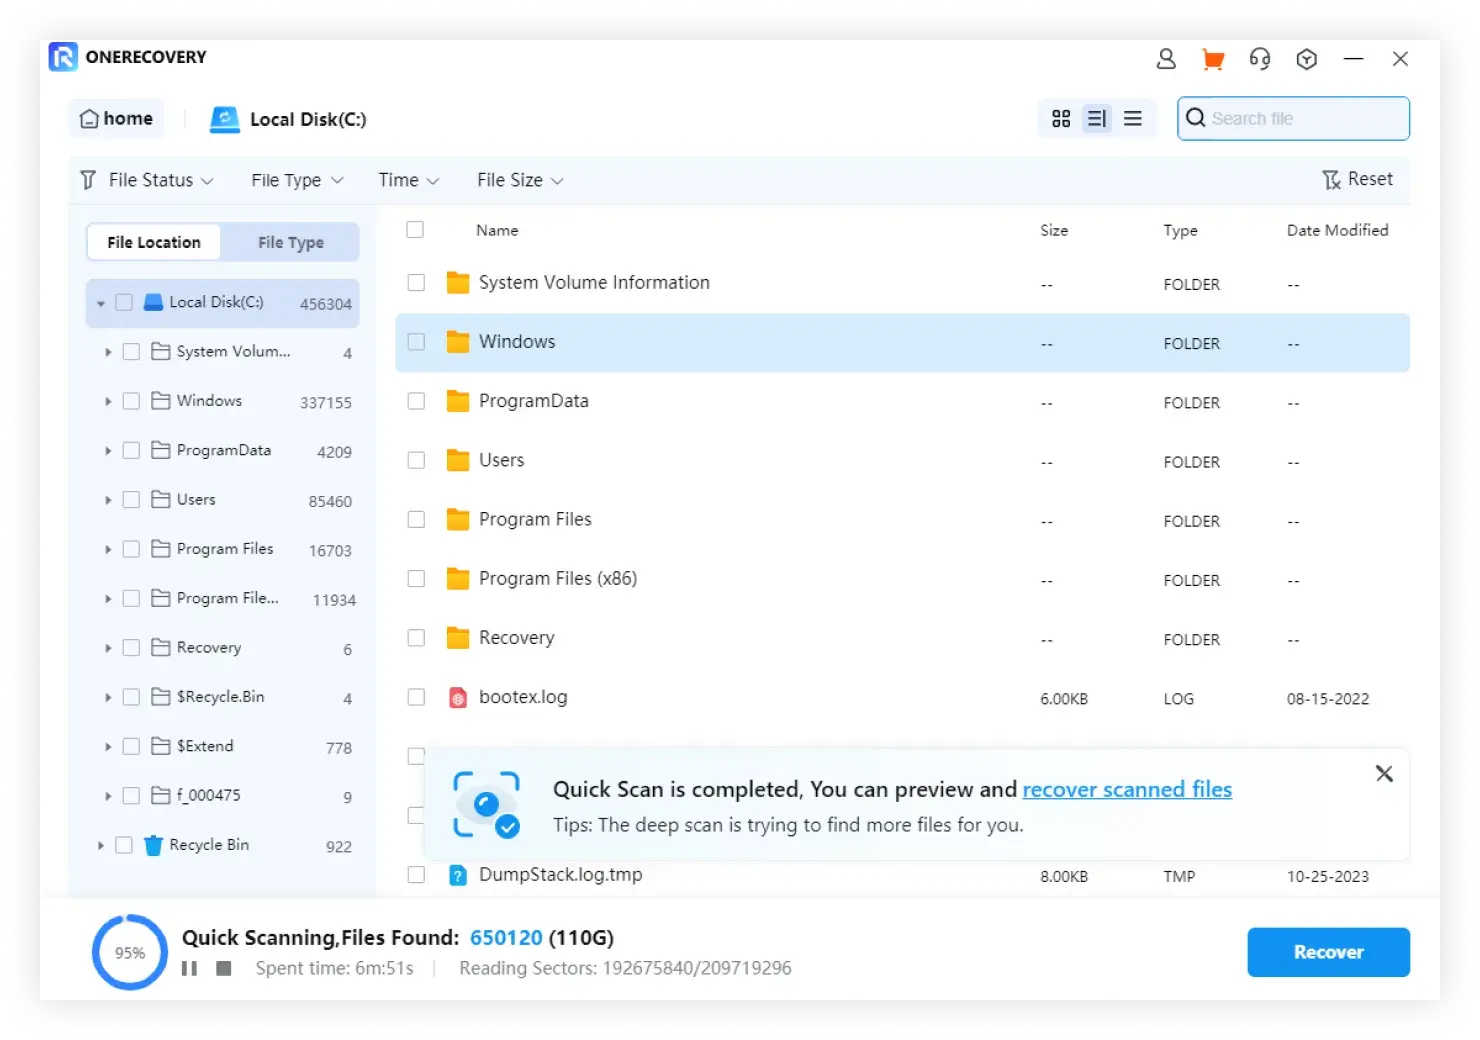
step 2
Scan the Location
A deep scan will be automatically initiated by ONERECOVERY. Previous versions may have taken a few minutes, or even several hours, to finish scanning, particularly when sizable files were present. Fortunately, ONERECOVERY has successfully expedited the scanning process, significantly saving time in the recovery phase. Furthermore, real-time scanning results are visible on the interface, enabling you to preview your recoverable files at any moment.
During the scanning process, you have the option to either focus on specific files or halt the scan according to your preferences.
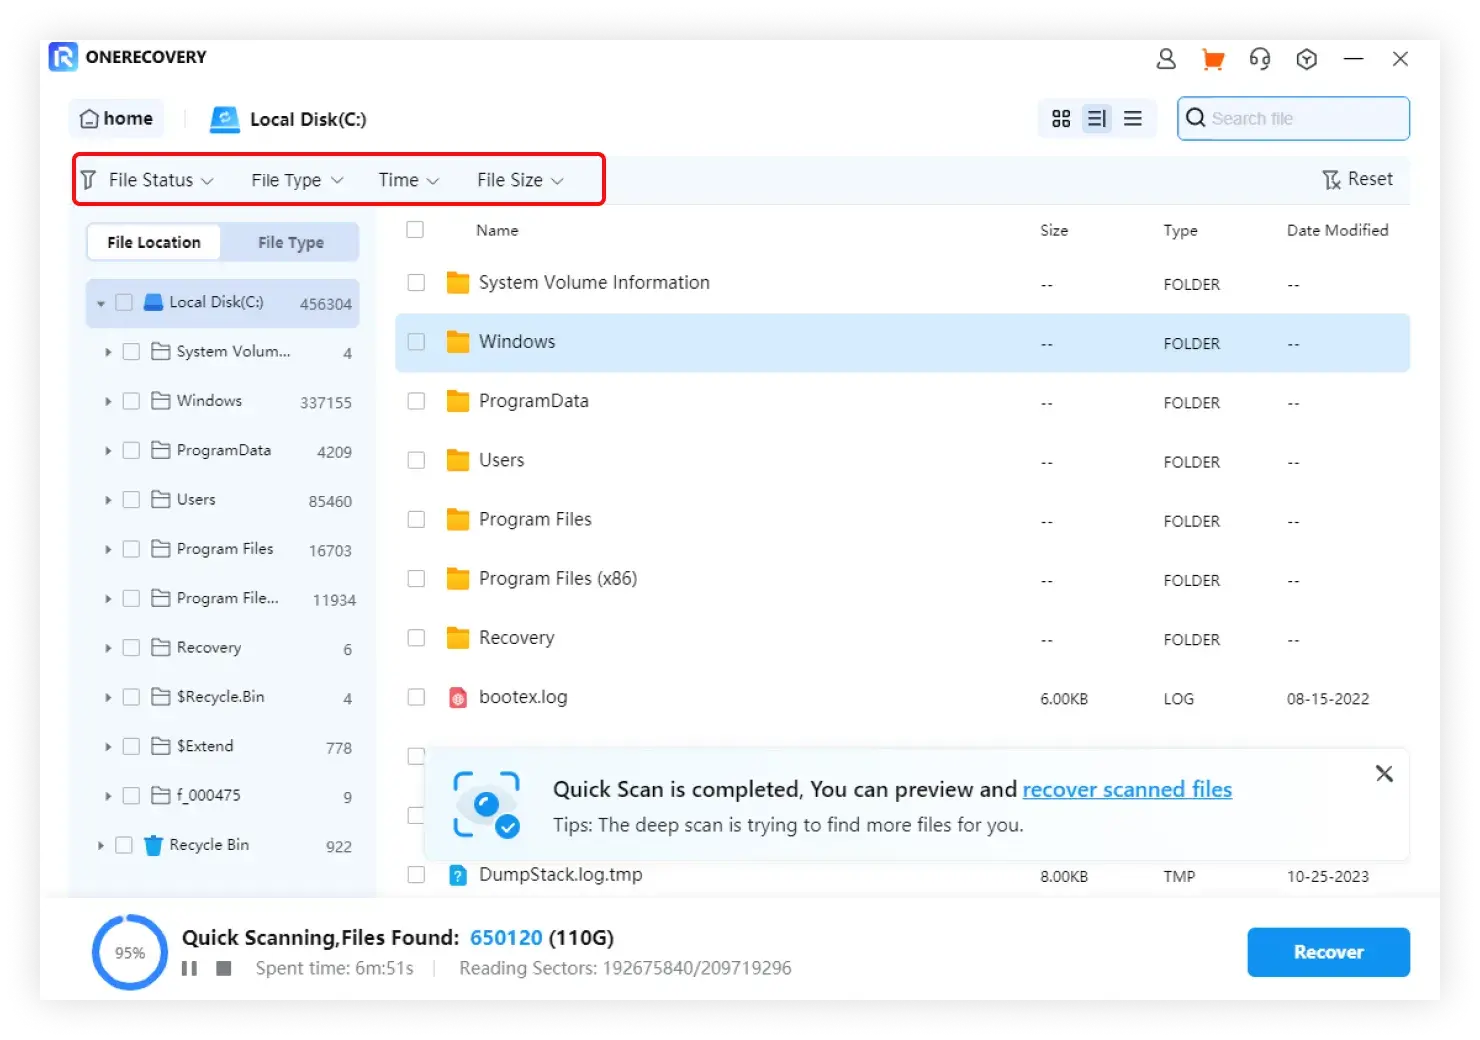
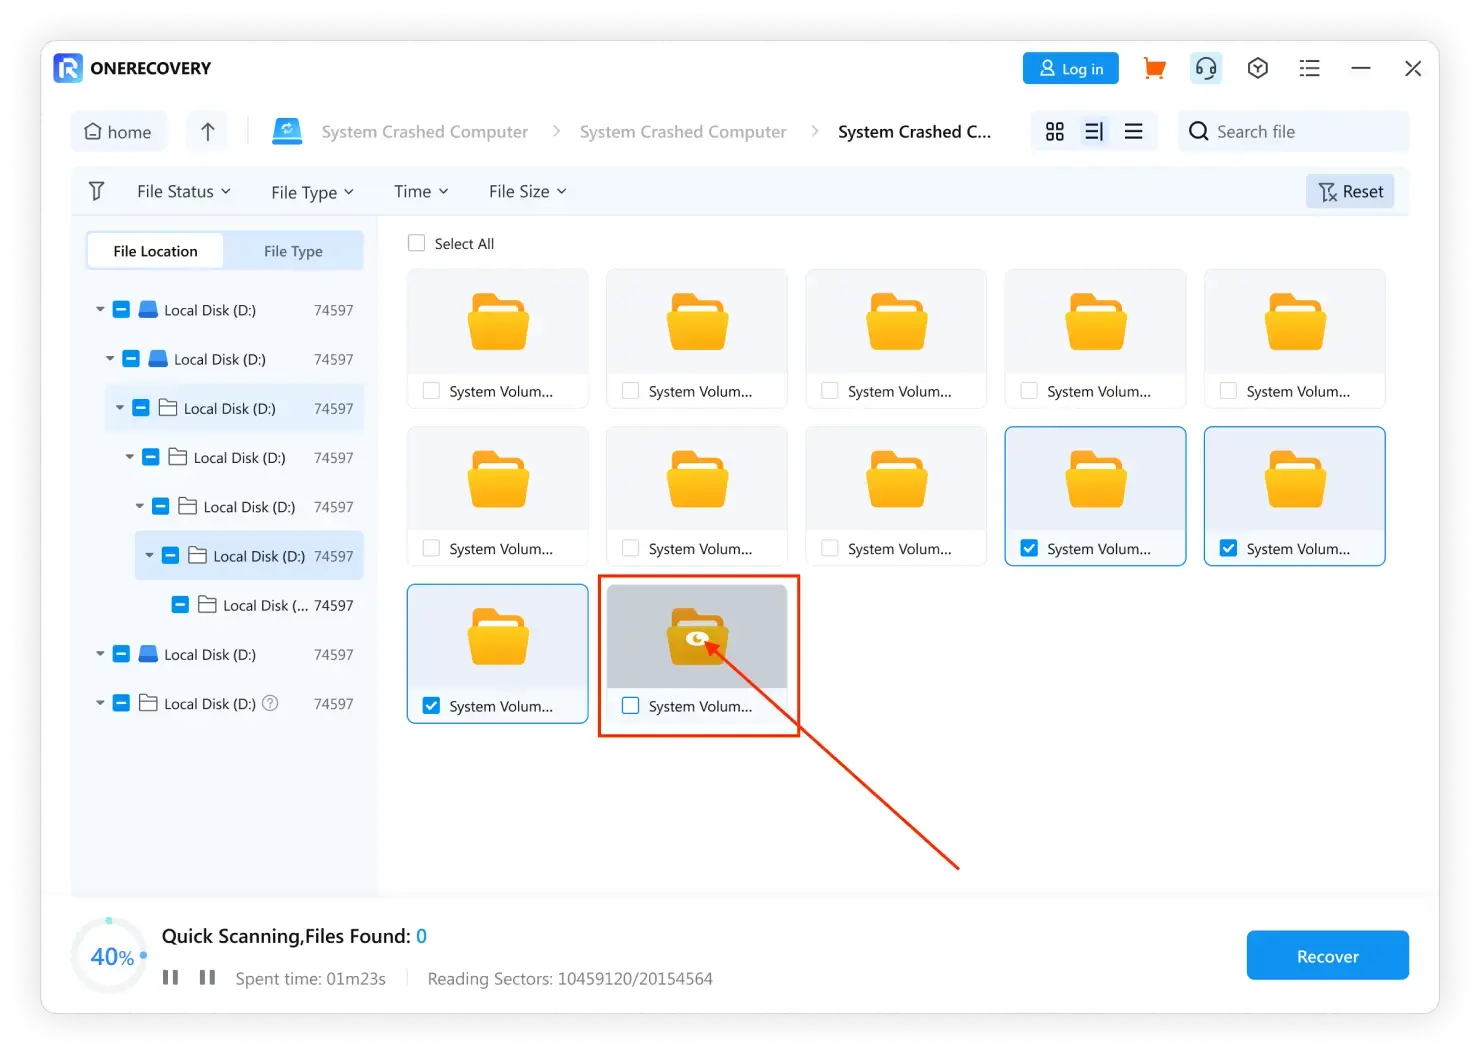
Locate Files During the Scanning
While scanning, you have the flexibility to toggle between various filtering options to pinpoint the desired files for recovery. The filtering options include "File Type," "Time," and "File Size, respectively.
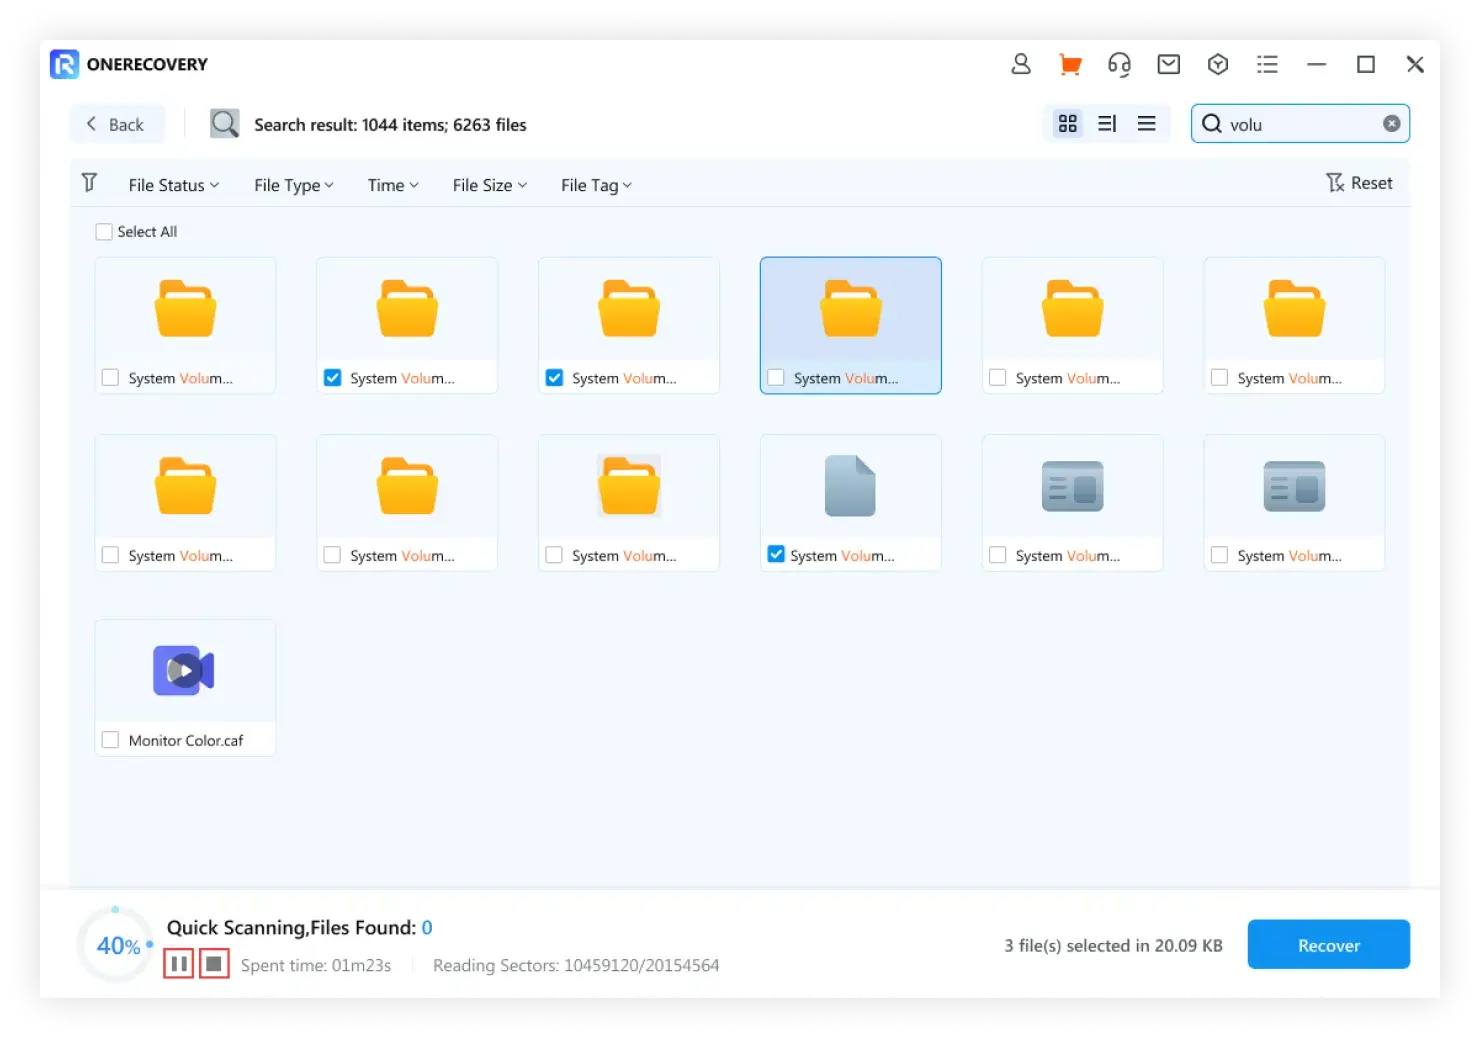
Additionally, you can search for specific keywords directly in the upper-right box, and ONERECOVERY will identify all files correlated with those keywords.
File Type: Filter search results for specific file types, such as viewing all file types, multiple file types, or photographs solely.
Time: Use this to filter files by specific modification or creation dates. You can switch to display or hide system files.
File Size: View all files irrespective of their size or filter files of a certain size (such as 100-500 MB).
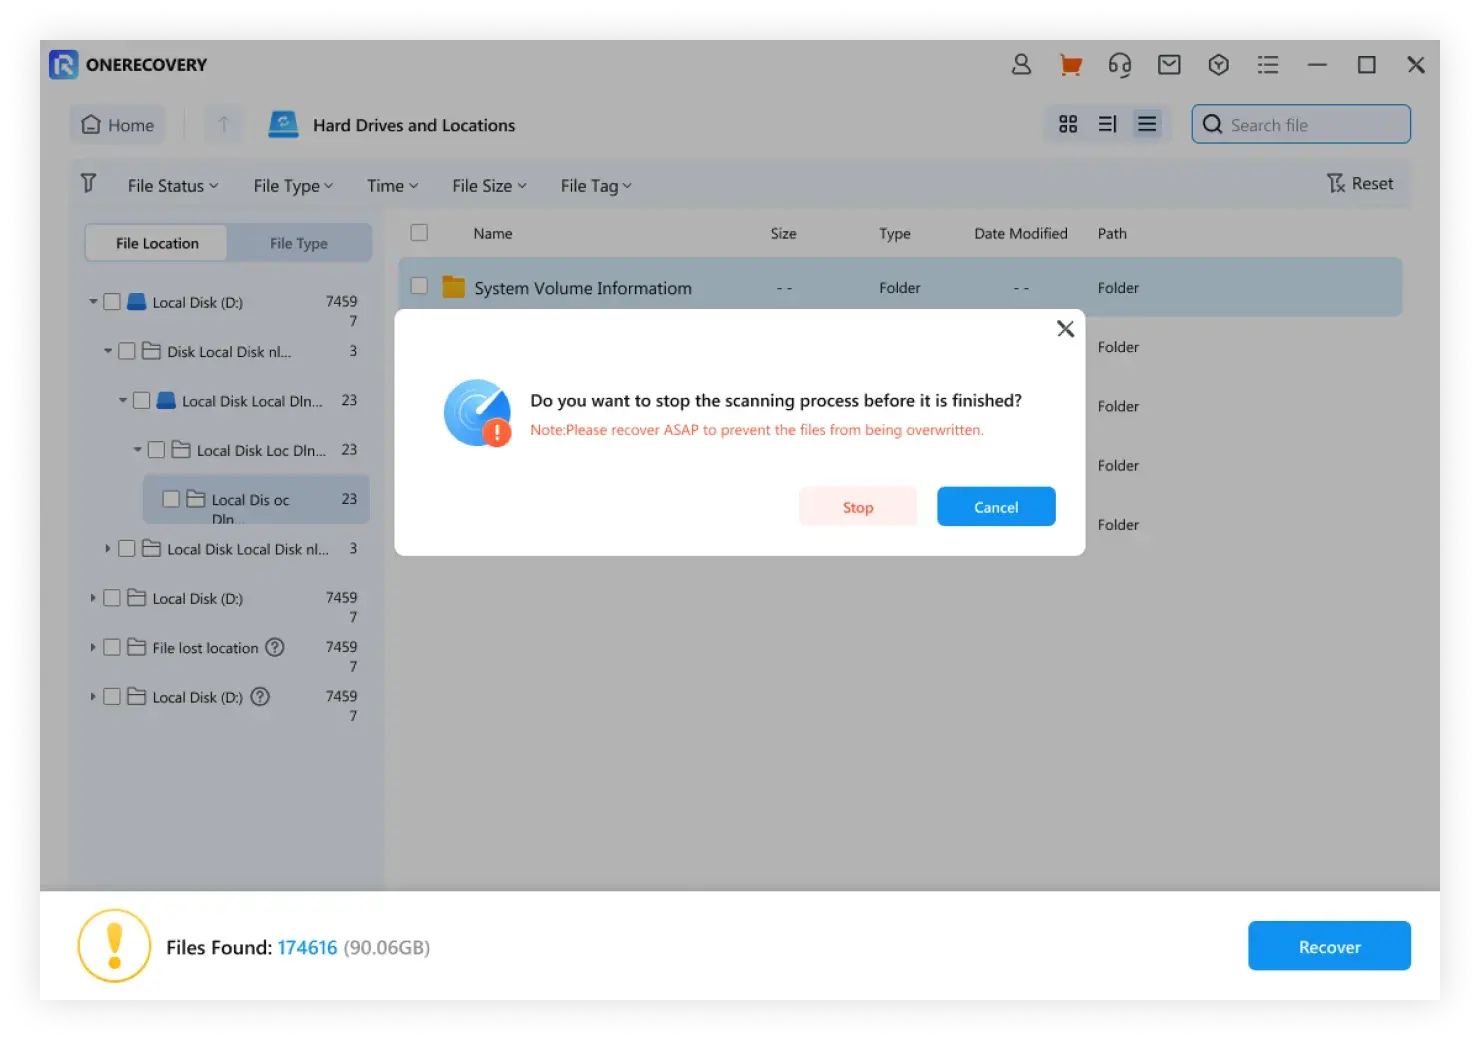
Pause or Stop the Scanning
You have the ability to halt or terminate the scanning process at any time, even if ONERECOVERY has begun scanning for your lost data in the selected location. By clicking on the pause button, you can temporarily suspend the scan, resulting in the "Scanning Paused" alert appearing on the progress bar. To resume the process, click the play button. If you've come across something essential during the scan, you can stop the process instantly by clicking the stop button.
step 3
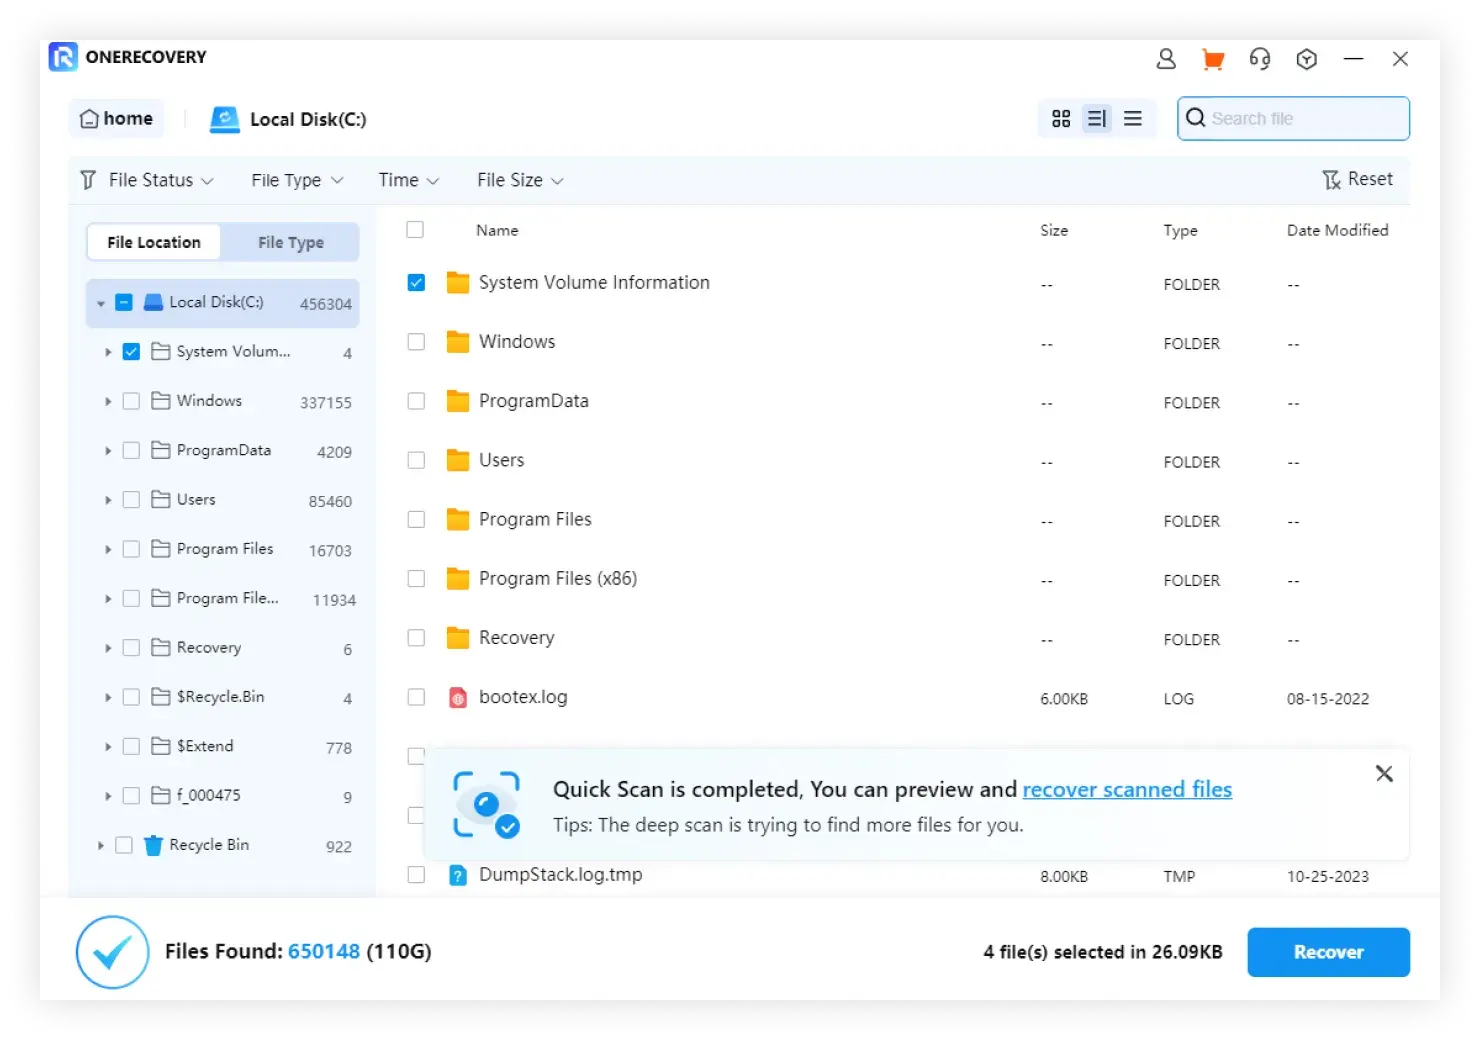
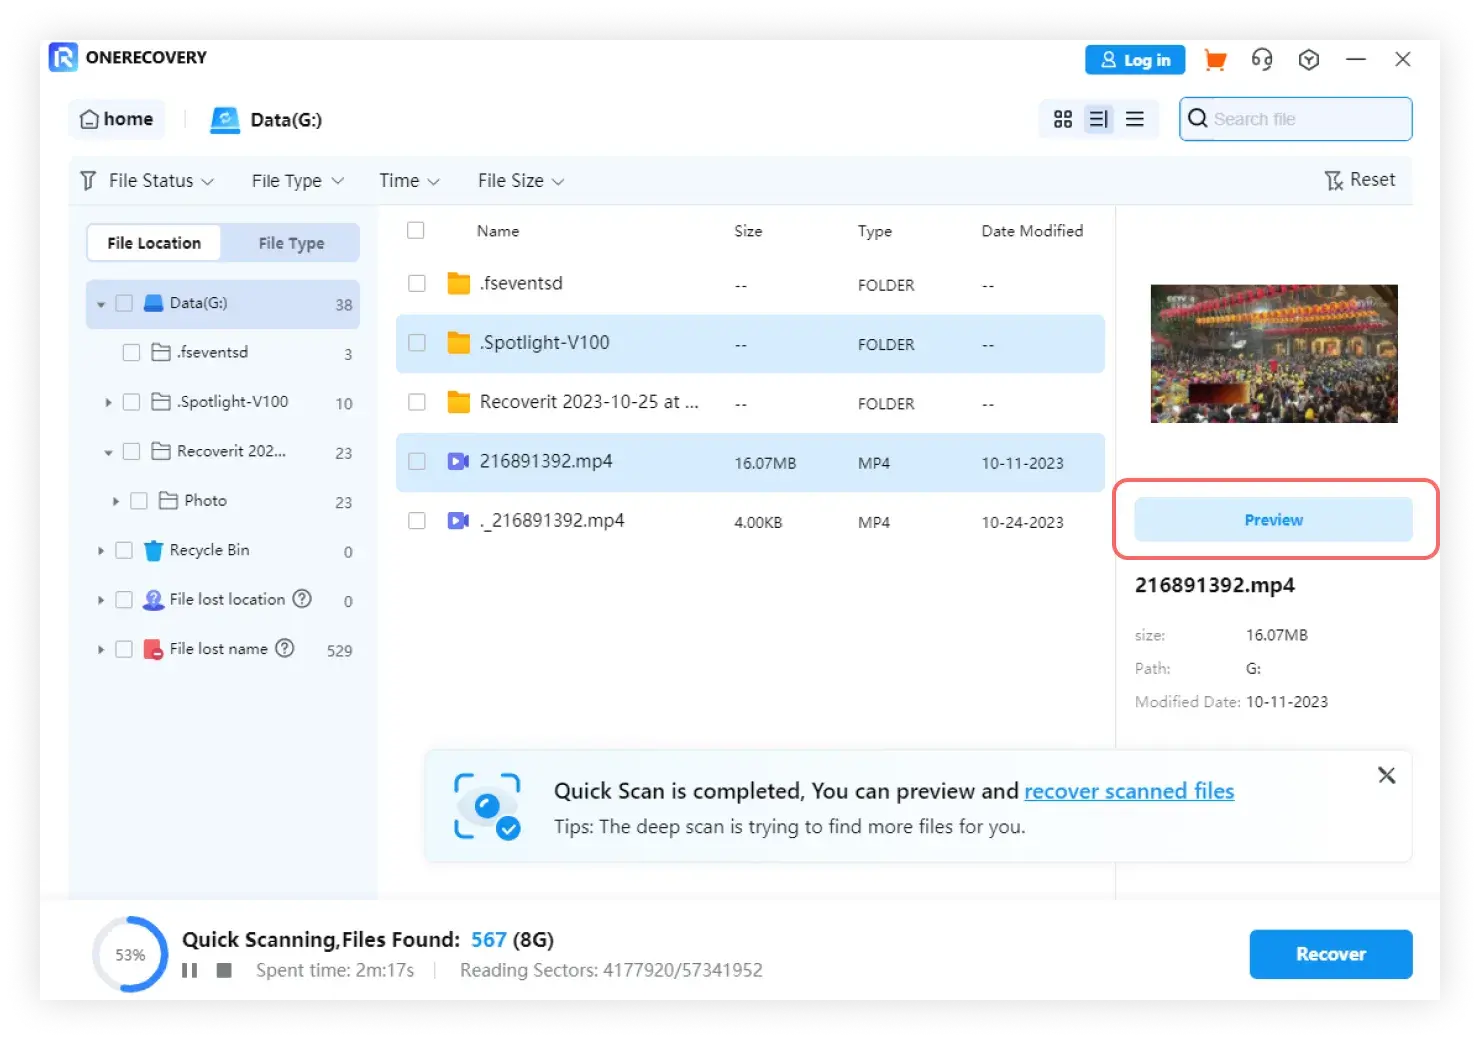
Preview and Recover Files
ONERECOVERY lets you preview recoverable files before proceeding to the recovery stage. All users can preview files with no restrictions. You can select the desired files and use the "Recover" button to retrieve your files.
Preview Files after the Scanning
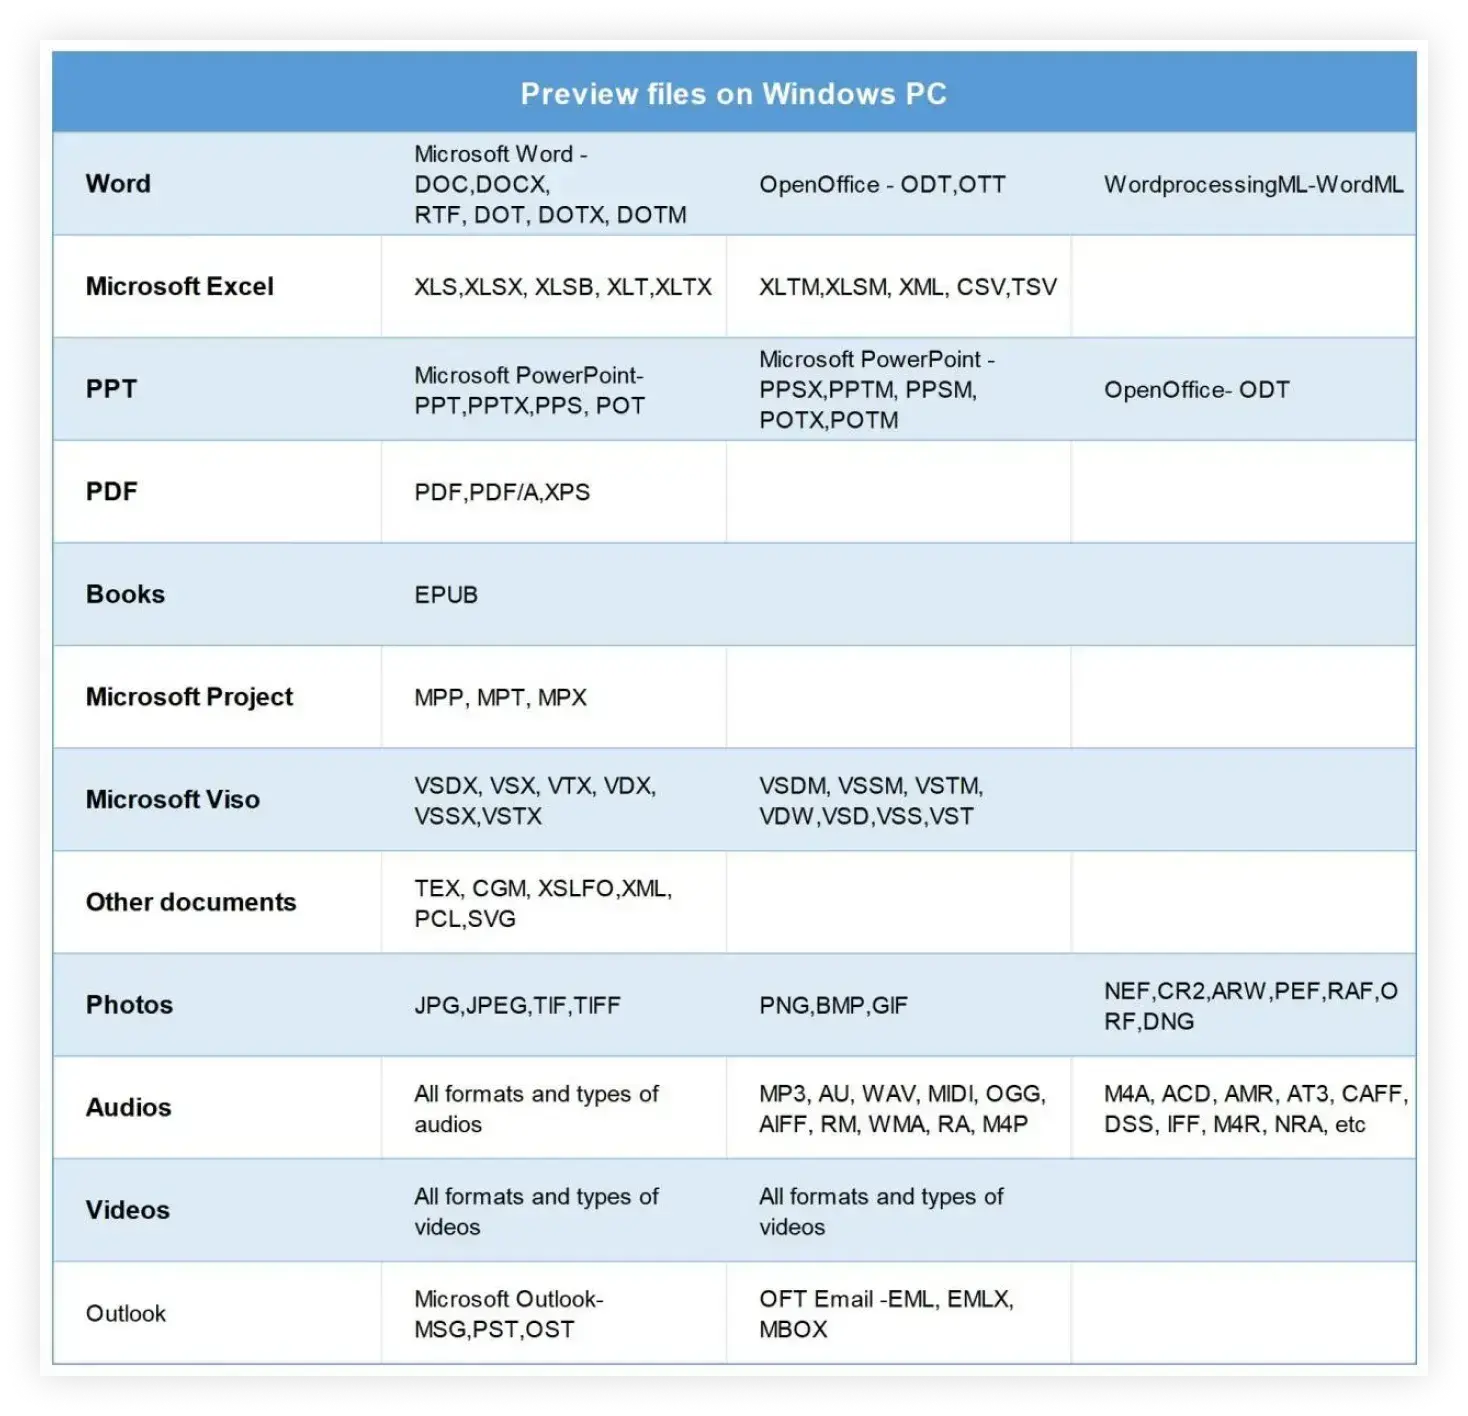
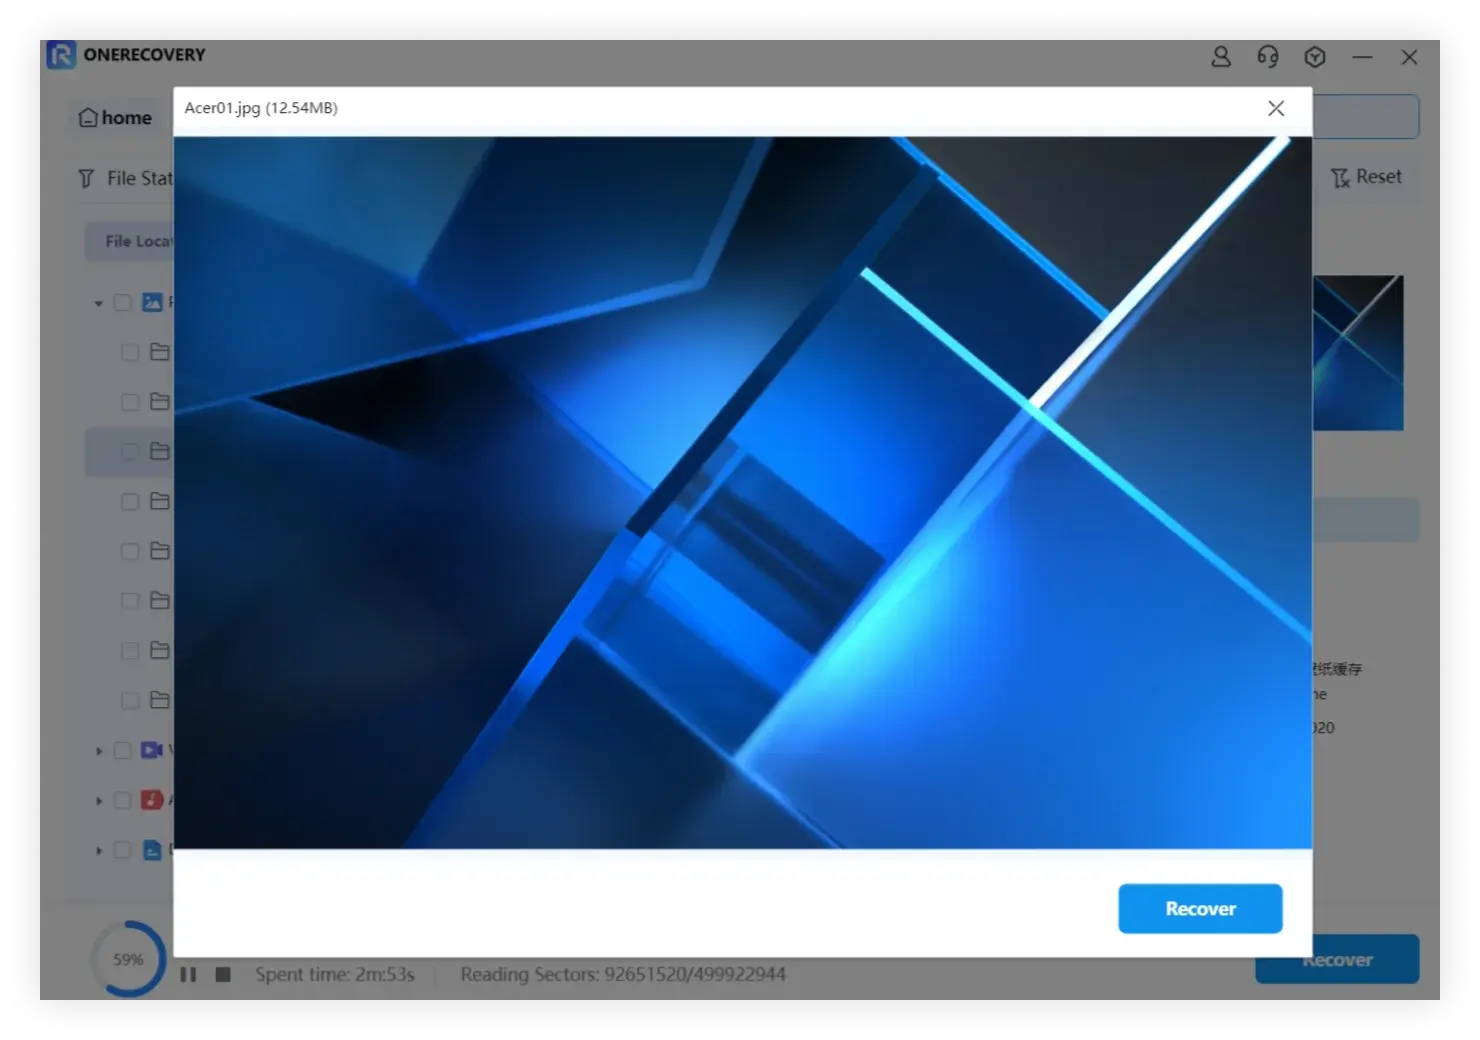
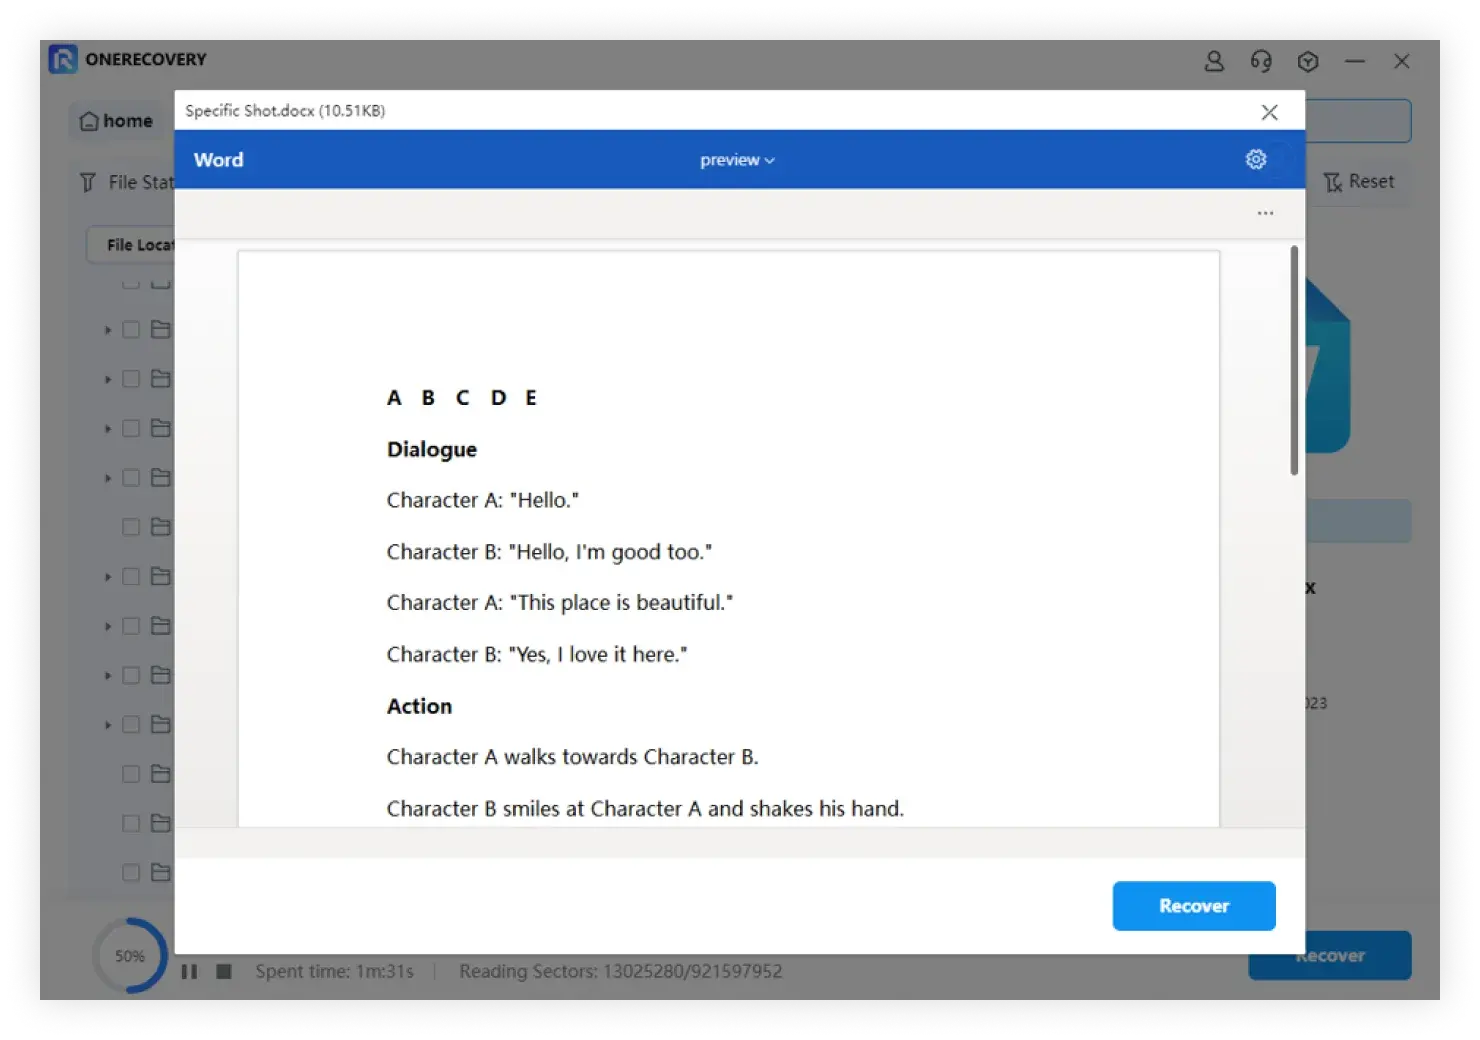
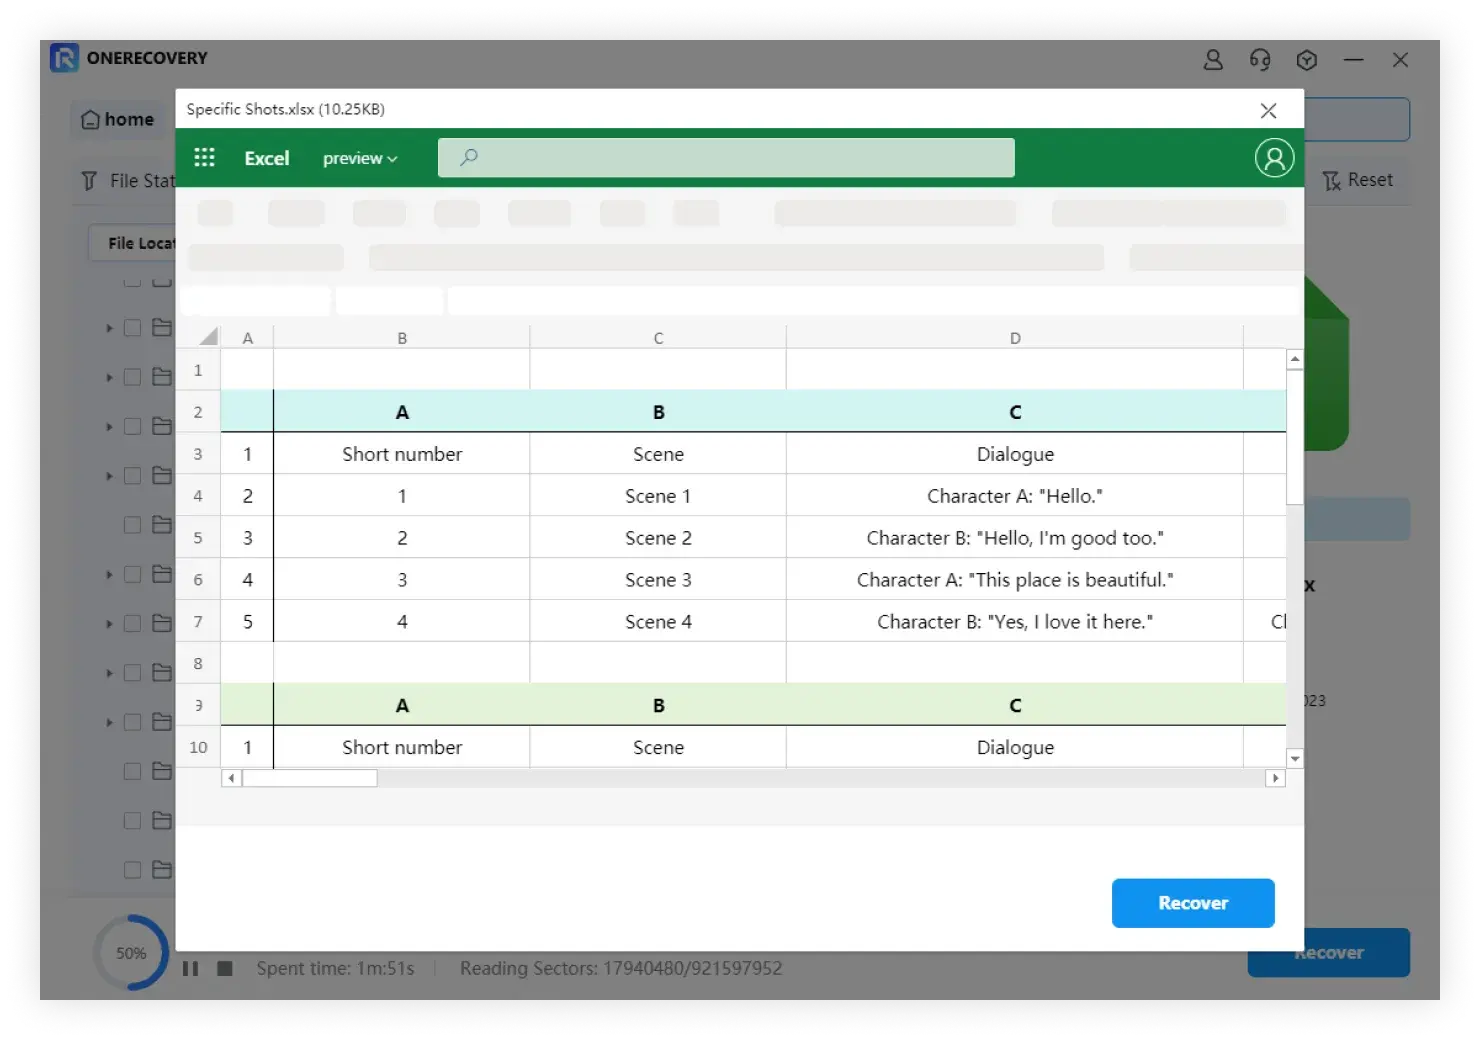
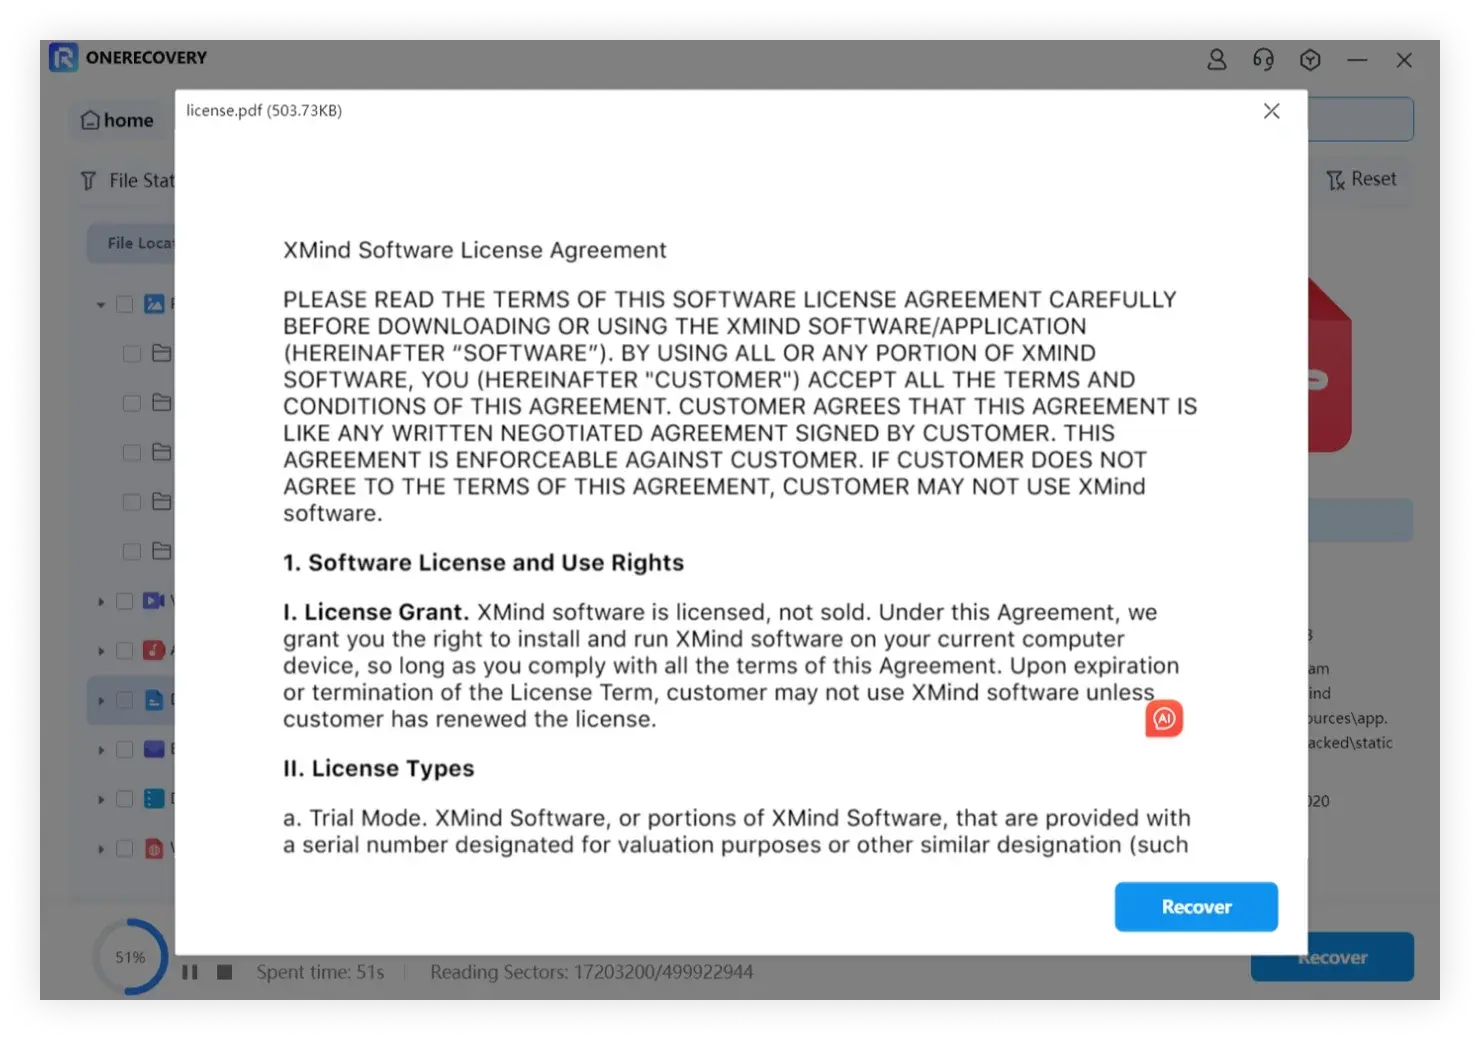
As an ONERECOVERY user, you can preview data by merely clicking on the file. Furthermore, when you click on a file, a preview window pops up. Additionally, certain details about the file, such as the file name, file size, file path, and modification date, are displayed. ONERECOVERY provides significant preview space for photos on its interface. Besides, it offers the option to view the photo on full screen. ONERECOVERY is capable of previewing almost all common types of files. This includes images, videos, audio files, Outlook emails, documents, and many others.
Preview a Photo
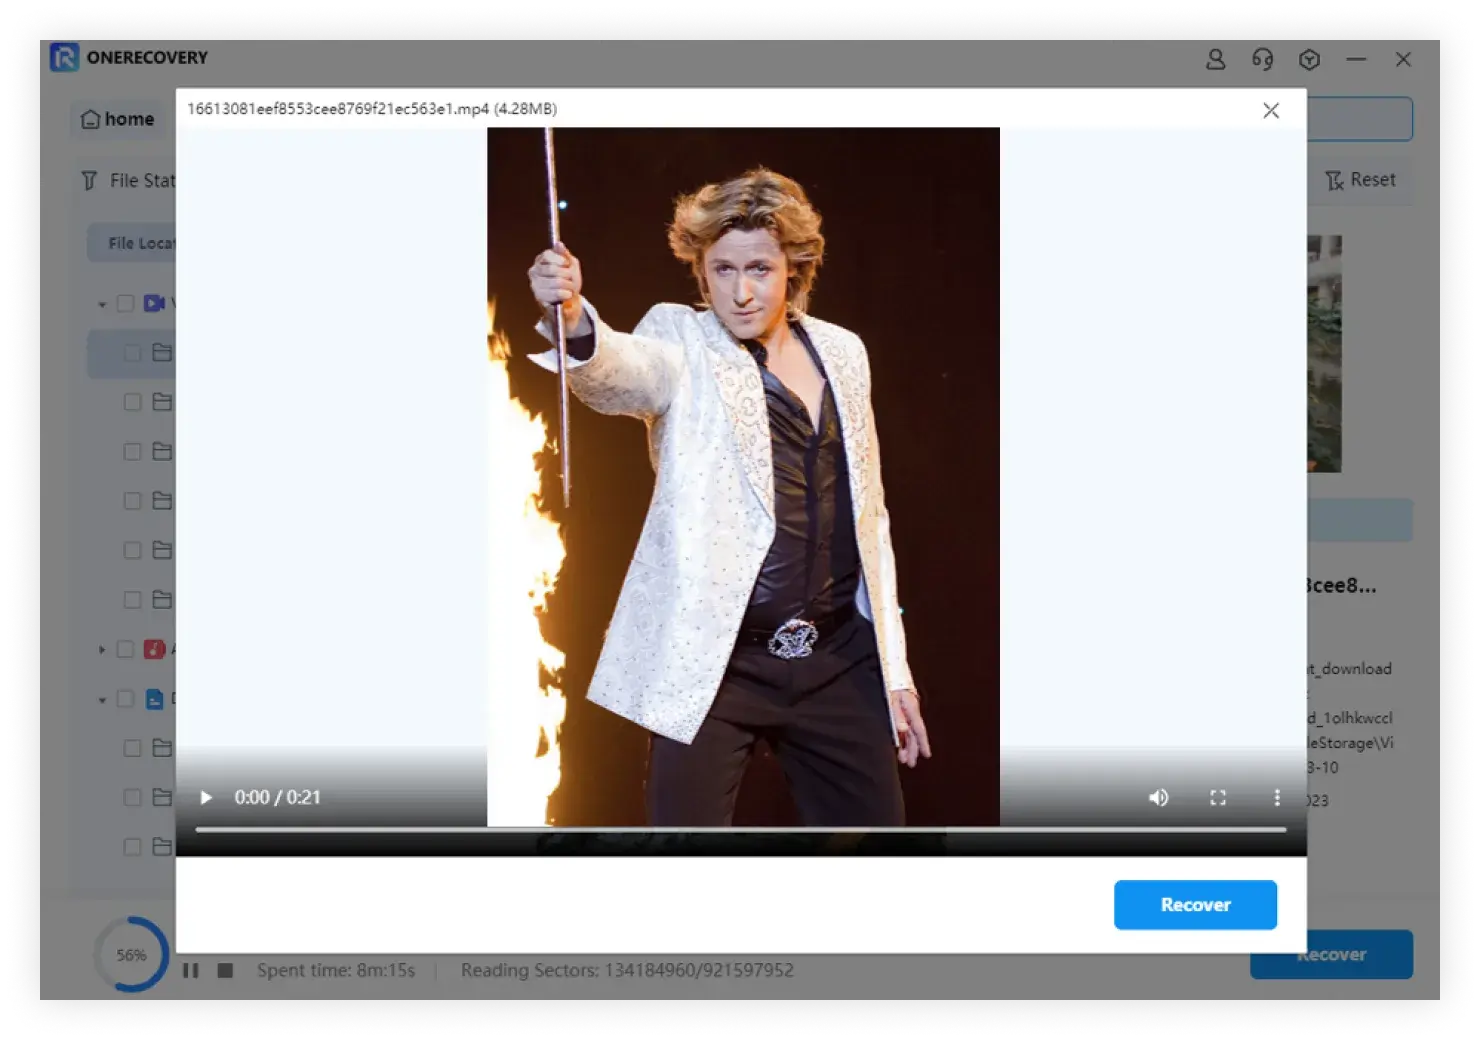
Preview a Video
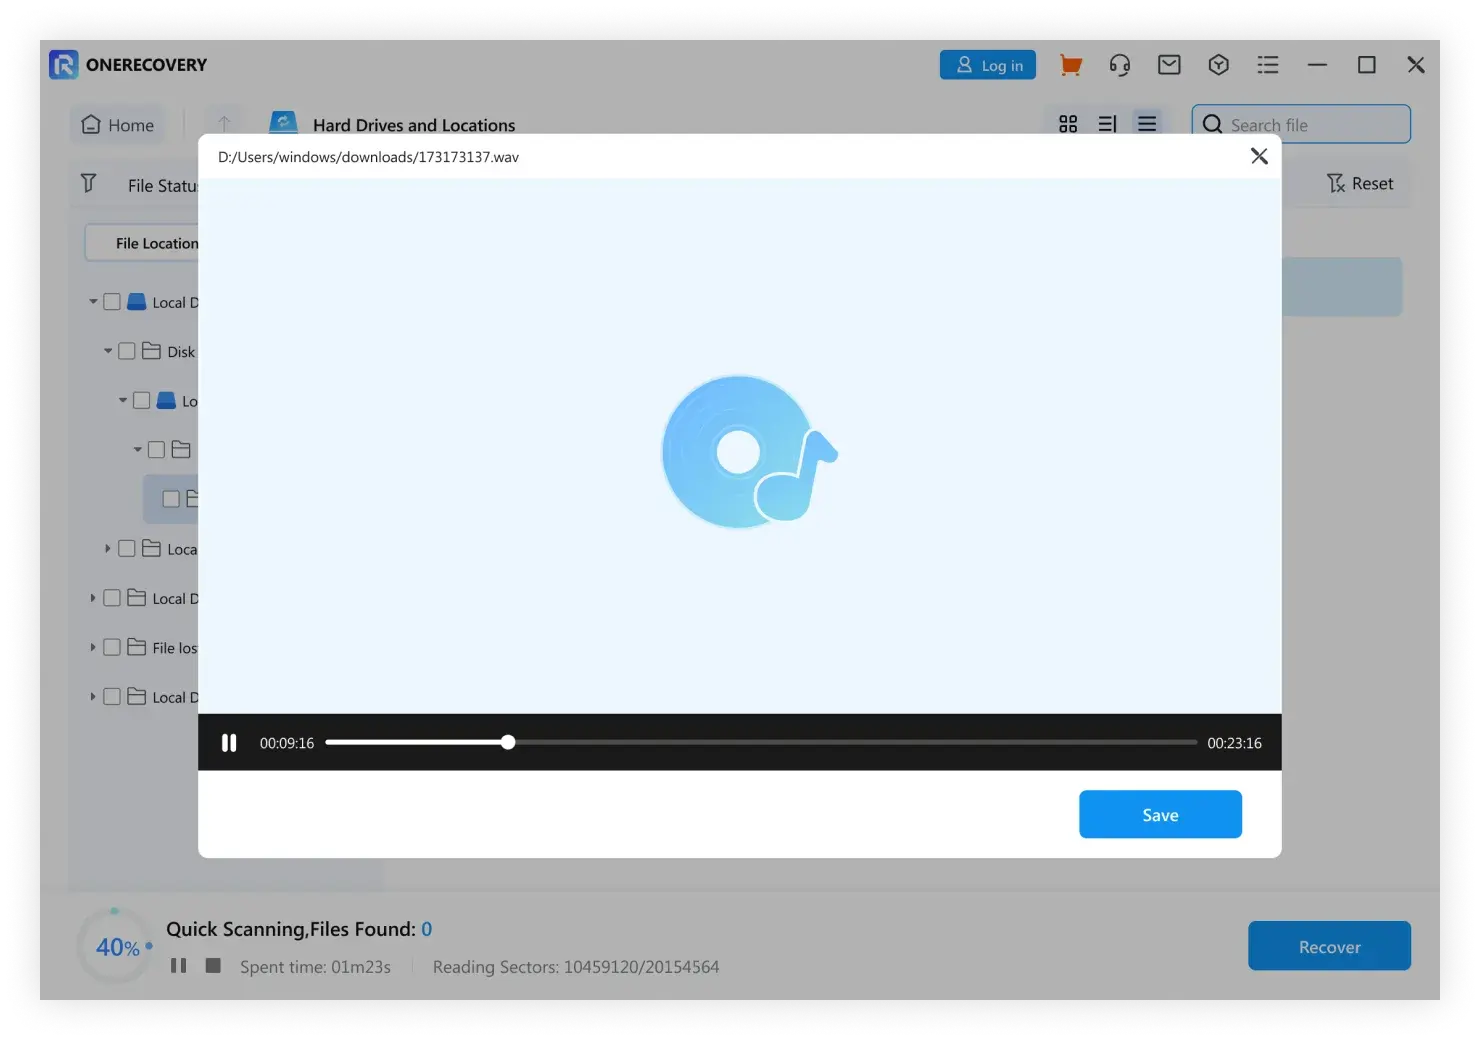
Preview an Audio File
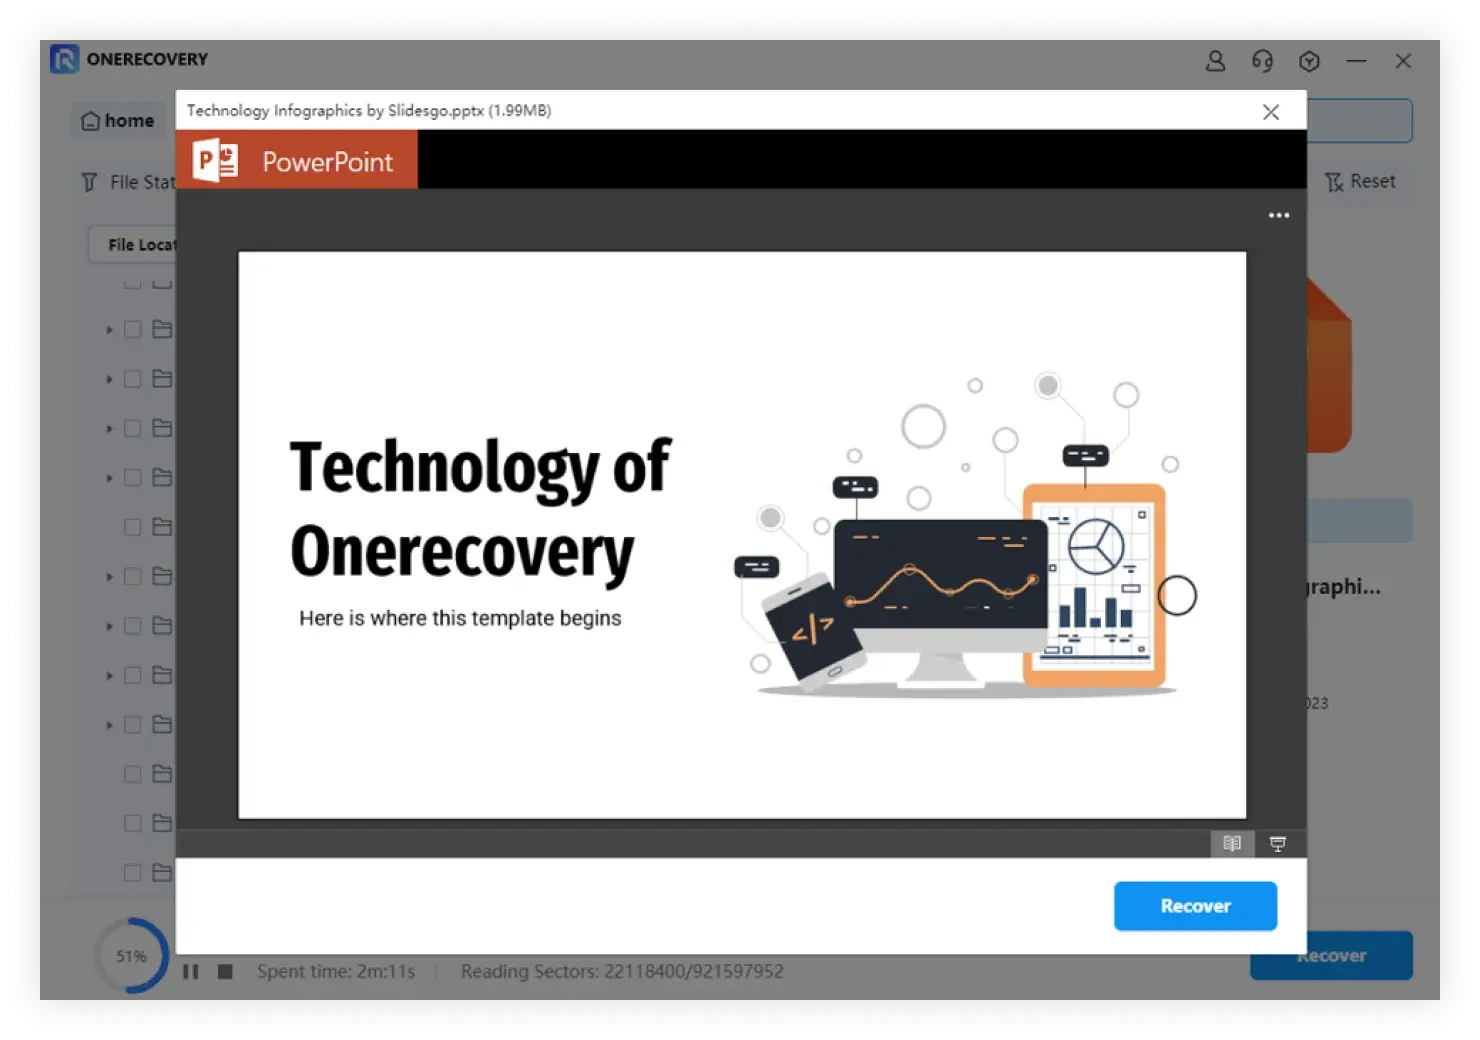
Preview a PowerPoint File
Preview a Word File
Preview an Excel File
Preview a PDF File
If you encounter issues viewing files, we have integrated tips to help you fix them. Visit our webpage to access detailed information: Preview files with ONERECOVERY
Recover Files from Windows Computer
After reviewing and confirming the files you wish to retrieve, you can recover them all easily using ONERECOVERY. Click the 'Recover' button to get your lost data back and specify a path to save the recovered files. Avoid saving the files to the hard disk where you lost or deleted the data.
Please note that these steps are designed to recover data from an internal hard drive of a Windows computer. If you need to recover data from the Recycle Bin, external devices, or a crashed computer, please read on.
Data Recovery
Recover from Emptied Recycle Bin
Recover Files from Emptied Recycle Bin
Whenever you delete files by selecting the "Delete" option, they end up in the Recycle Bin. The lost files may originate from various sources on your computer, including the internal hard drive, partitions, sectors, and external devices.
Scanning your entire computer to recover permanently deleted or emptied data from the Recycle Bin is not practical and results in lengthy scanning periods. Therefore, there are two scan modes for Recycle Bin Recovery that aid in saving scanning time: quick scan and deep scan. If the quick scan does not yield any results, you may use the deep scan mode to explore your lost data more profoundly.
Step 1
Select the Recycle Bin
To recover the Recycle Bin, recover emptied items, or retrieve permanently deleted files on your computer, select the Recycle Bin as the target location under 'Quick Access.'
step 2
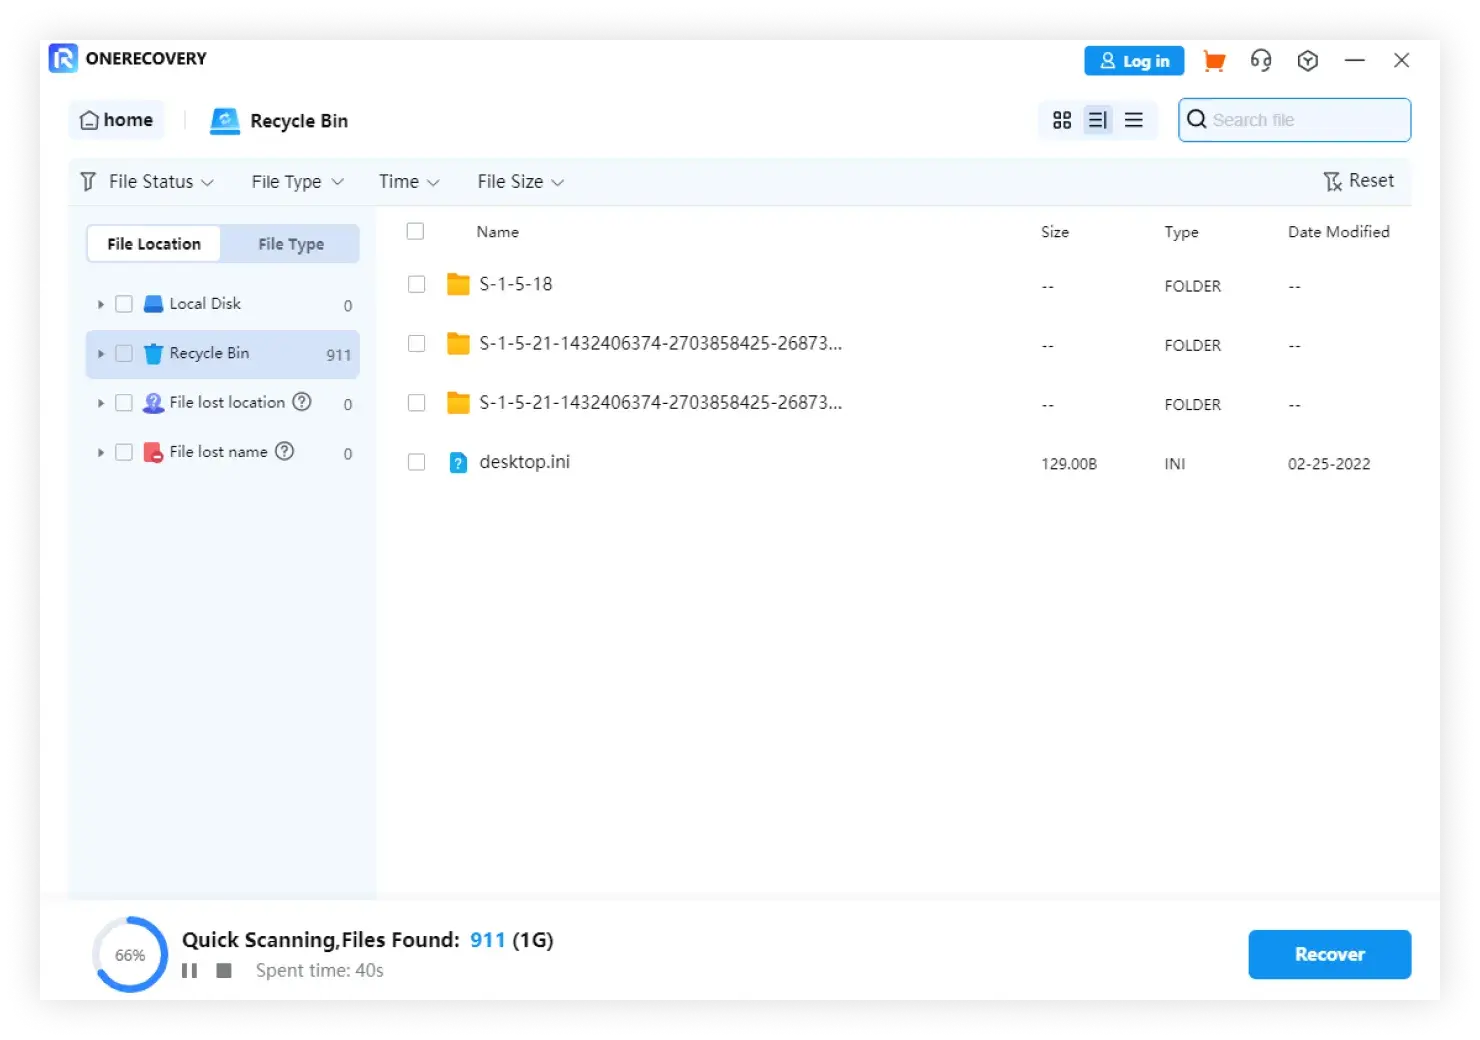
Scan the Recycle Bin
As previously stated, there are two scan modes for scanning and recovering files from the Recycle Bin. You can categorize files by file type while scanning, and the process can be paused or stopped at any moment.
Quick Scan
A quick scan will automatically search for files in the Recycle Bin. Generally, the scan should suffice for lost data.
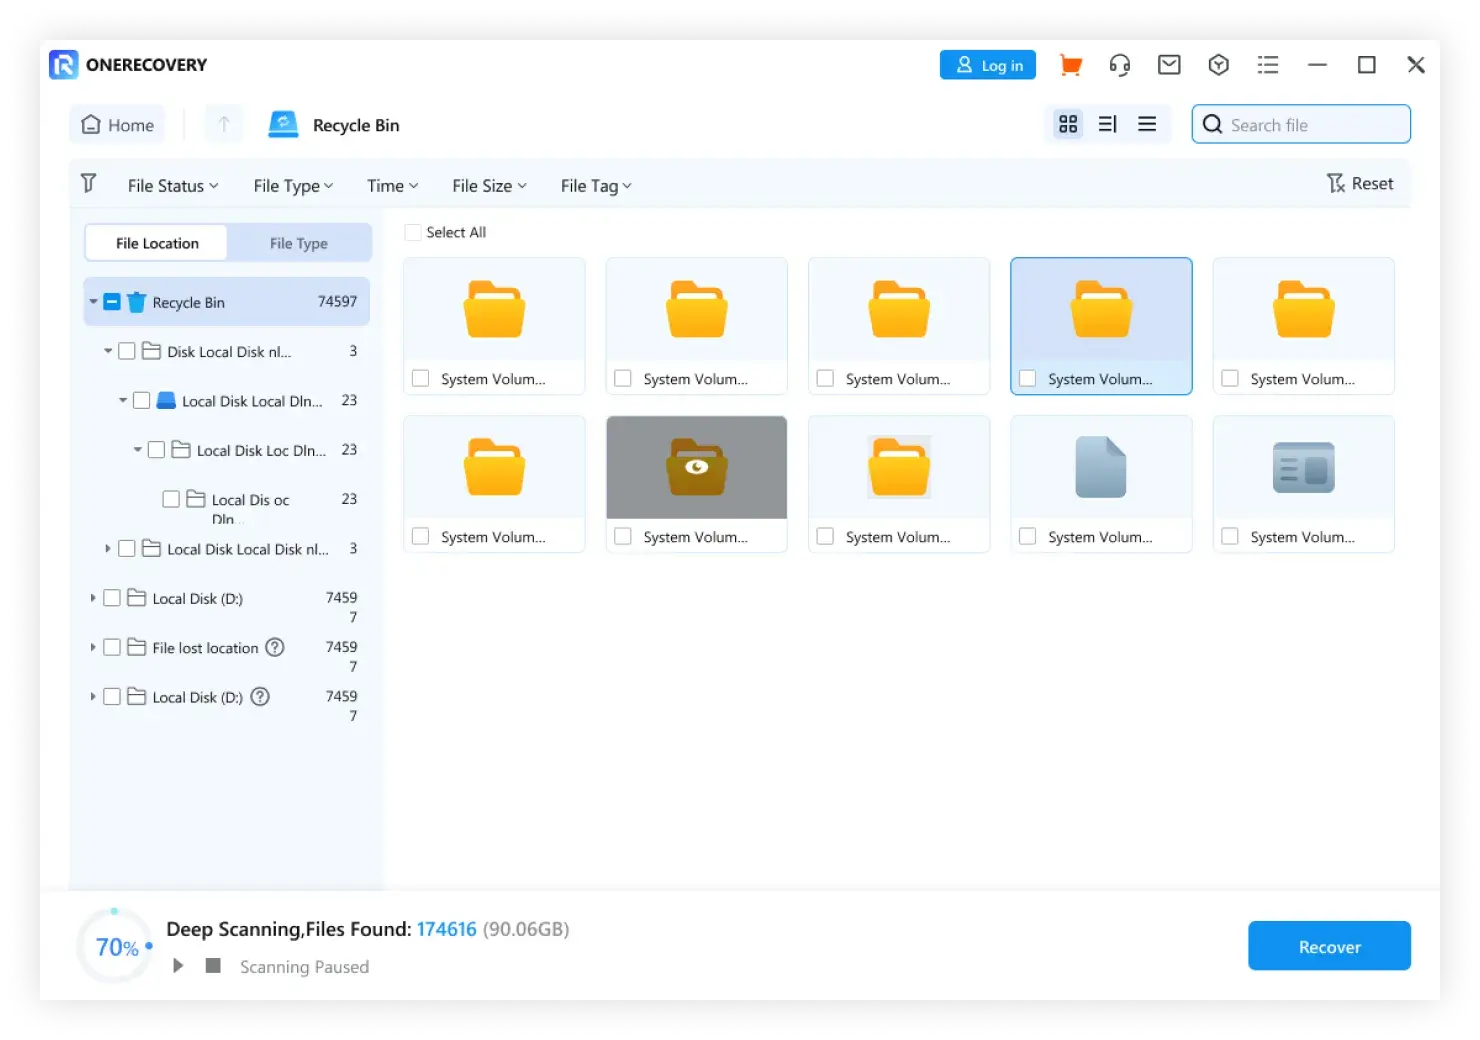
Deep Scan
If the quick scan does not retrieve the desired results, you can use the deep scan mode to recover additional lost data from the Recycle Bin.
During scanning, you can filter files by category on the left bar. Similarly, you can choose to pause or stop the scanning process at any time. Avoid closing the application during the scanning process to achieve better results. Once the scan is finished, you can preview your files.
step 3
Preview and Recover Your Data
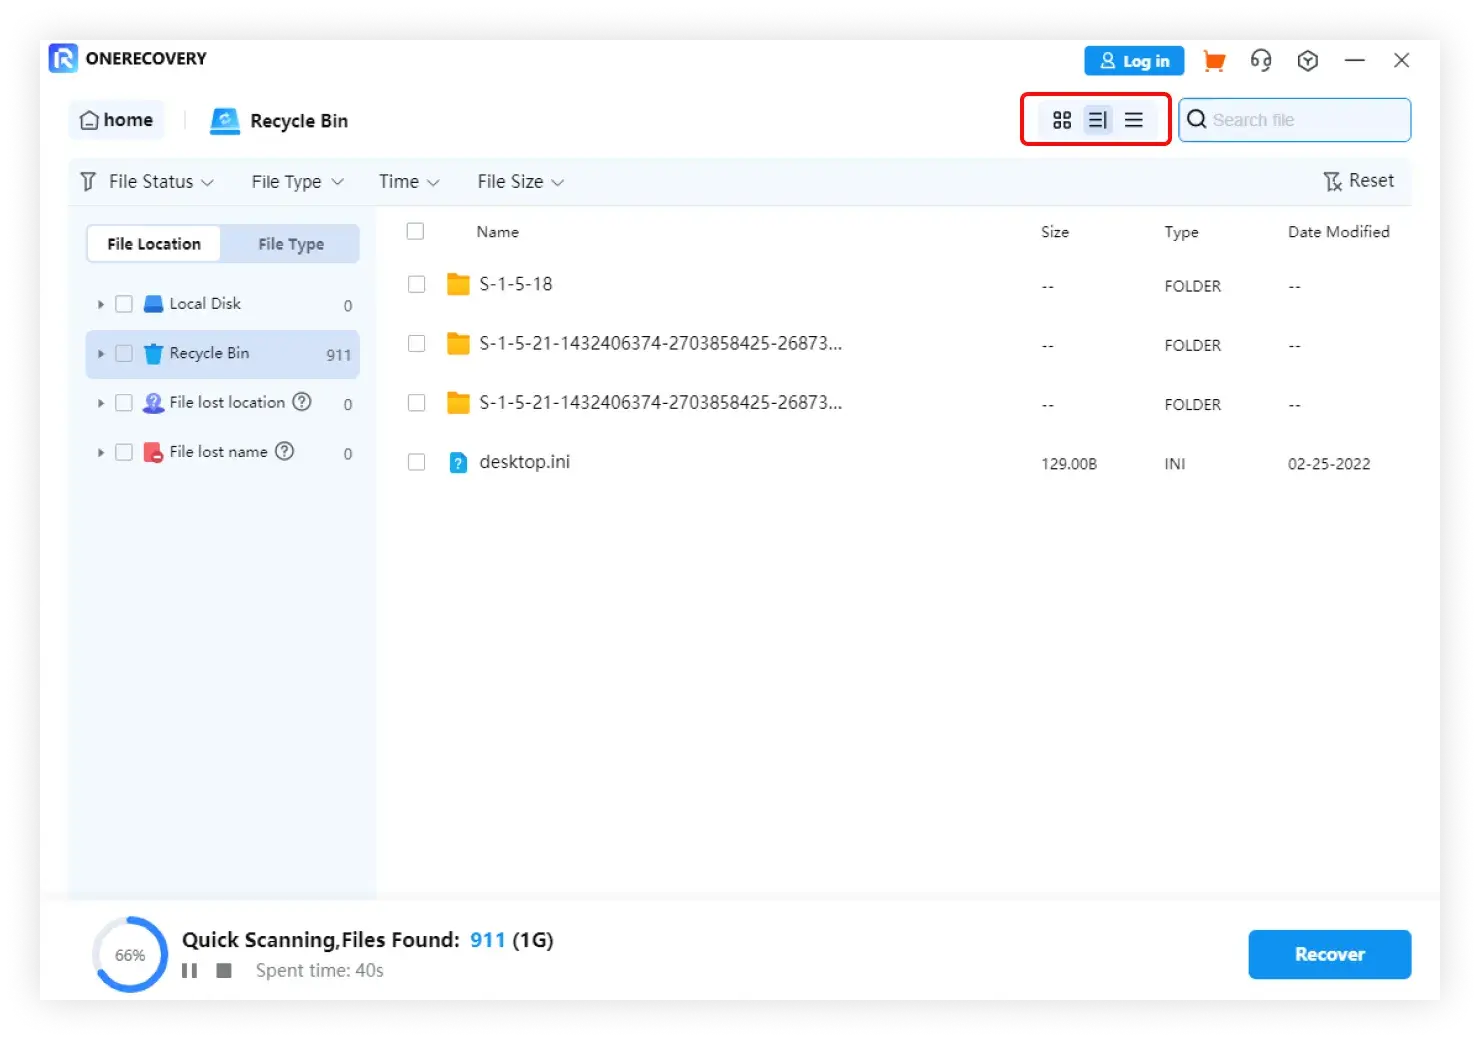
Select a File or Files
You can filter files using 'List View,' 'Detail View,' or 'Icon View.' After configuring the filter, the program will load the search results that match your preferences. Then, you can choose the files you want to recover.
Preview Data
Before recovering your data, you can use the preview feature to ensure that the files you have selected are the ones you need. To do so, just double-click the file and click on the "Preview" button.
Recover and Save Files
Finally, select the files you want to recover and click the 'Recover' button to retrieve your data from the Recycle Bin. Avoid saving recovered data in the same location to avoid data overwriting.
Data Recovery
Recover from External Devices
Recover Data from External Devices
If you lose data from external devices on your Windows computer, ONERECOVERY can assist you in retrieving it. External devices can be anything from external hard drives, memory cards, SD cards, digital cameras, Drone cameras, USB flash drives to music players, sound recorders, and so on.
step1
Connect the External Device
Before starting ONERECOVERY, connect the external device to your computer, such as cameras, mobiles, USB flash drives, SD cards, etc. Ensure that it is recognized or detected by your computer.
step2
Select the External Device
To recover lost or deleted files from removable storage media, select the device as the target location. Afterward, press the "Start" button to proceed. Even if the device partition has been lost, ONERECOVERY can still recover the lost data.
step3
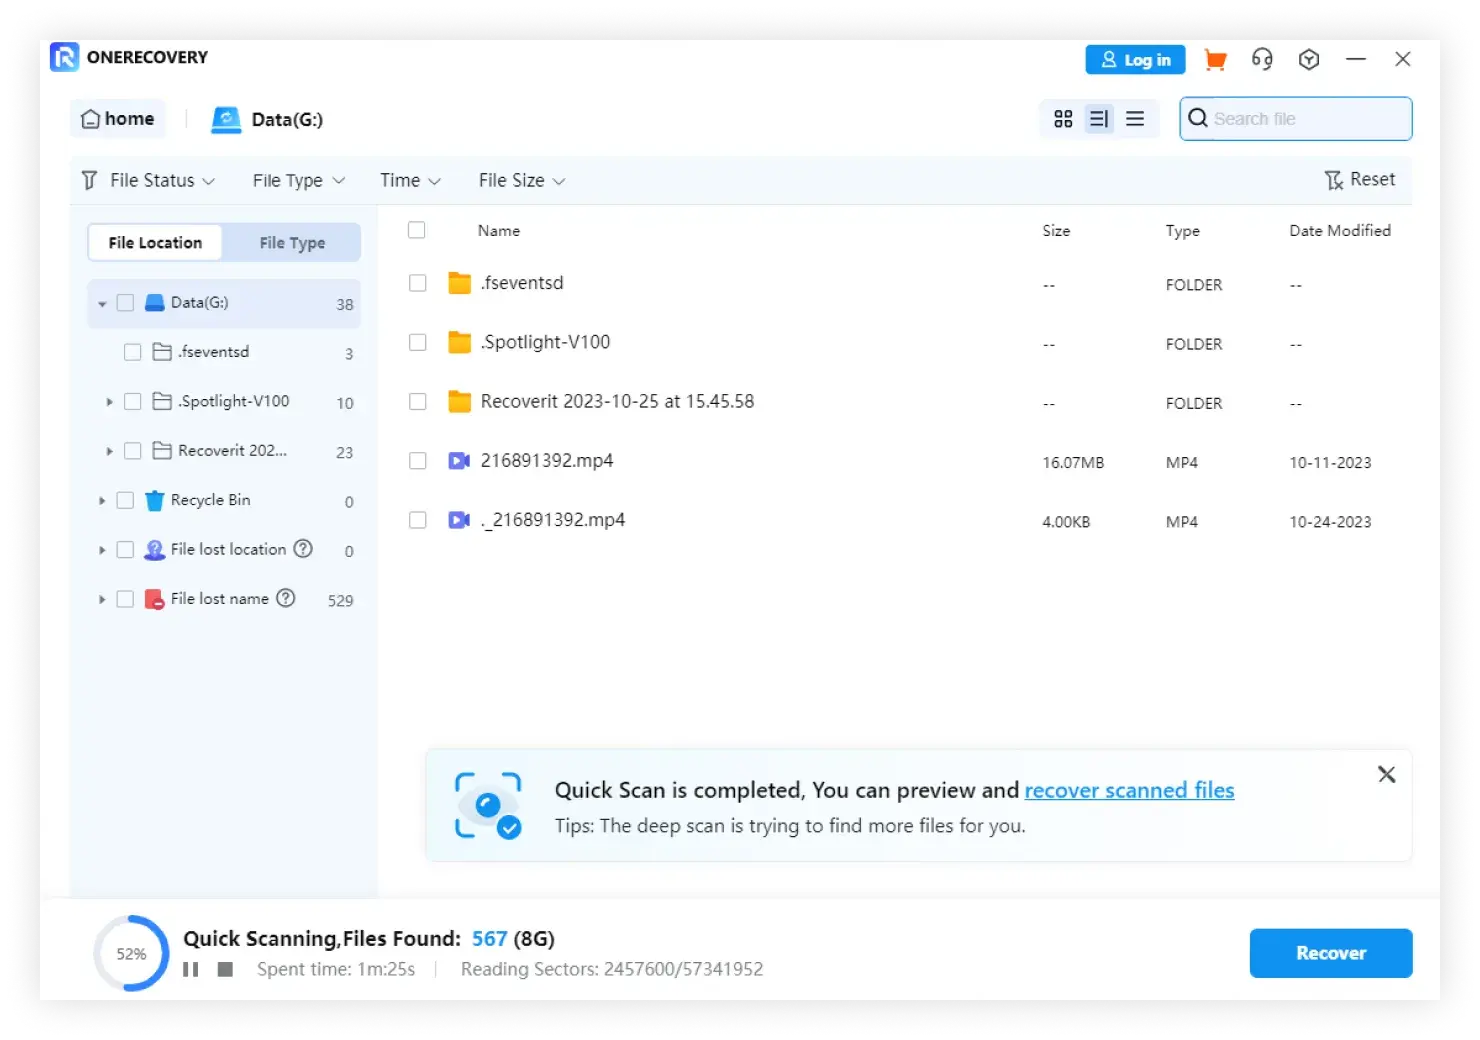
Scan the External Device
An all-around scan will be launched on the external storage media. Wait a few minutes to complete the scanning process. During the process, you can locate the targeted files and pause or stop the scan at any time.
step4
Preview and Recover Files
After scanning, preview the files with no limitations. You can preview all videos or documents from the scan results. To retrieve the files, select 'Recover' and save them in a safe location.
Crashed Computer Recovery
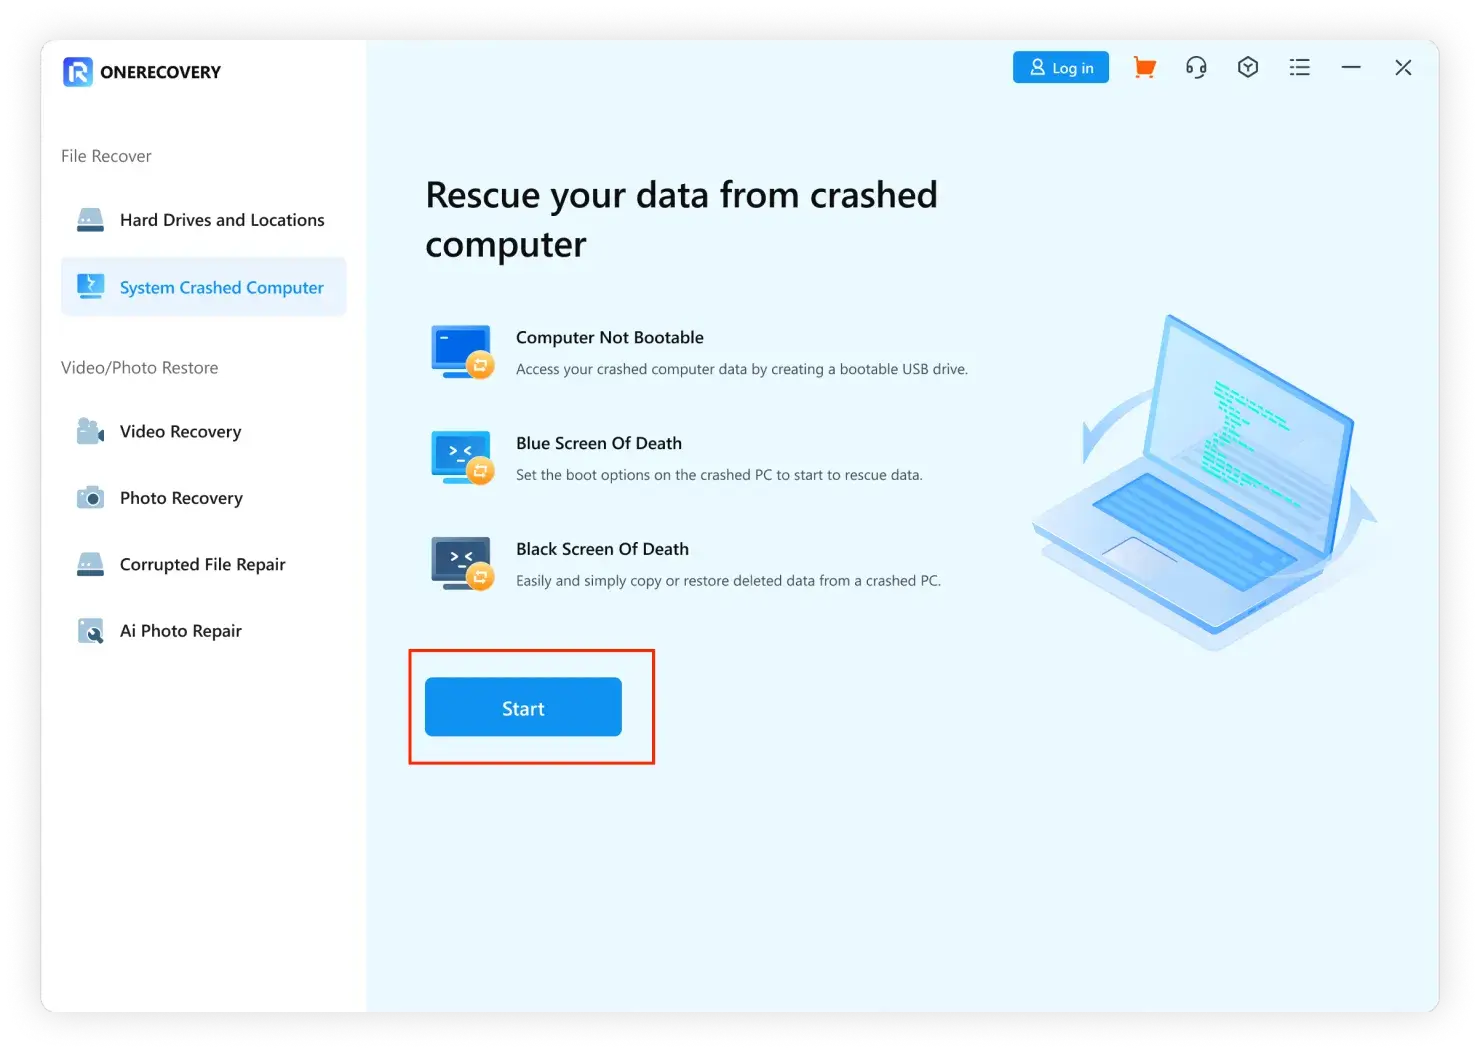
Recover Data from Crashed Computer
If your system is crashed or isn't performing as expected, then you can get ONERECOVERY to bring back all of your lost or inaccessible data. Just download and launch ONERECOVERY on a working computer, prepare a blank USB drive, and connect it to the computer, your lost data can be retrieved in minutes.
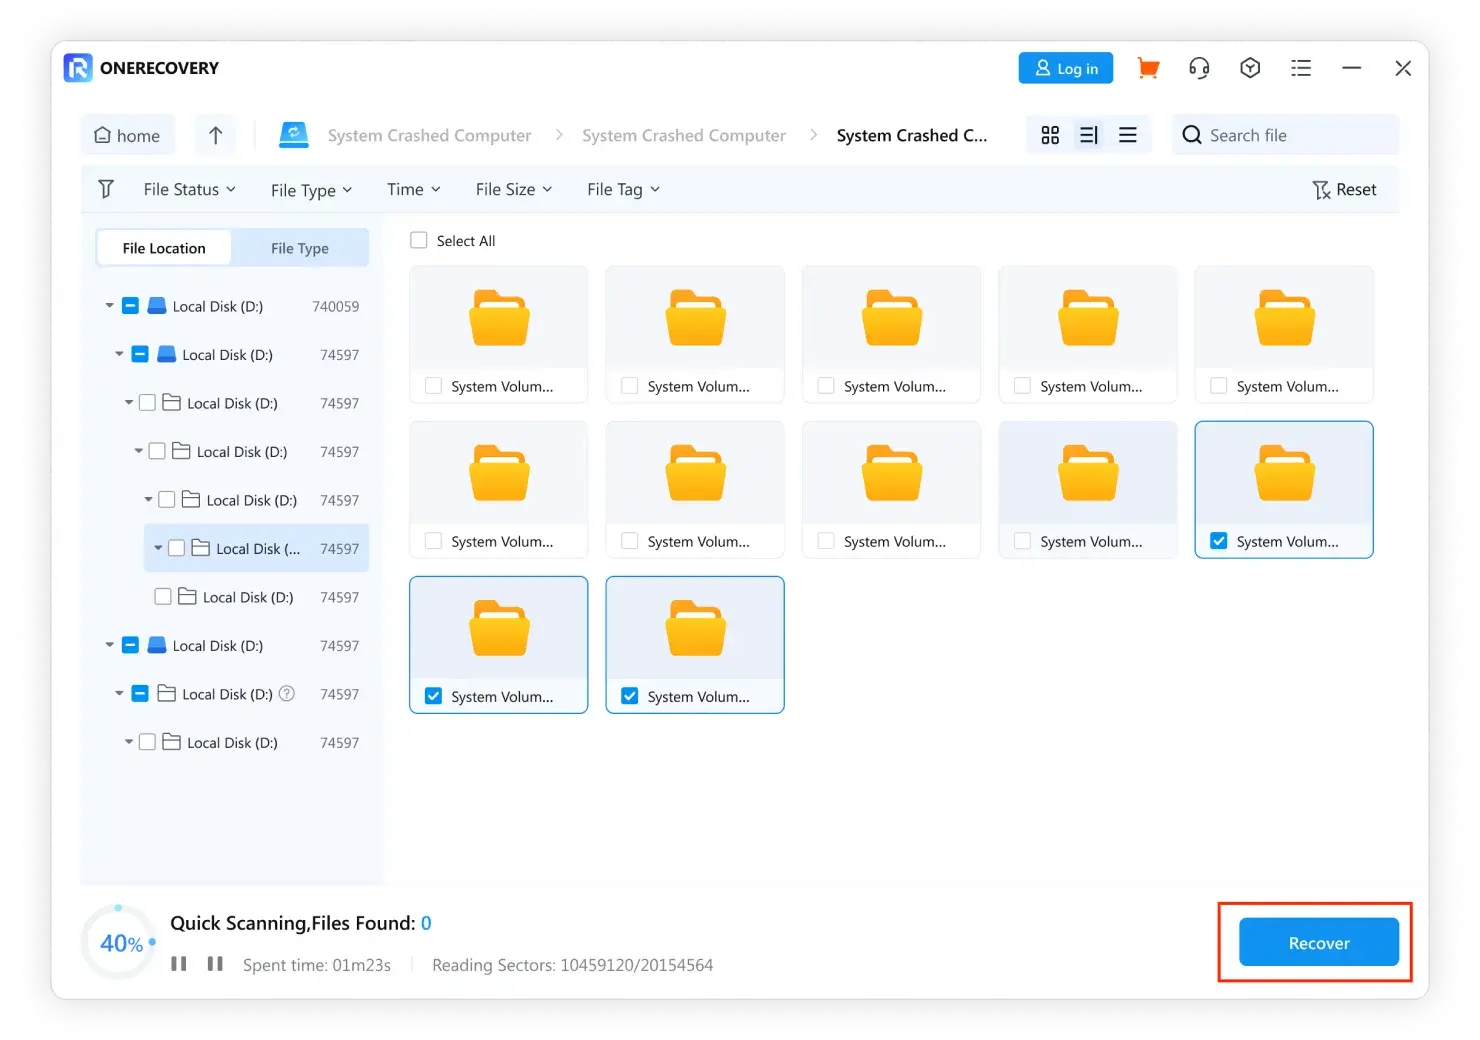
In ONERECOVERY, you can just select "System Crashed Computer" on the left side of the interface, and then click on "Start" button to start the recovery.
step 1
Preparations for Crash Recovery
Another working computer
A blank USB drive
step 2
Create a Bootable Media
To retrieve data from a computer that is crashed, you must first make a bootable drive. Here's how to create a bootable drive with specific steps.
01.
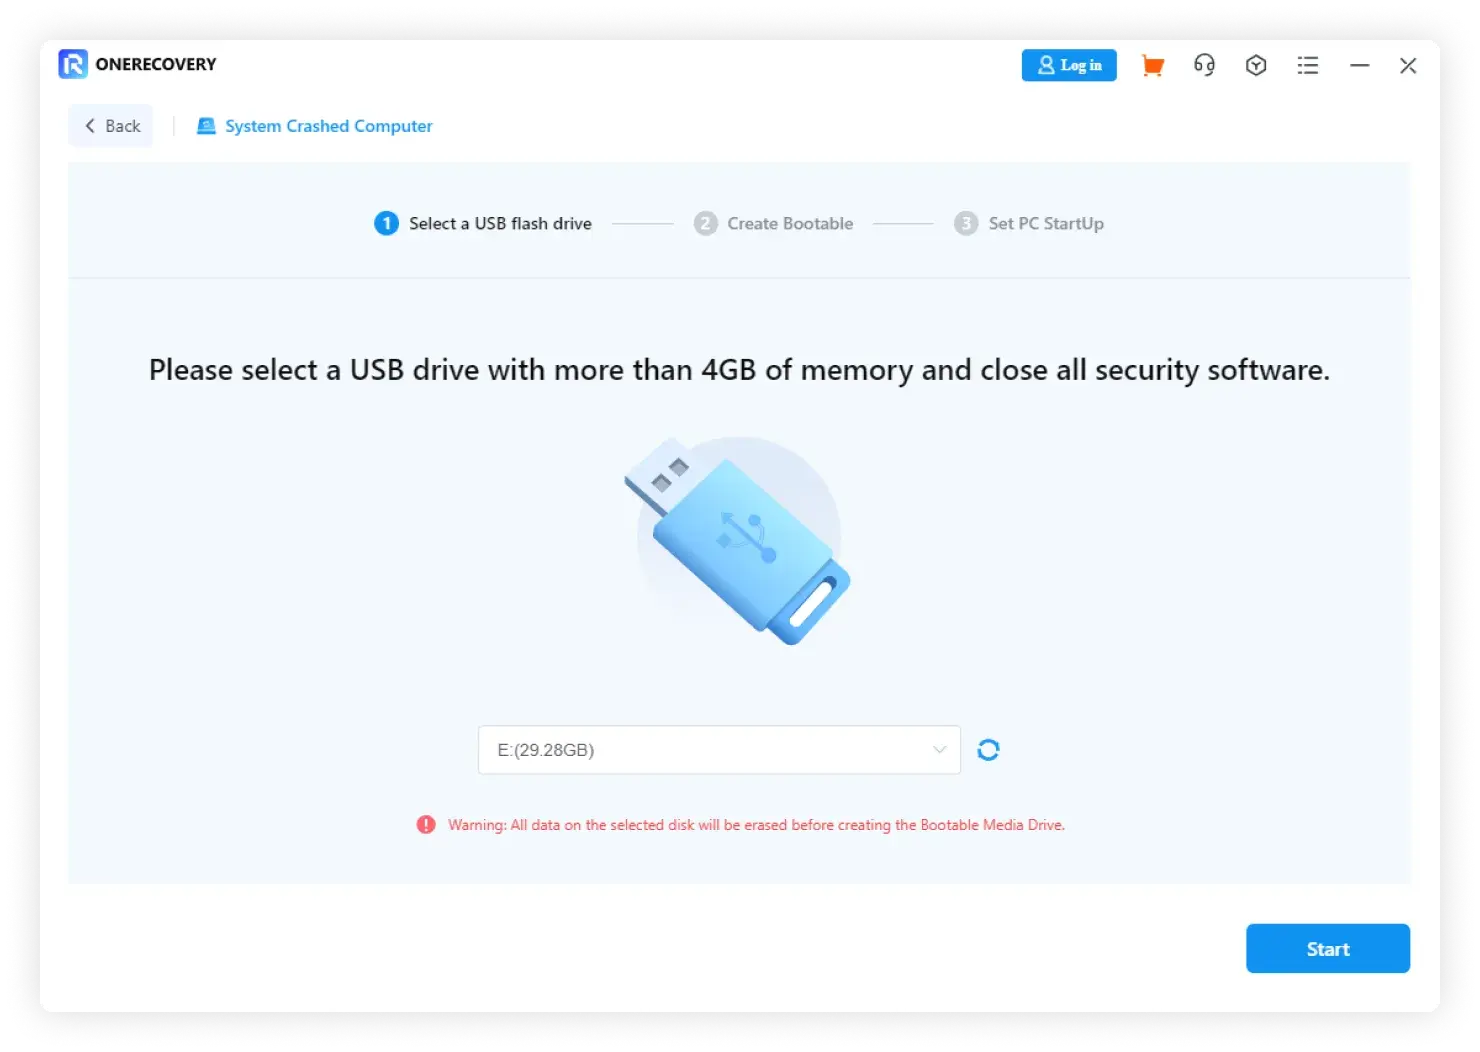
Create a Bootable Drive
If your computer is crashed and you are unable to launch your Windows computer, you can use ONERECOVERY to create a bootable media and recover data.
Before start, make sure the blank USB drive is connected to the working computer and can be recognized. Select the drive to create a bootable media, and then click "Create" to start.
Notes: Before creating a bootable drive, you have to format the USB drive first.
As soon as you click the "Create" button, an alert window about formatting a USB flash drive will pop up. So, back up your important data before formatting the media.
After the process is finished, your bootable drive is created successfully.
02.
Boot Crashed Computer from USB Drive
After creating a bootable USB flash drive, follow the below steps to restart your computer.
Connect the USB flash drive to your computer..
Adjust the BIOS to boot from USB drive: restart your crashed computer and press the BIOS entry key when the first screen is displayed. (The key can be different from one system to another).
The Basic Input Output machine (BIOS) is an option that can be used on any machine. In this way, users can change the BIOS settings and make the USB drive the main source for starting. You can access the BIOS options by pressing the BIOS Entry key when the system is turning on.
step 3
Recover Data from Crashed Computer
After following the above steps, you'll find that the crashed computer becomes bootable now. You can choose Hard Disk Copy or Data Recovery as you need.
Steps to Copy Hard Disk
Click the Hard Disk Copy button, and choose the copy directory.
Connect a good hard drive to the crashed computer.
Select the hard drive you just connect and click the "Copy" button. Then the screen will show the process of copying data from a crashed computer to the hard drive.
When the copying process is finished, A window "Data copy completed" will pop up.
Data Recovery
If you choose Data Recovery, then you should select a disk to start the scanning.
Connect a good hard drive to the crashed computer.
Once the scanning process is over, you can choose a location to save the recovered data. You can choose the hard drive that you connect to the crashed computer, and click the "Recover" button, then ONERECOVERY starts to recover data from the crashed computer to the hard drive.
If your data gets back successfully, a window "Congratulations! Files recovery completed!" will pop up.
Notes: You can preview different types and formats of data before recovering, such as photos, videos, audios, documents, and many more.
After recovering data, please save them to another location to avoid losing again or getting damaged. You can save your data to an external hard drive or removable device.
Photo/Video Recovery
Get Your Lost Or Deleted Photos/Videos Back Safely
“High Definition” videos are bigger in size than those general ones, they're usually saved in cameras and other storage devices in pieces. When you try to fix broken videos with regular recovery tools, you might get frustrated.
However, with the advanced recovering feature, ONERECOVERY's “Photos/Videos Recovery” function performs deep and quick scans to retrieve your lost photos /videos from all internal and external devices, including but not limited to SD cards, various camera brands like DJI, Canon, GoPro, and Sony, and other hard drive brands such as Seagate and more. It scans, collects, and matches video fragments automatically to make sure of restoring the whole video, efficiently and effectively recovering HD, Ultra HD, 4K, and 8K videos.
The steps of “Photo Recovery” and “Video Recovery” are the same, so let’s take “Video Recovery” as an example.
step 1
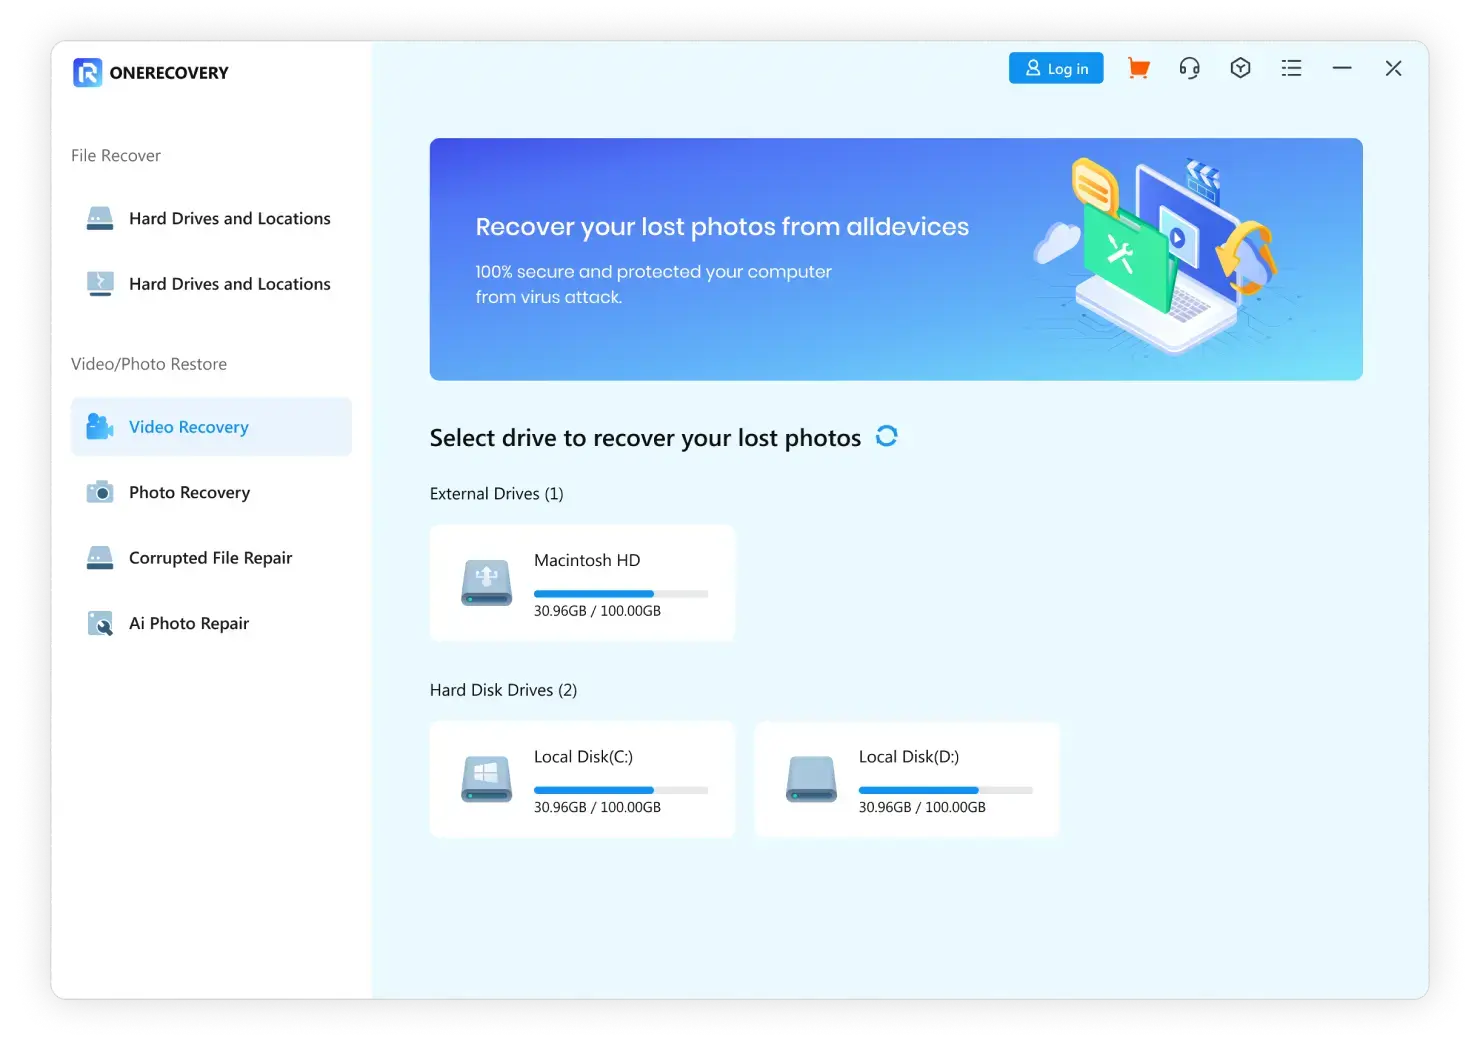
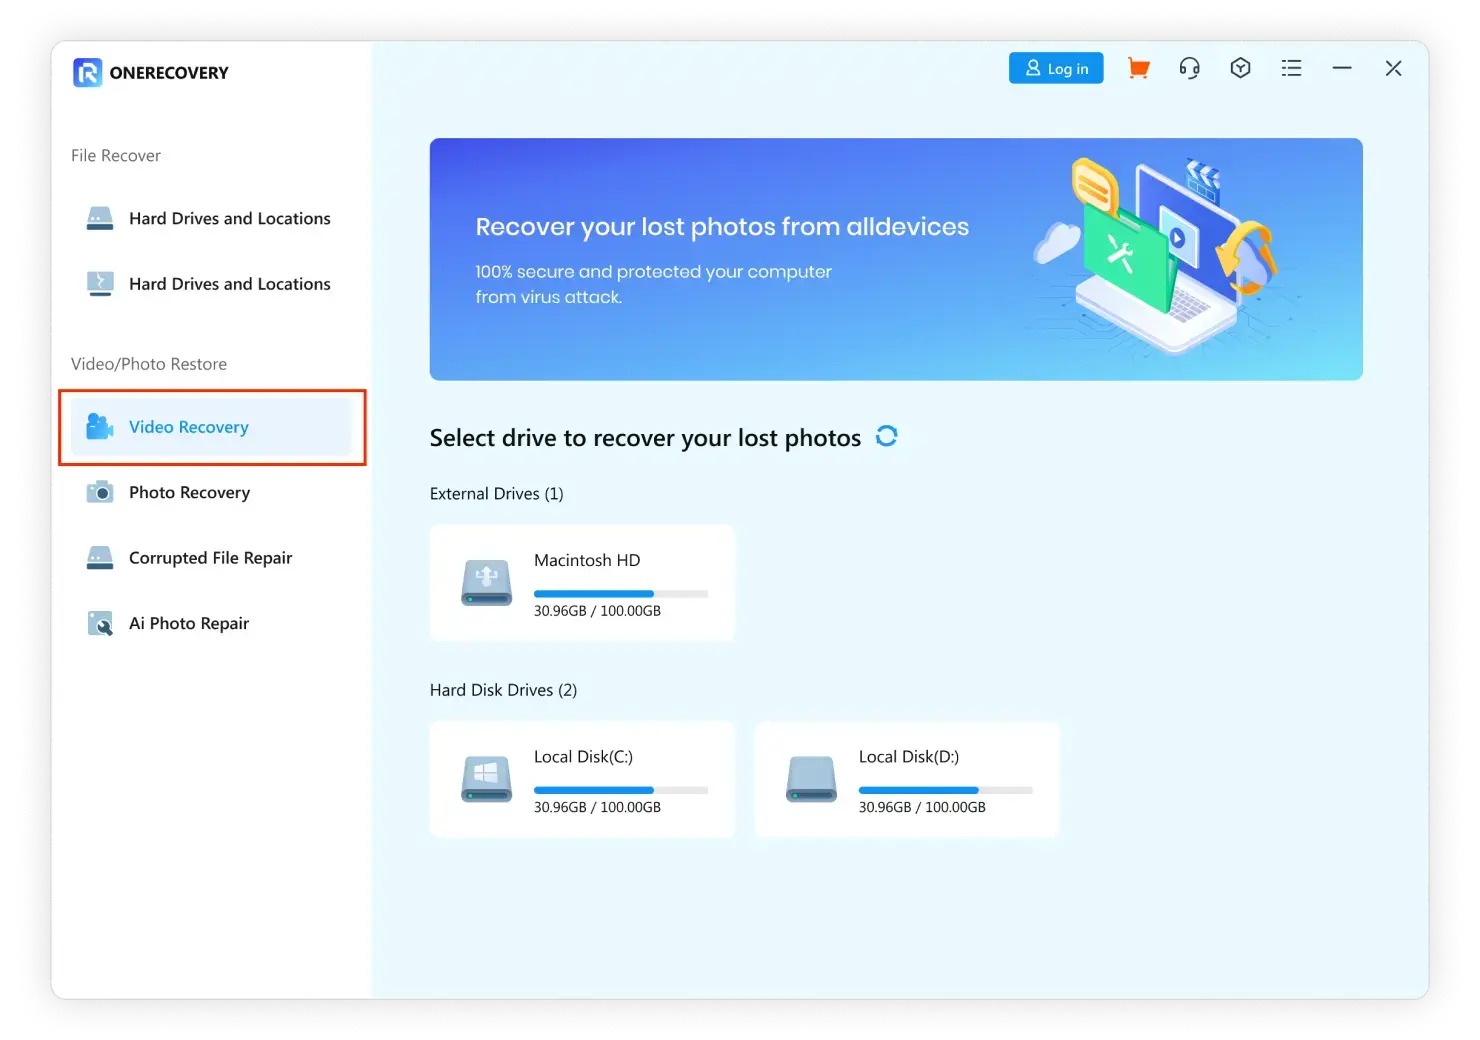
Click the “Photos/Videos Recovery” Button
Download ONERECOVERY and launch the program on your computer. Click the "Photos/Videos Recovery" button on the left side of the interface.
Here, you will find a list of external drives and hard drives. Choose the one you want to recover your lost or damaged videos from.
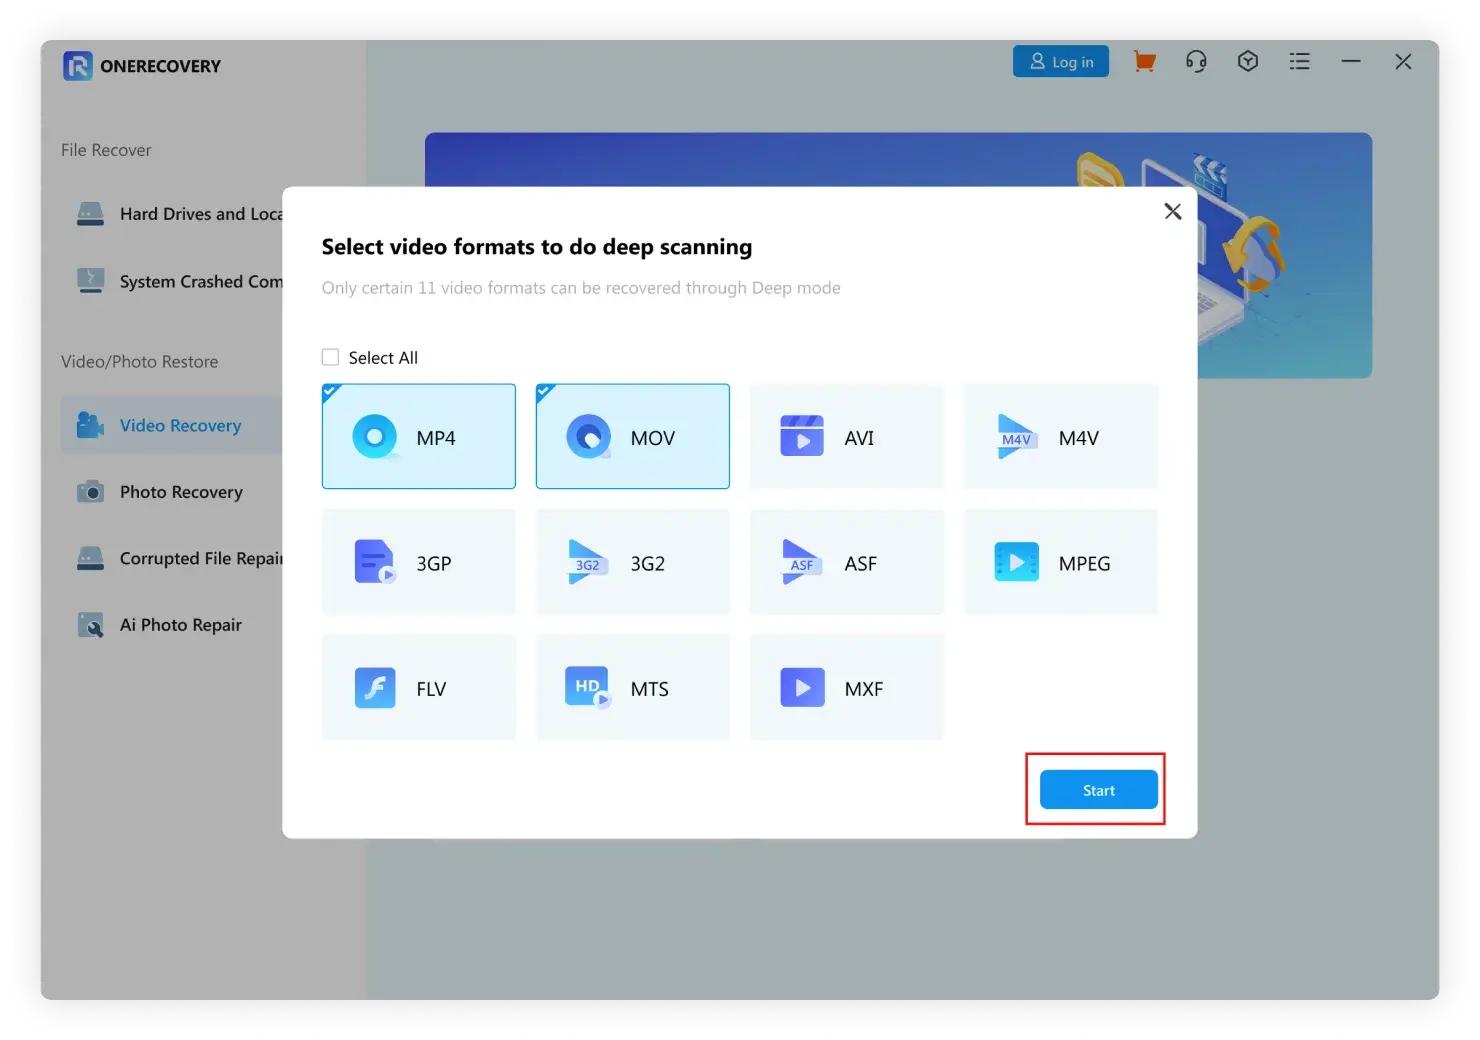
After selecting, you'll need to choose the file format (eg. mp4. mov. mpeg. mpg. and more) you want to get back.
Once you choose the formats, hit the "Start" button to proceed further.
Notes:
By default, ONERECOVERY will check for the first two formats, i.e., MP4 and MOV.
If you choose more file formats, it will take ONERECOVERY more time to scan the storage device.
step 2
Quick and Deep Scan Videos/Photos
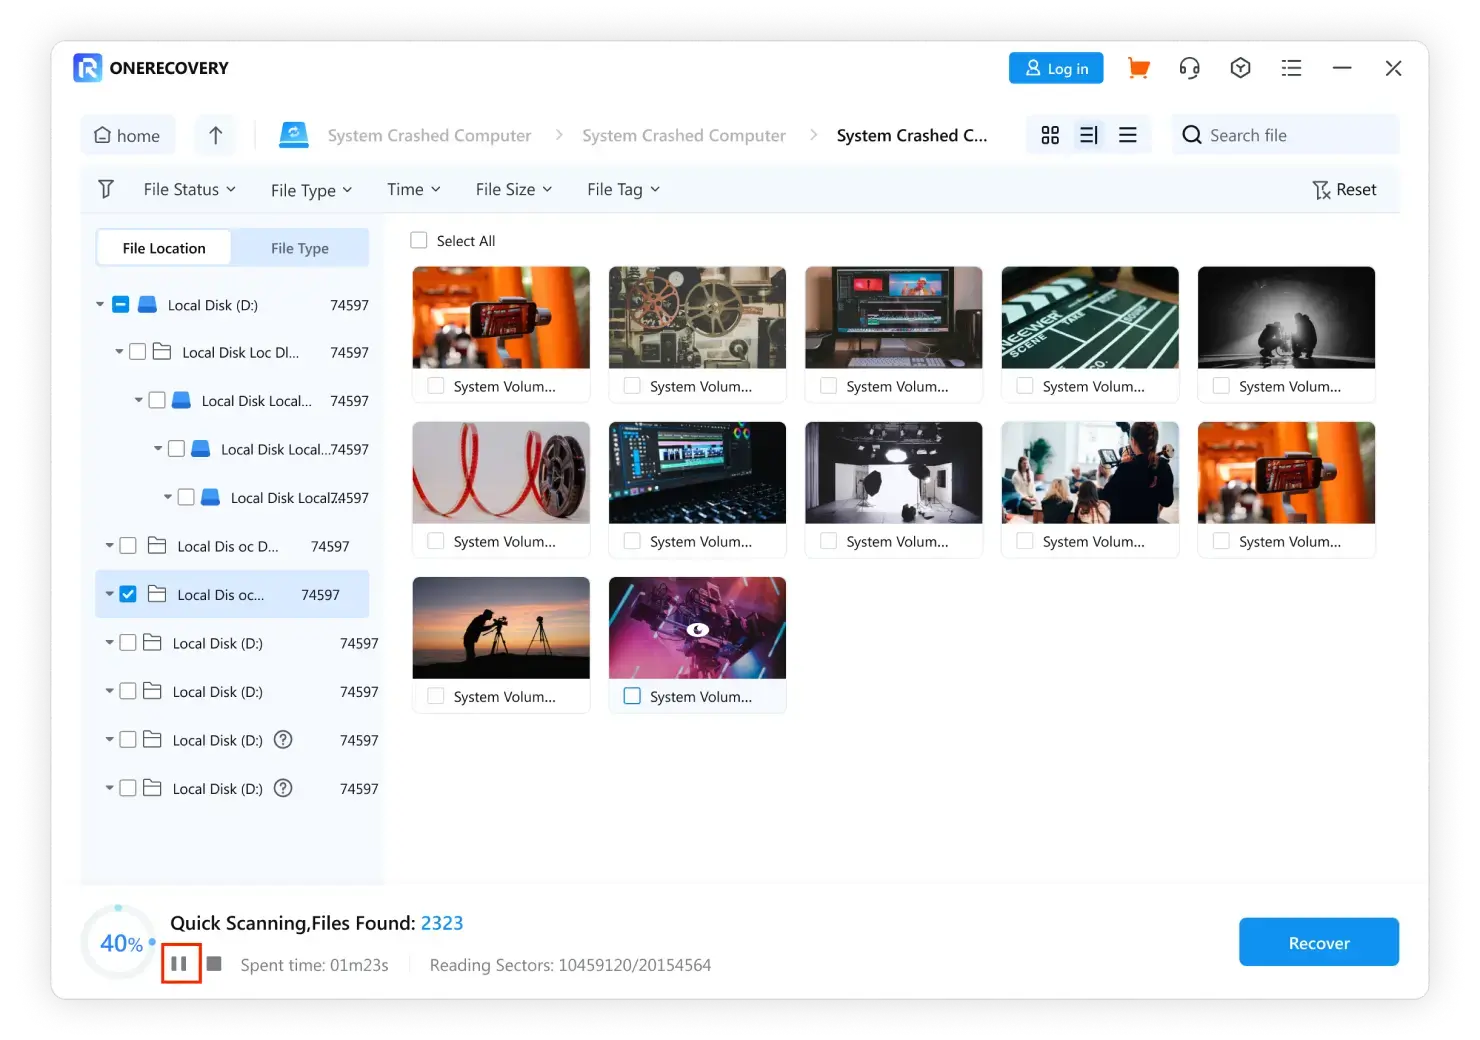
ONERECOVERY will do both "Quick Scan" and "Deep Scan" at the same time after you press the "Start" button. The progress can be seen at the bottom of the window, as shown below.
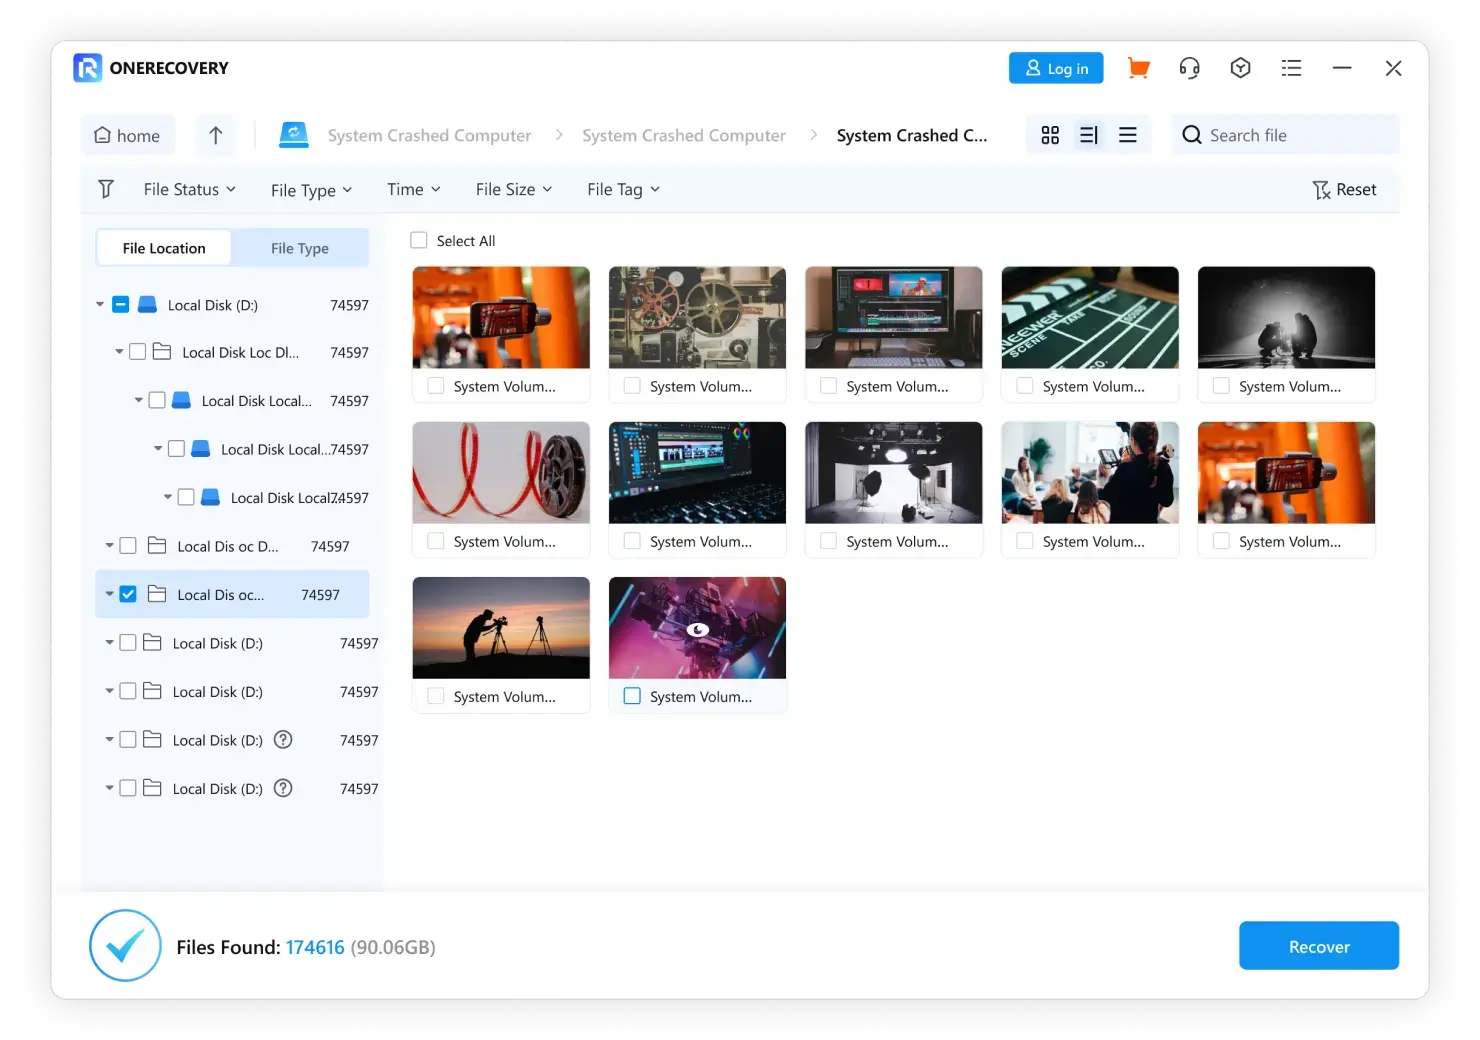
Quick Scan checks all of your files, but it only shows source files, like video fragments. Deep Scan, on the other hand, takes longer because it has to look for different video pieces and match them up to ensure the whole video is recovered. Once you find what you want, you can stop the scanning process at any time before it's done.
Once the scanning is done, it's best to preview the videos first before you try to get them back. It makes sure that you will get back the things you need.
step 3
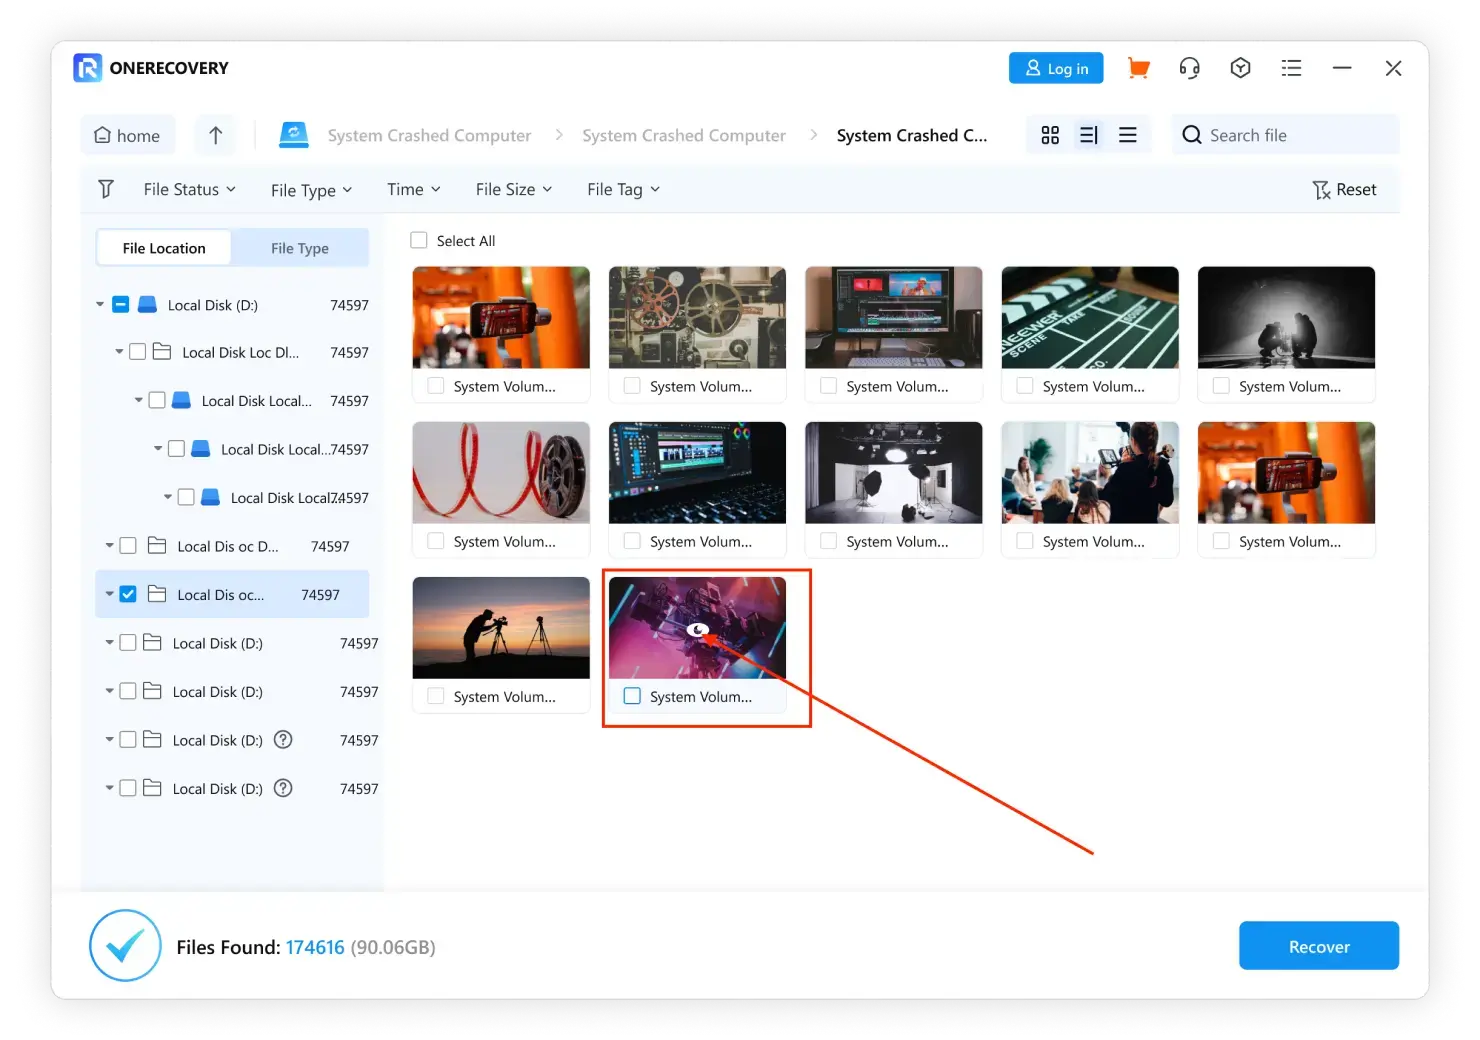
Preview and Recover Photos/Videos
In this step, you can see a preview of the recovered videos. Place your mouse over the video and click the "Preview" button. You can see the video that you want to get back.
Press the "Recover" button when you are sure you get the right video files during preview. If you do this, a new window will appear on your screen where you can choose where to save the recovered videos on your laptop or computer.
Notes:
You can preview unlimited photos and videos before you restore.
We recommend you choose a different location to save the recovered data on your device compared to where it was lost in case it gets lost again.
Corrupted File Repair
Recover Your Corrupted Files in Multiple Formats
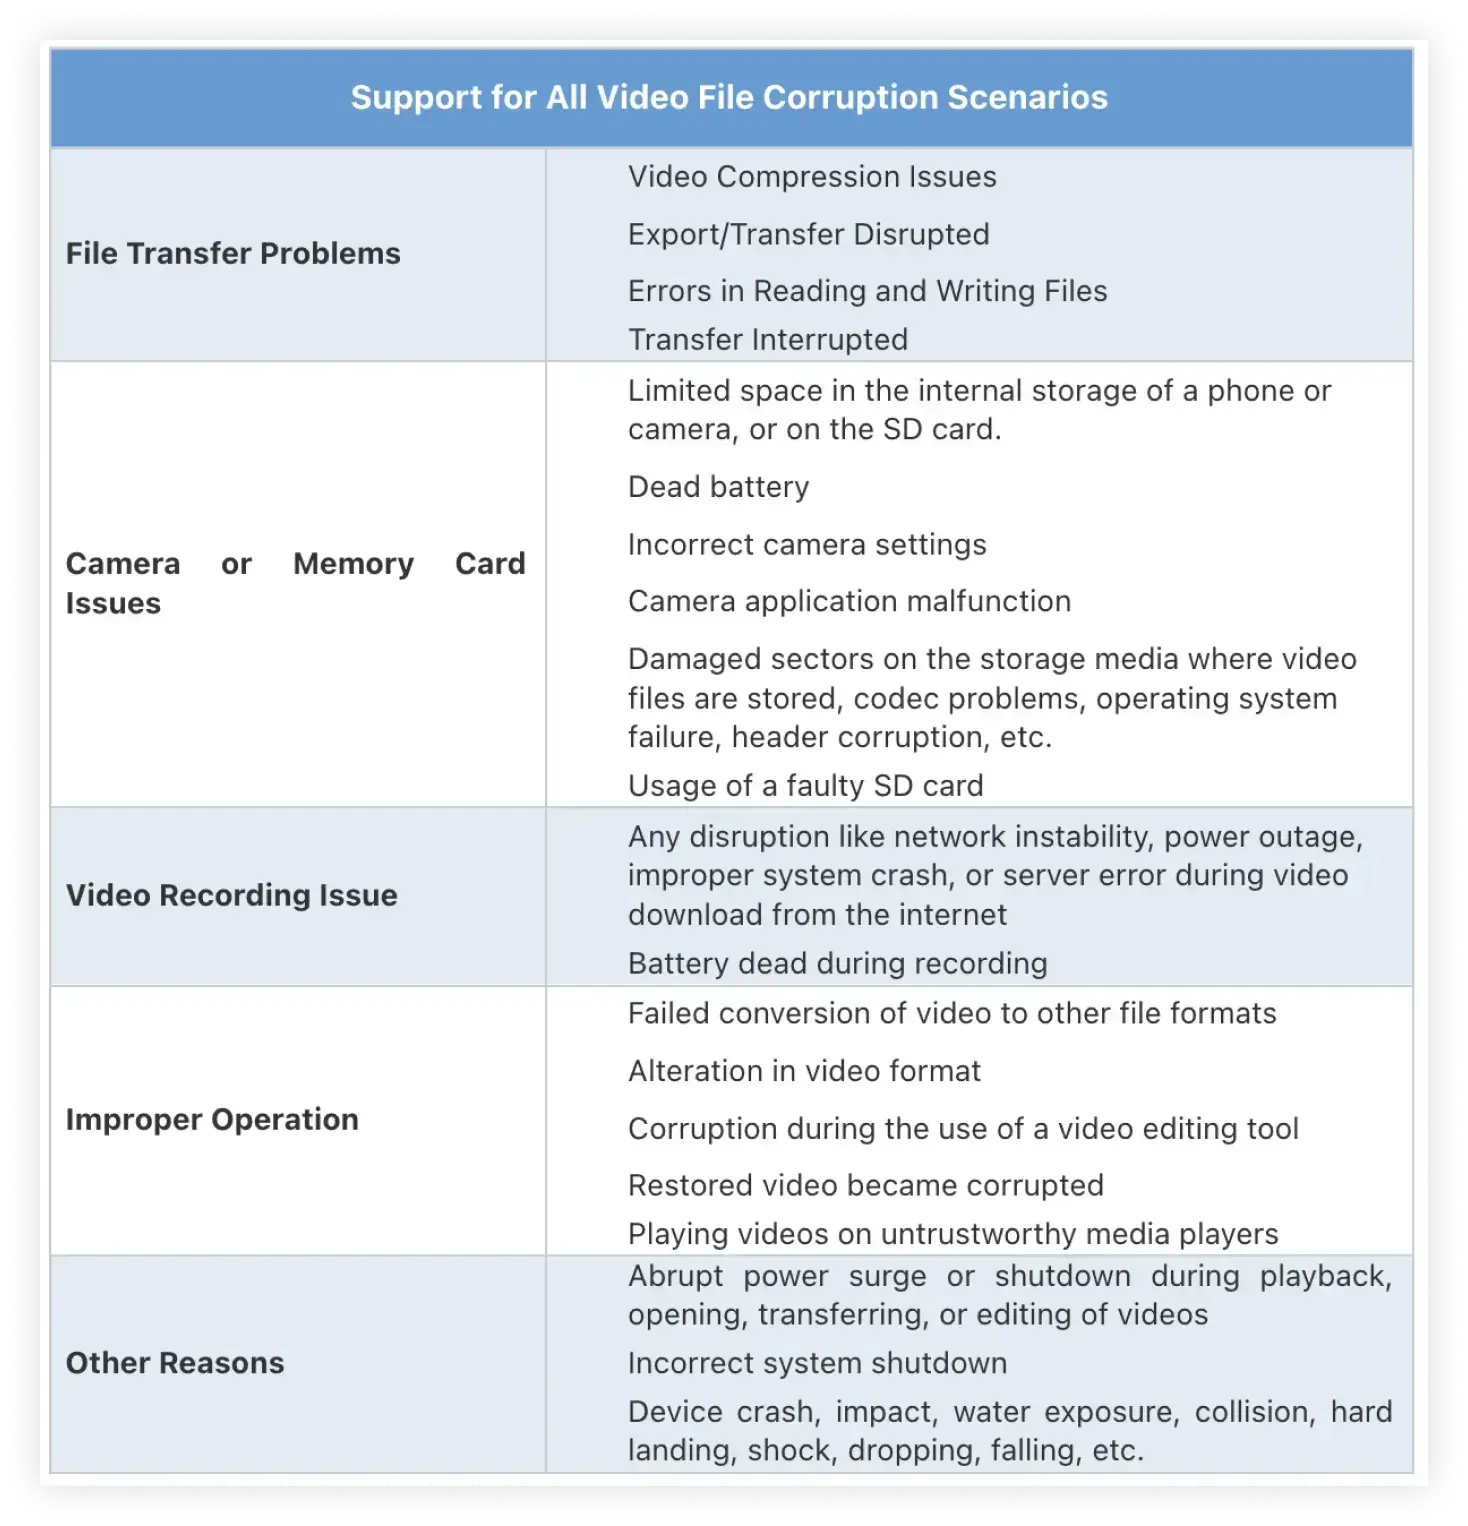
When faced with sudden power surges, virus attacks, or mishandling of files, your valuable files may be at risk of becoming corrupted. With state-of-the-art AI algorithms, ONERECOVERY provides a thorough analysis to ensure an accurate corrupted file repair process to help you retrieve your accidentally inaccessible files.
The advanced repair tool prepares the most effective solution to repair corrupted documents, including PDF, Word, Excel, PowerPoint, and various image and video files.
If you have incomplete files, garbled files, or you can’t open the file, ONERECOVERY can be used to help you. All you need to do is follow three simple steps to get your corrupted files back and resolve your worries.
step 1
Select file types
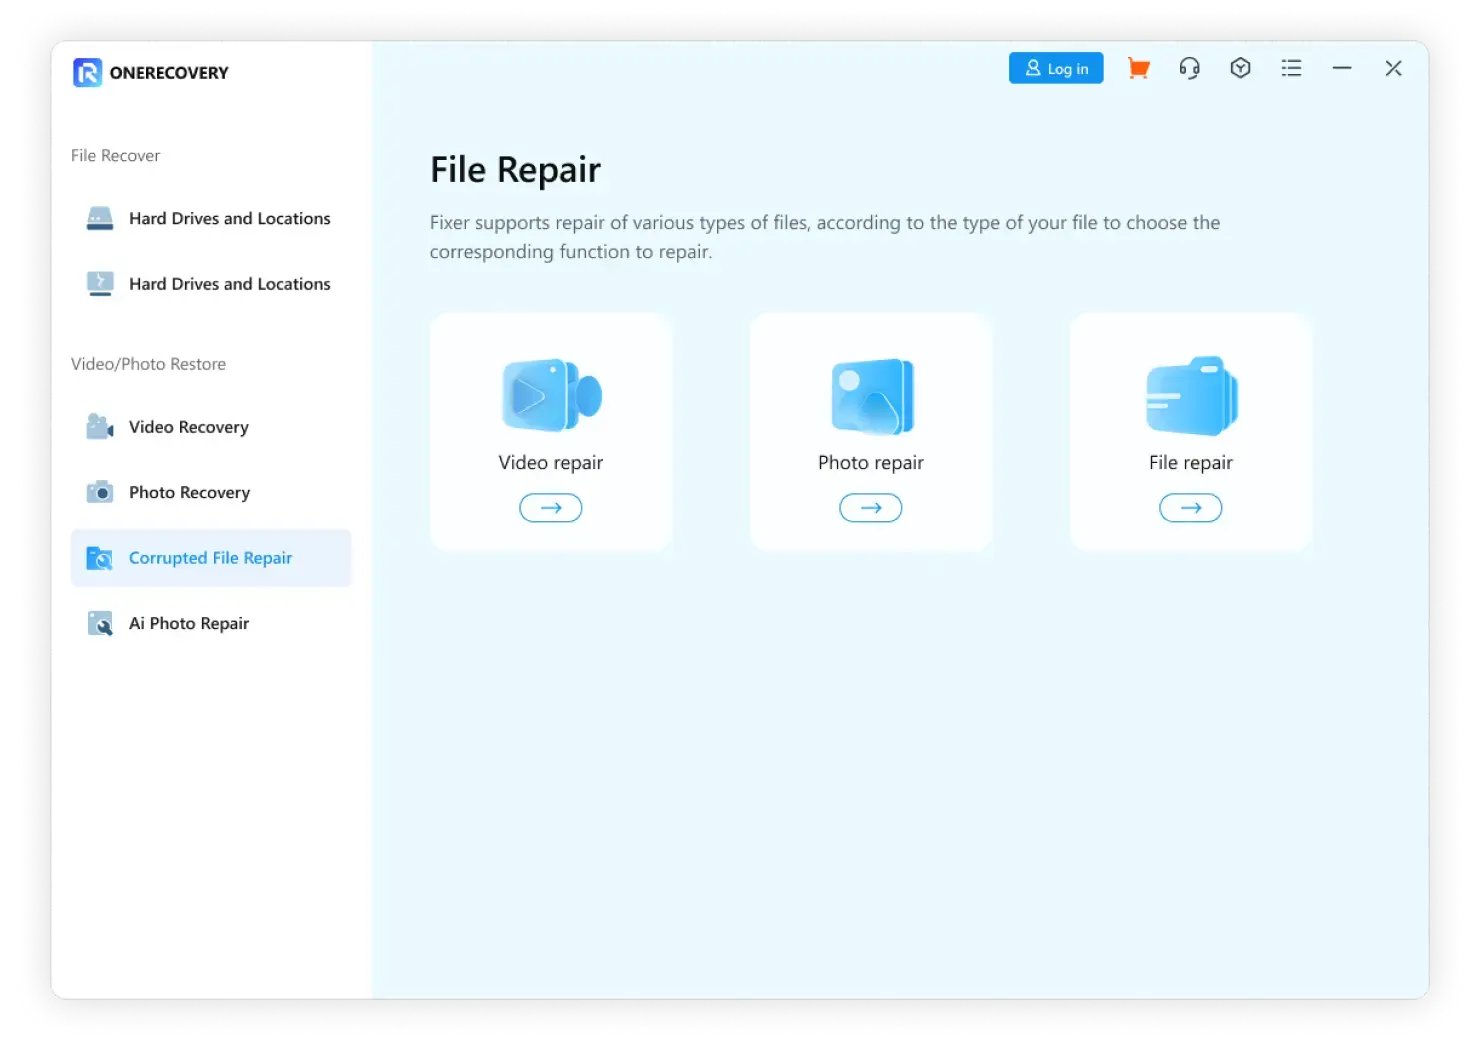
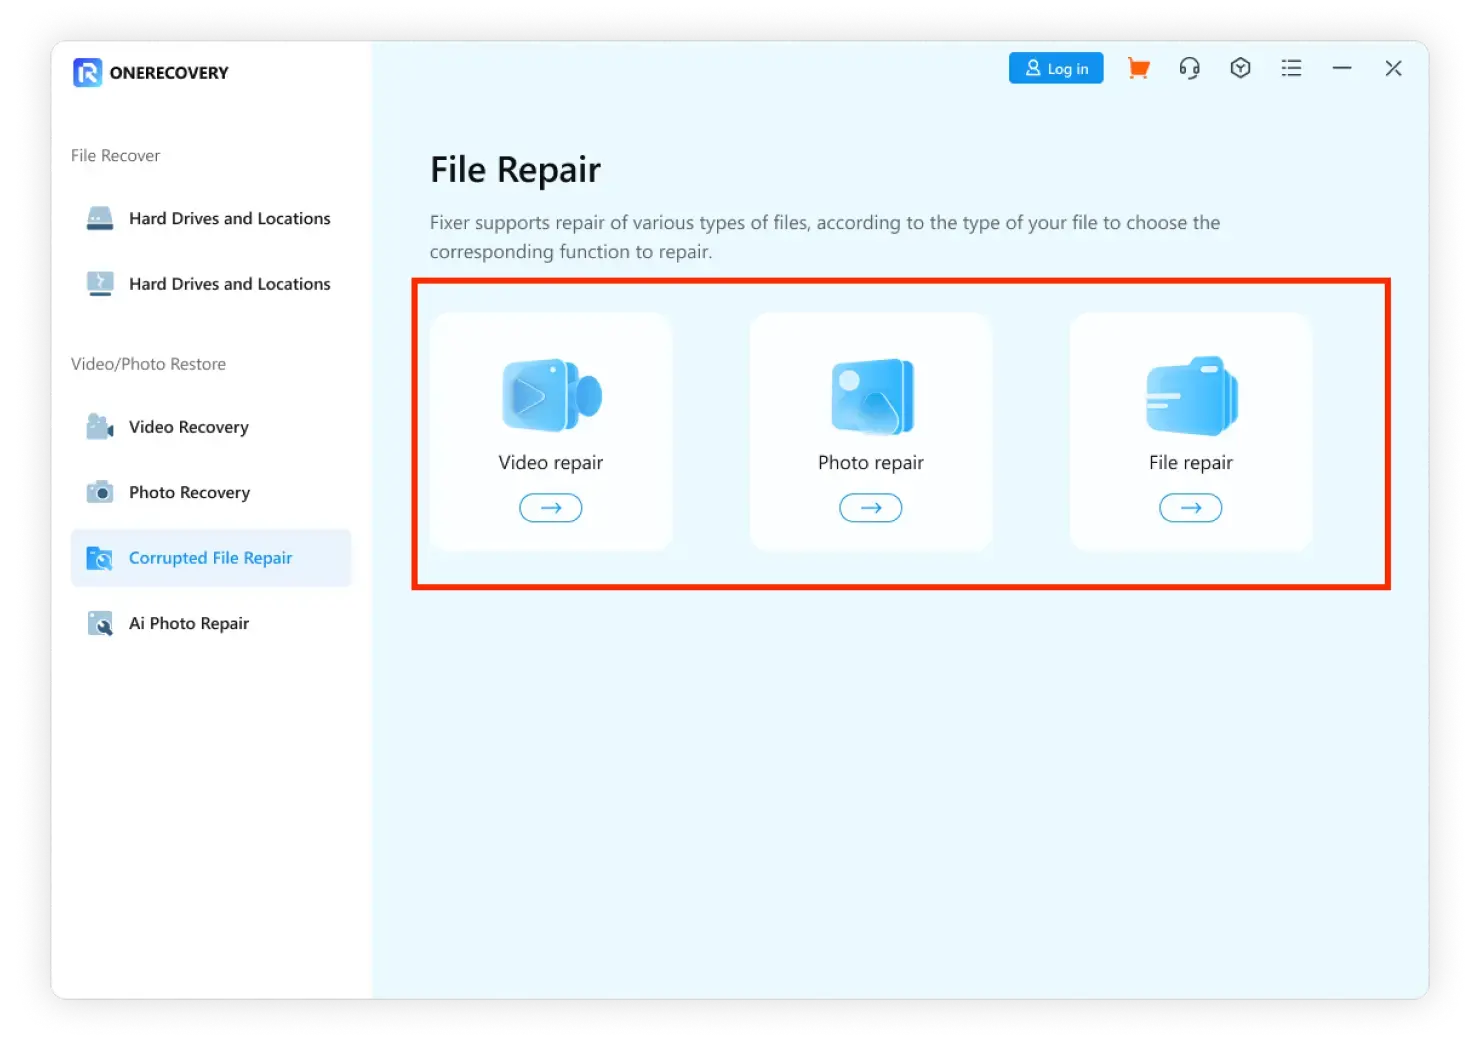
Launch ONERECOVERY on your computer and click the "Corrupted File Repair" button on the left side of the interface. Here, you will find a list of function options: Video Repair, Photo Repair, and File Repair. Choose the function you need according to the files you want to repair.
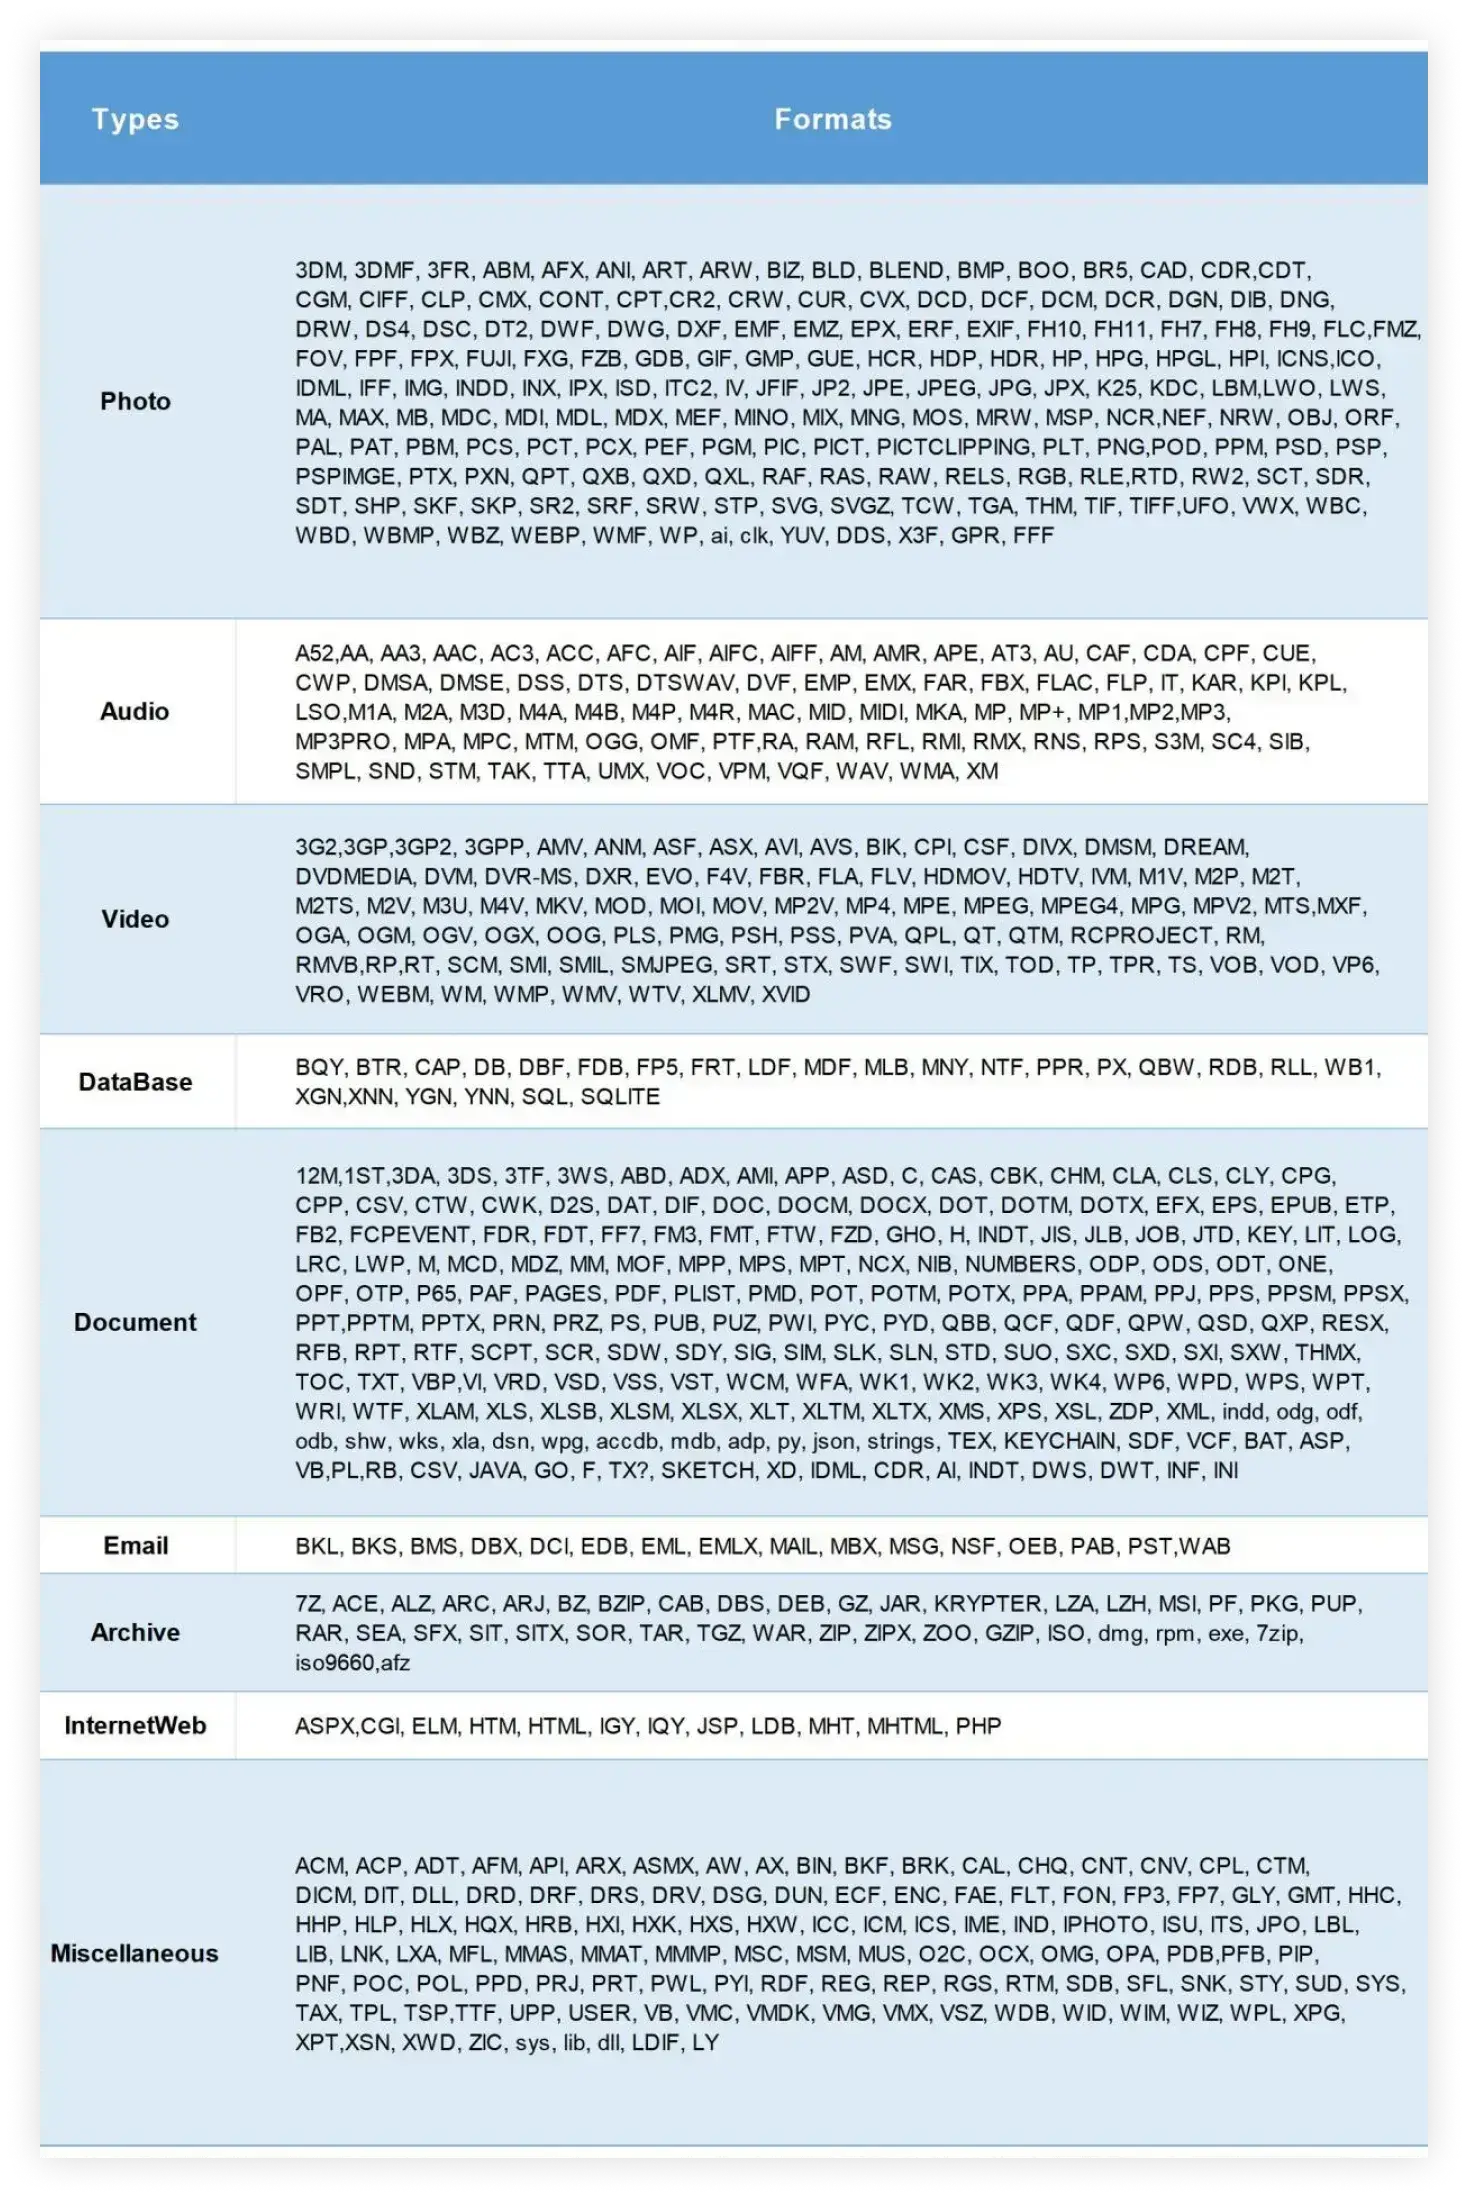
After selecting the file type, you'll need to choose the file format. ONERECOVERY supports repairing multiple files at a time, up to 10 files, and the size of each file should not exceed 5G. It’s important to note that once you choose the file repair type (like “video repair”), you can just select the related formats (like “mp4”) in this step, and can’t choose formats under other types (eg. the format “jpg.” of type “photo”).
A comprehensive guide of the file types supported by ONERECOVERY is provided from the charts:
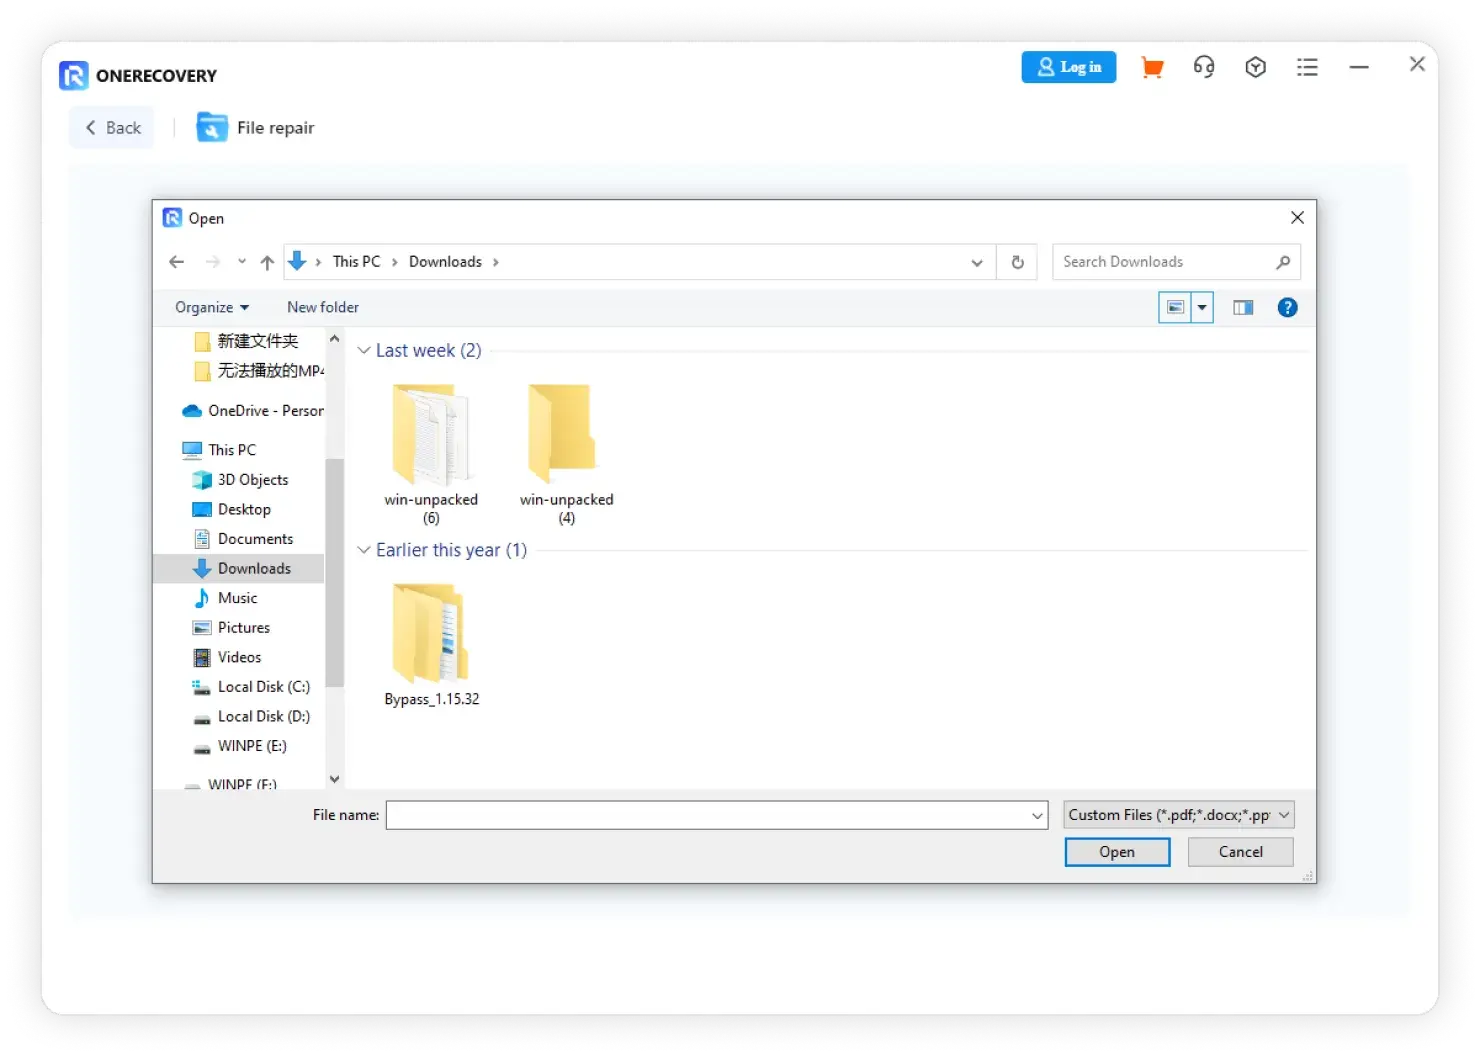
Once you choose the file formats, hit the "Open" button to proceed further.
step 2
Corrupted File Repair
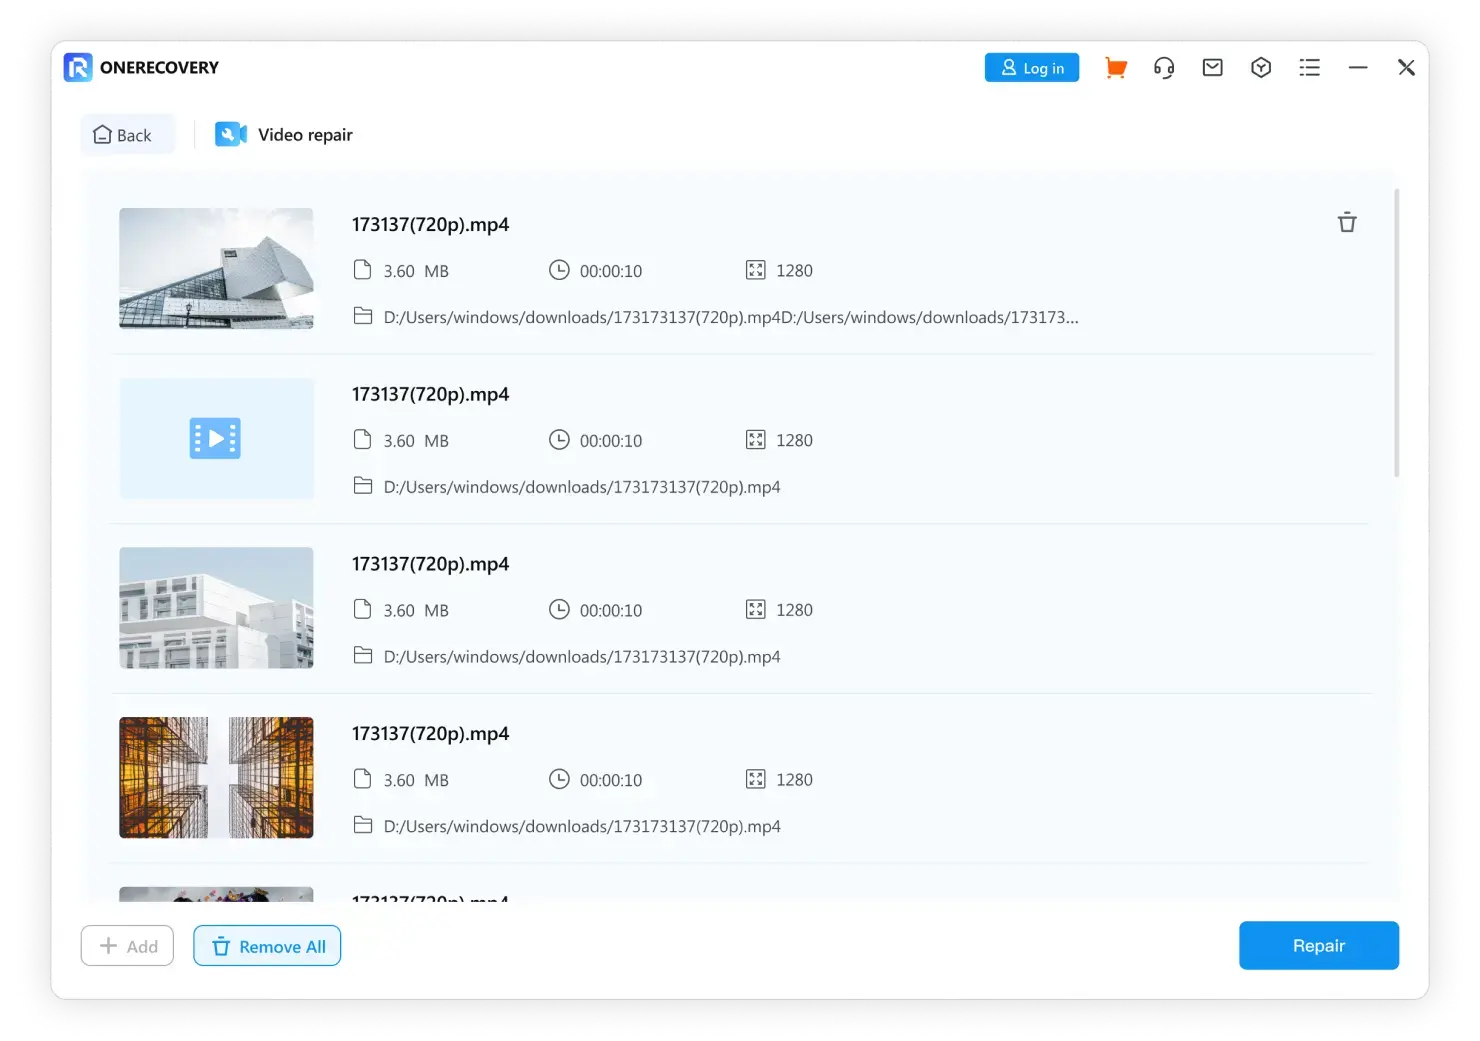
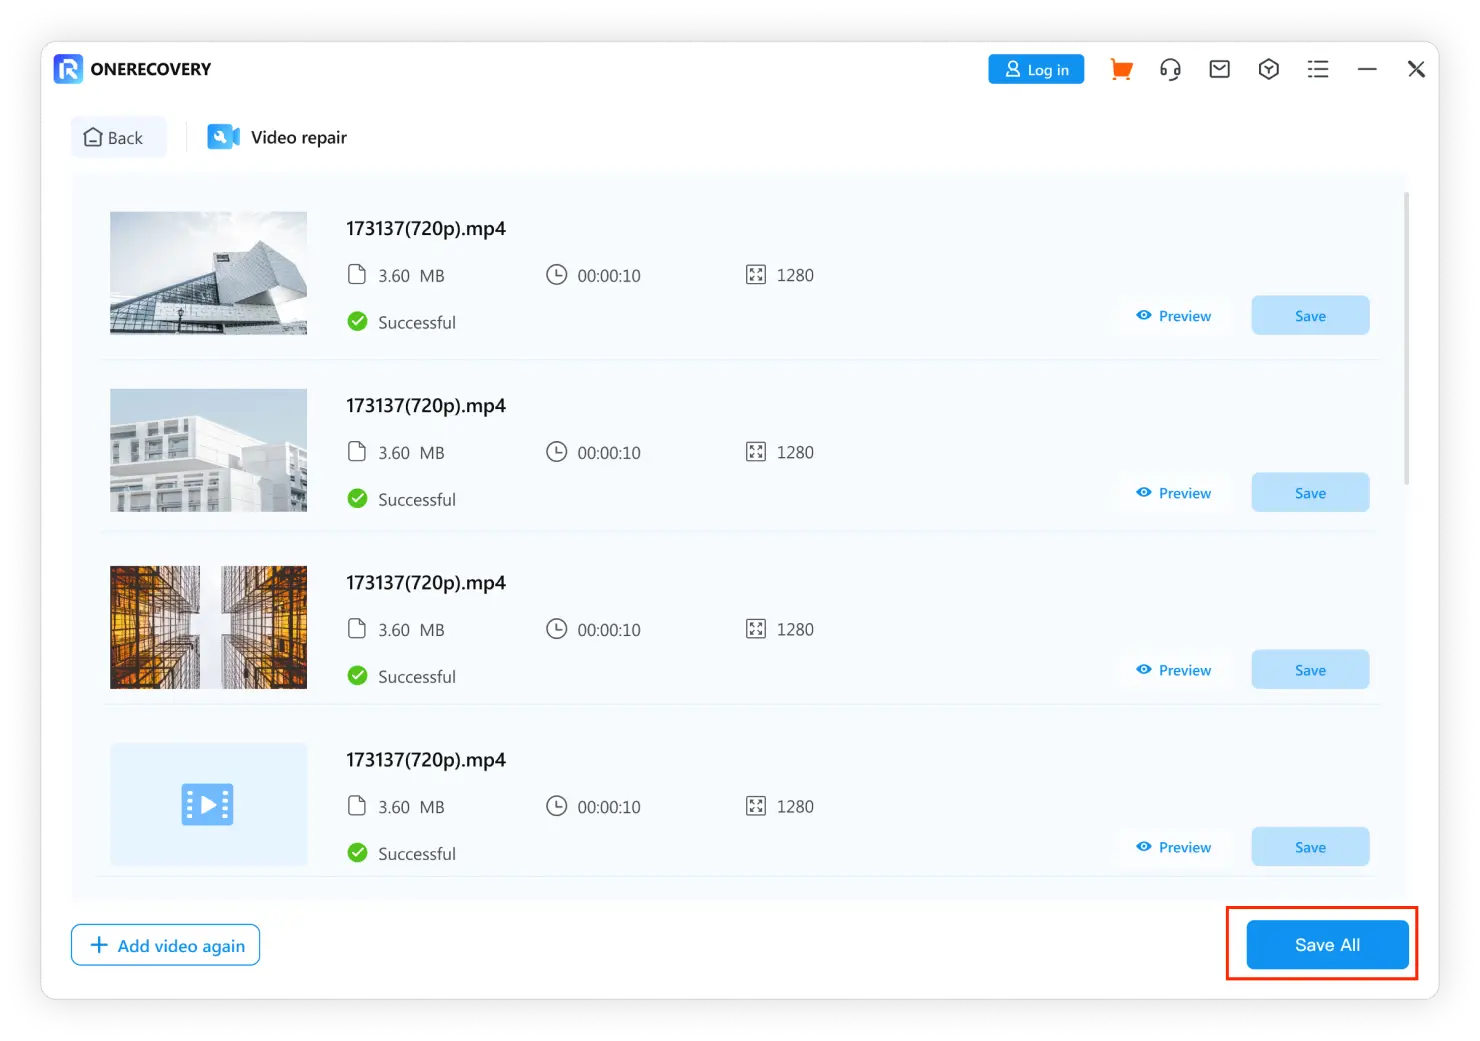
After uploading your corrupted files, basic information about the selected files is automatically presented by ONERECOVERY. For example, if you choose videos to repair, information including their names, sizes, durations, resolution ratios, and locations will displayed on the window.
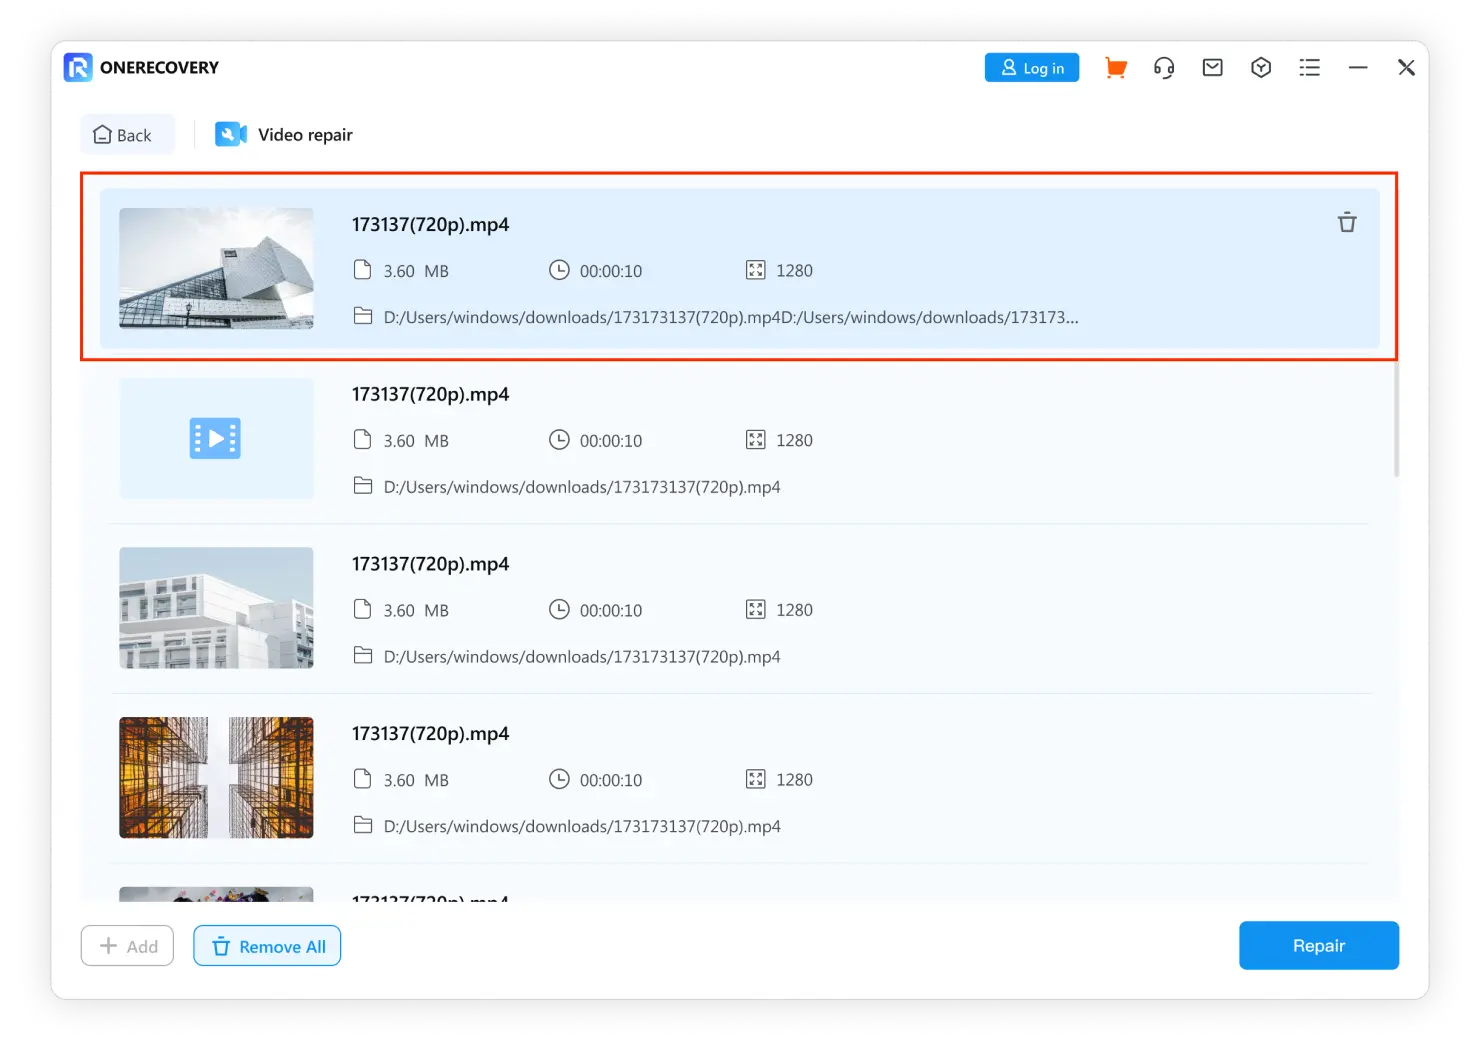
Before repair, ONERECOVERY offers the convenient feature of allowing users to preview their files before initiating the repair process. ONERECOVERY is capable of previewing all types of files you upload. For instance, you can click on the “Preview” button on the right side of each video to easily check whether that's the file you want to repair. Once you click on a file, a preview window will appear, displaying the contents of the file.
Click on the “Repair” button, then ONERECOVERY will help you repair the file.
During the repair process, the garbled elements, missing fragments and data in your file can be reconstructed and repaired, making it intelligible and functional. This process will take some time, please wait patiently.
step 3
Preview and Download Files
When "Successful!" appears in the place where the file location was originally displayed, your corrupted file has been successfully retrieved. Click the “Save All” button at the bottom right of the window to select a path to save your videos at the same time.
If you want to save an individual successful video while others still repairing, you can also click the “save” button on the right side of the corresponding video.
Please note that due to varying degrees of file corruption, there may be cases where file repair fails; for those files that cannot be repaired, please contact our technical team for further support: support@tinyfrom.com.
AI Photo Repair
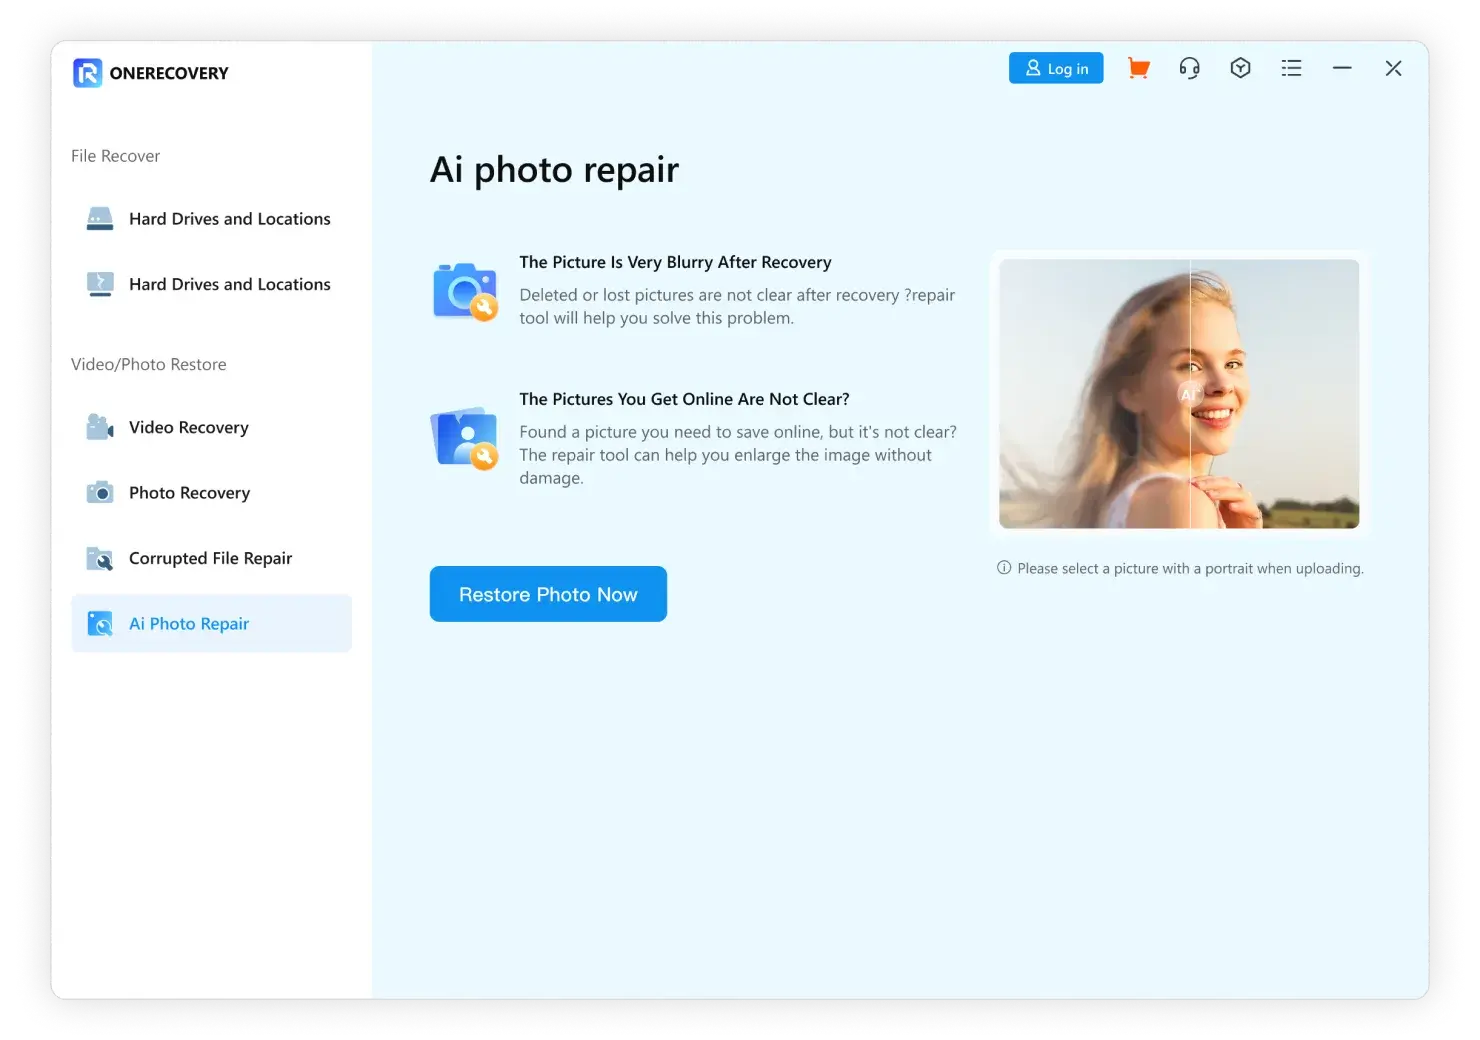
Repair corrupted/blurry photos with powerful AI tech
In this functional module, ONERECOVERY will help you repair the corrupted photos depending on advanced AI algorithms. By quick recognition and accurate analysis, our AI tool will focus on the imperfections in your photos, customize the processing techniques, and fix all kinds of corrupted ones like blurry, grainy, pixelated, old photos, and more.
To restore your picture from fading, corruption, and more, please kindly follow these steps:
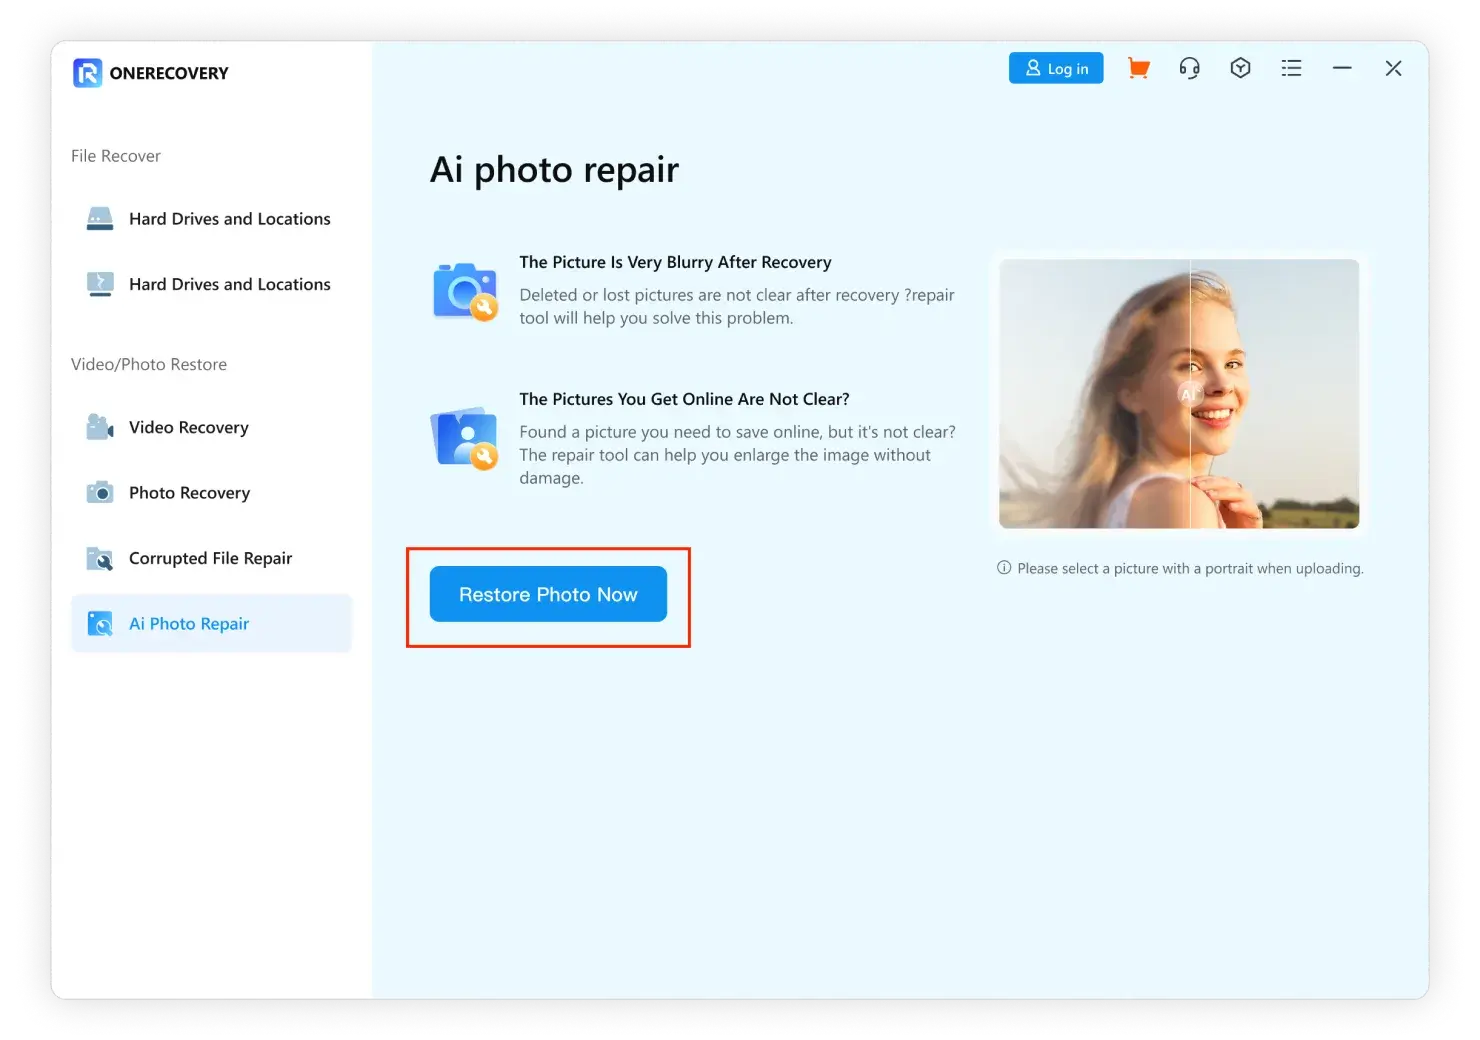
step 1
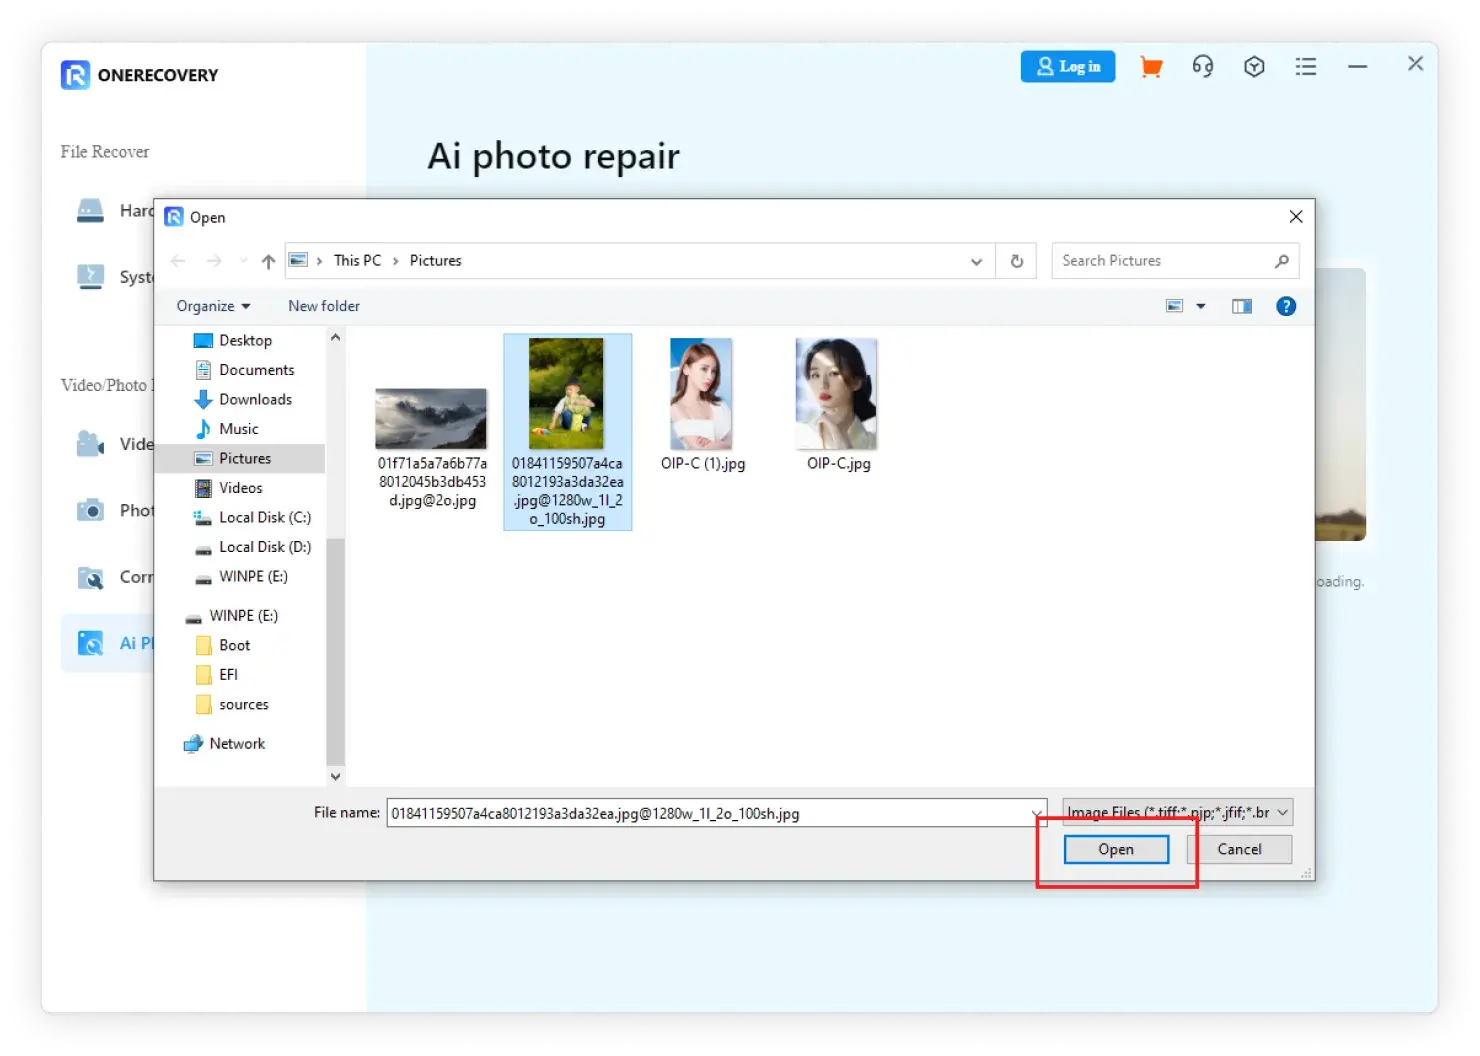
Enter the “AI Photo Repair” module and click “Restore Photo Now”.
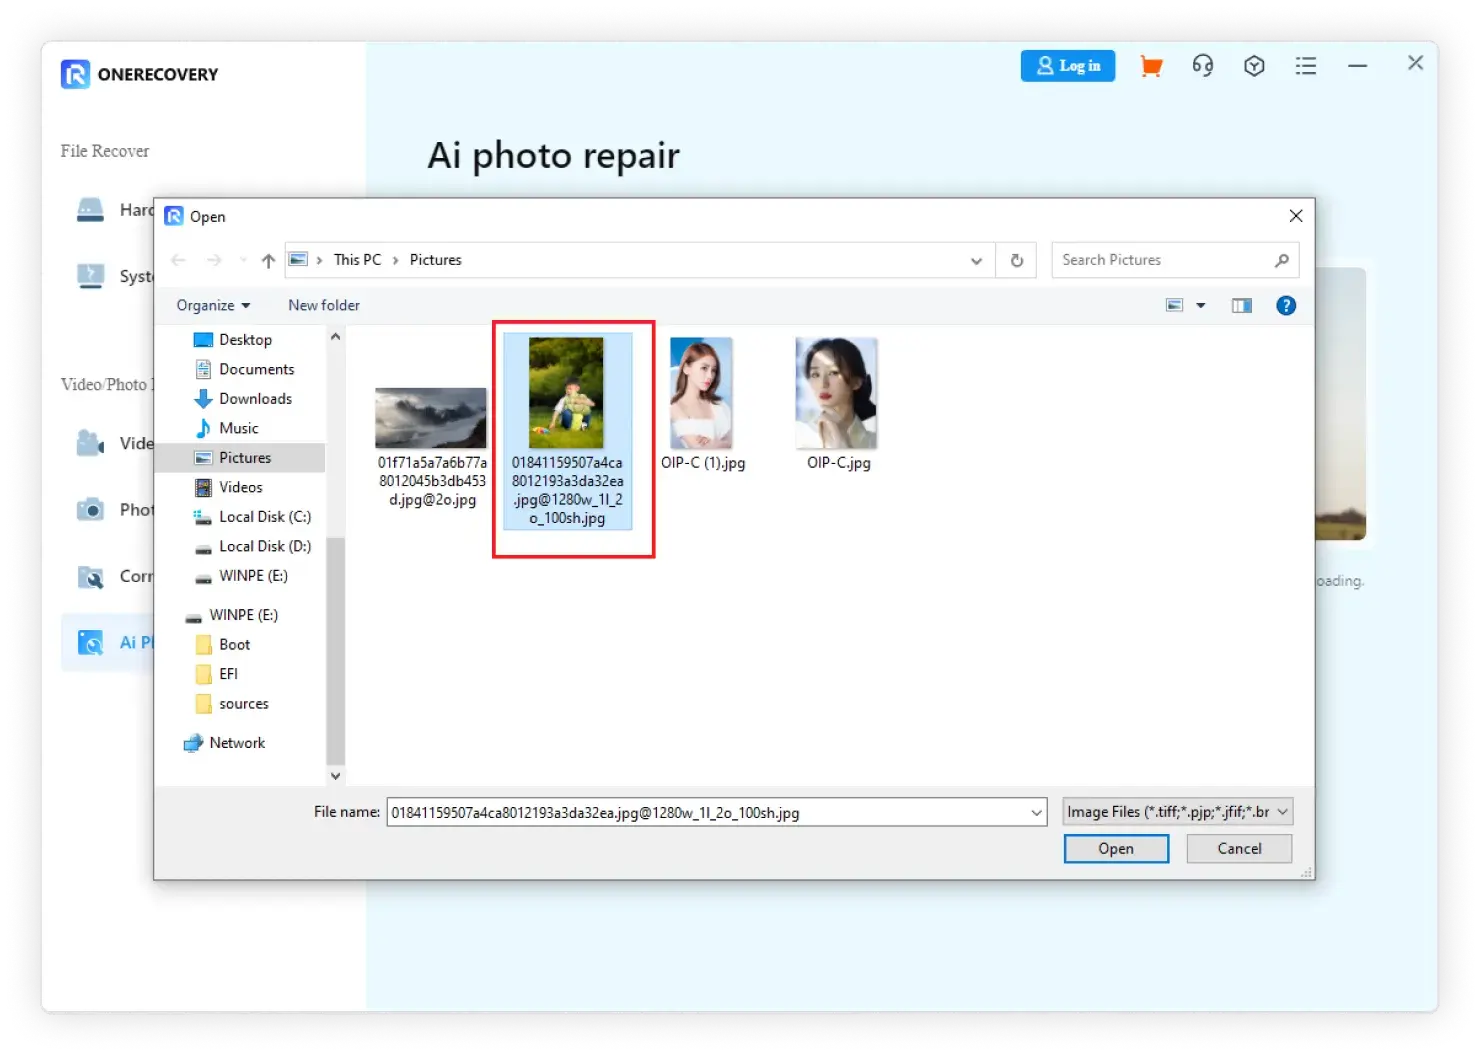
step 2
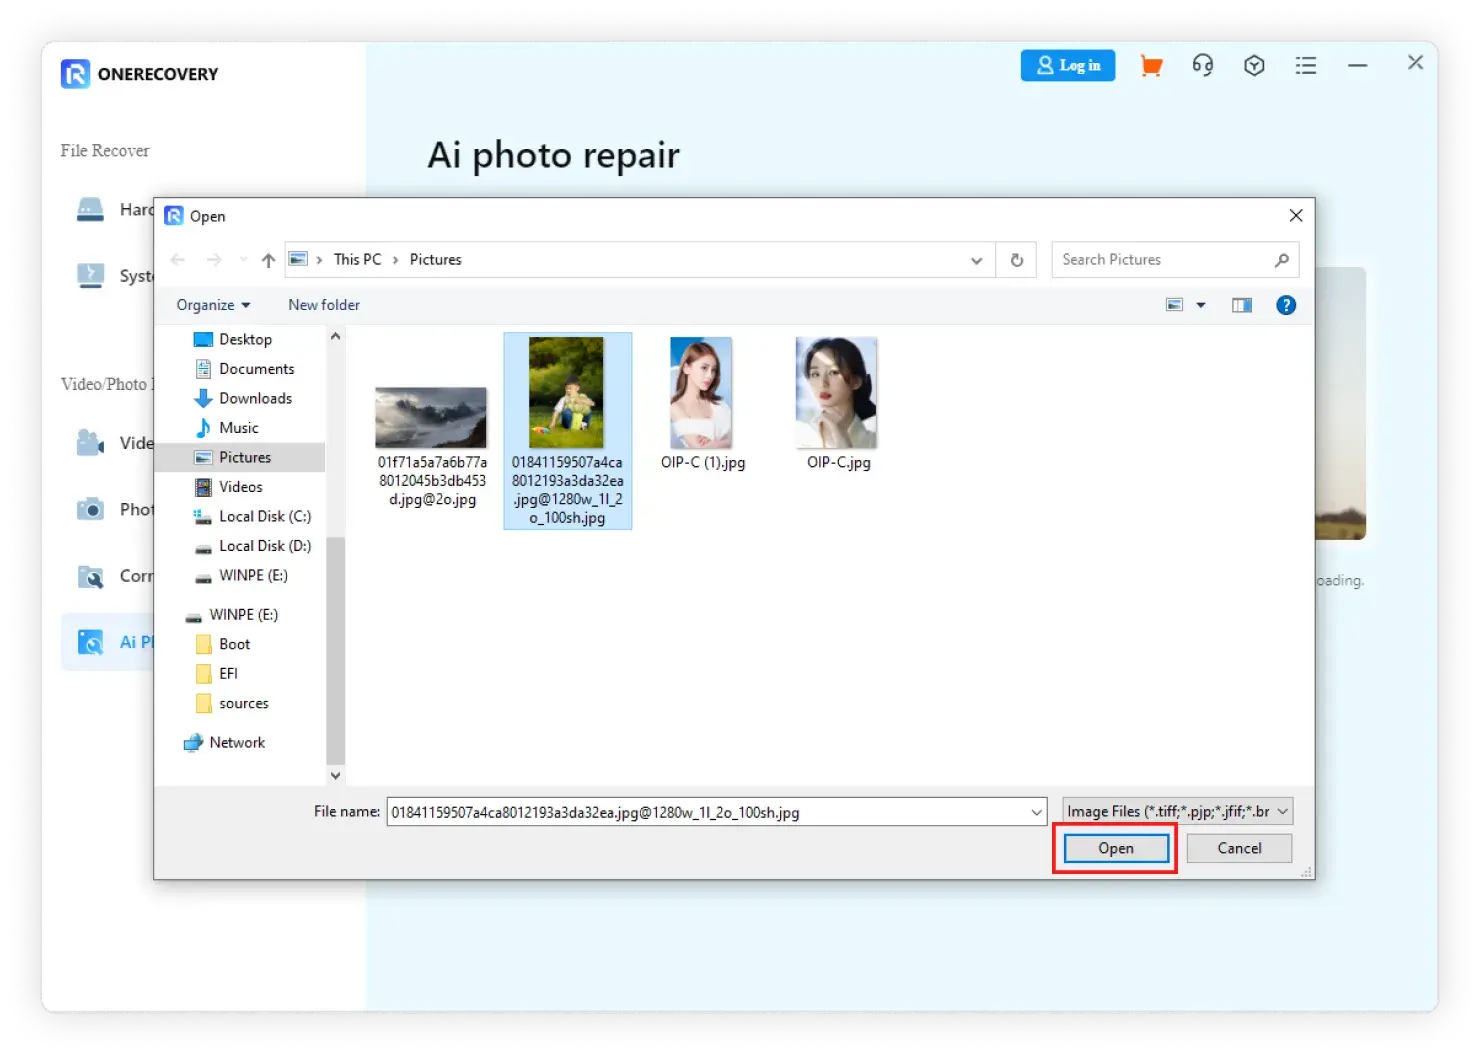
When the pop-up folder appears, select the photo you want to repair. For successful repair, please upload only one image with a human face.
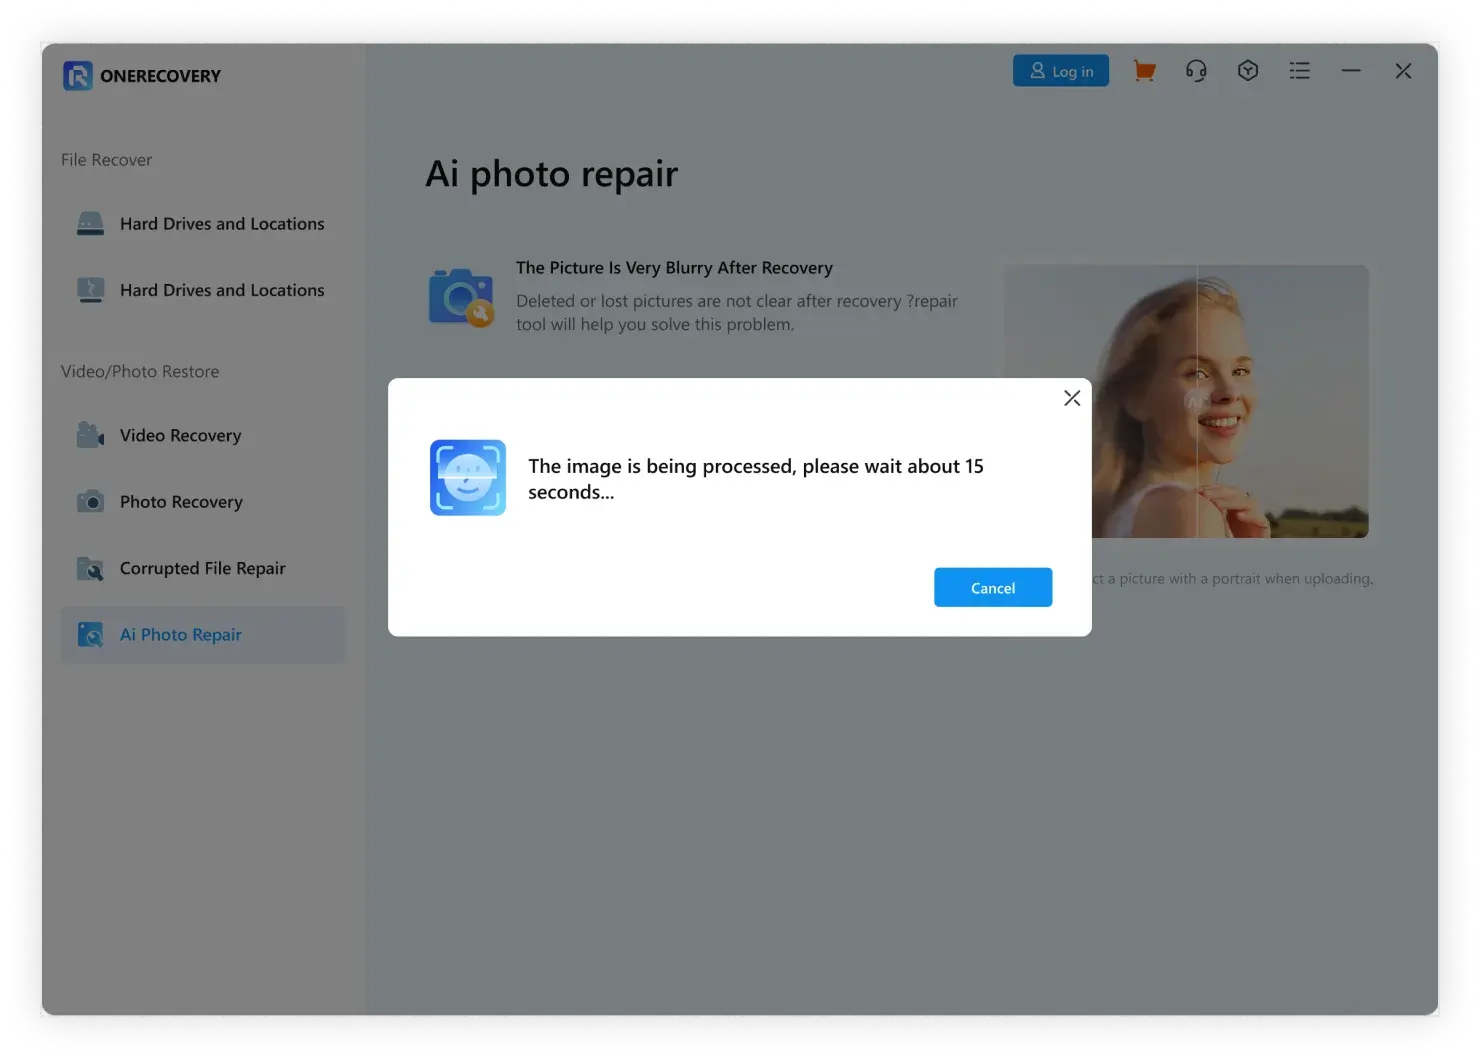
step 3
Once you have uploaded your photo, ONERECOVERY will automatically begin to repair.
It will automatically detect the type of damage and corruption in the photos, repair the images by correcting color fading, adjust brightness and contrast, and sharpen blurry areas. The blemishes will be removed, and the photos can be restored to HD quality. This process will take about 15 seconds, so please be patient.
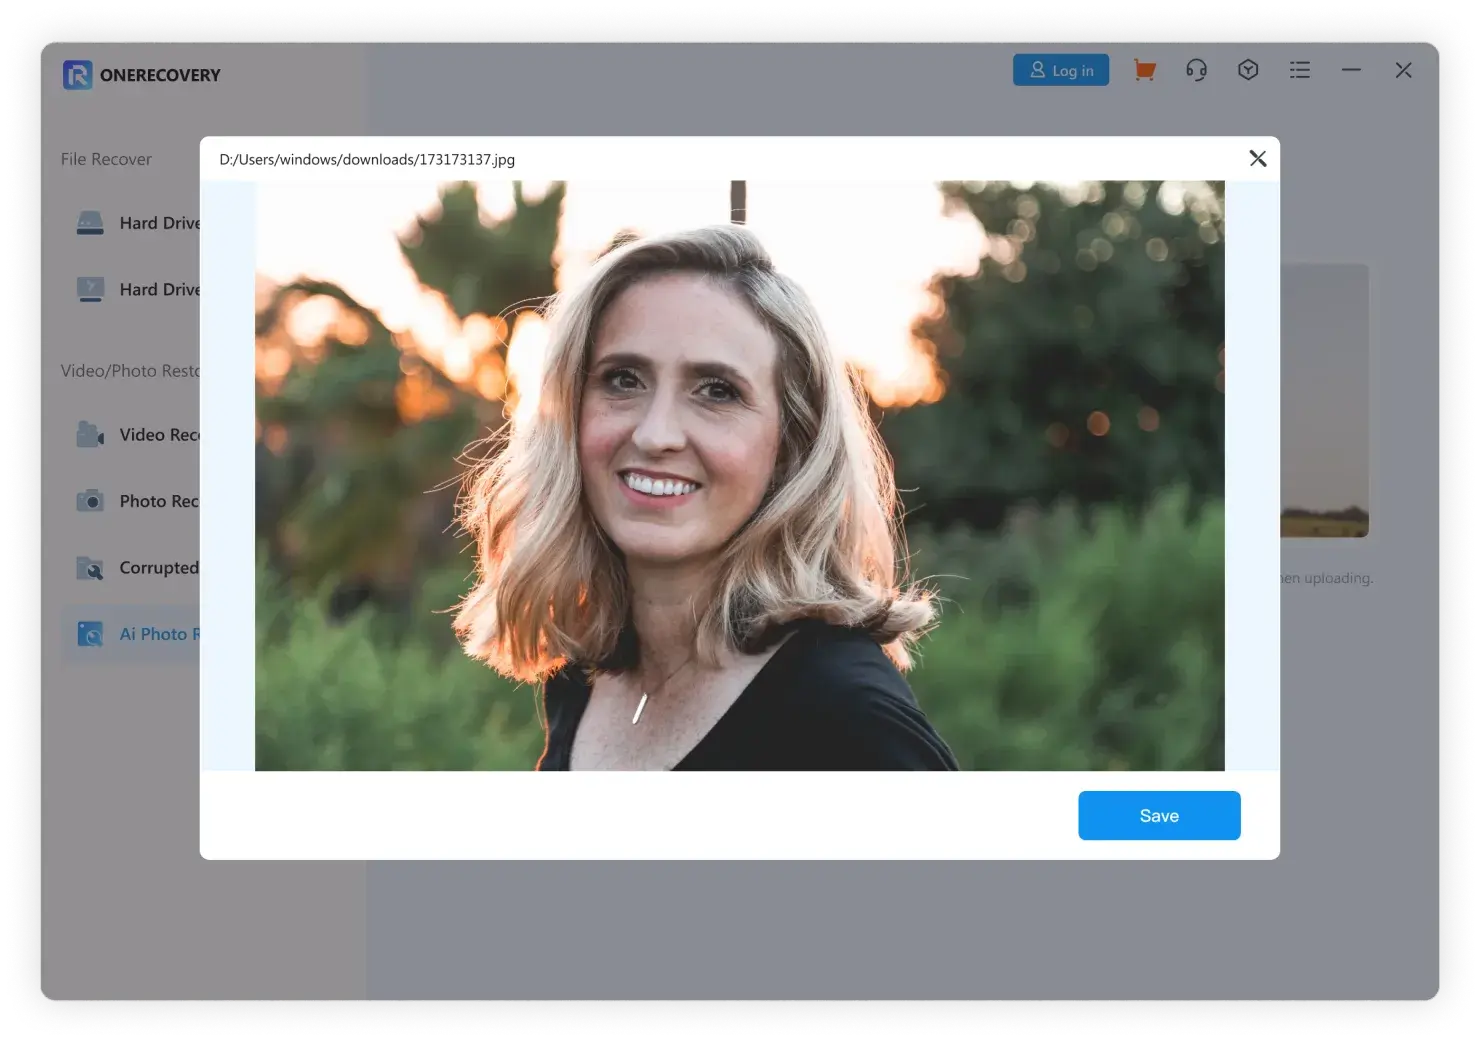
step 4
After the repair process is finished, you can check your photo by previewing or downloading it.
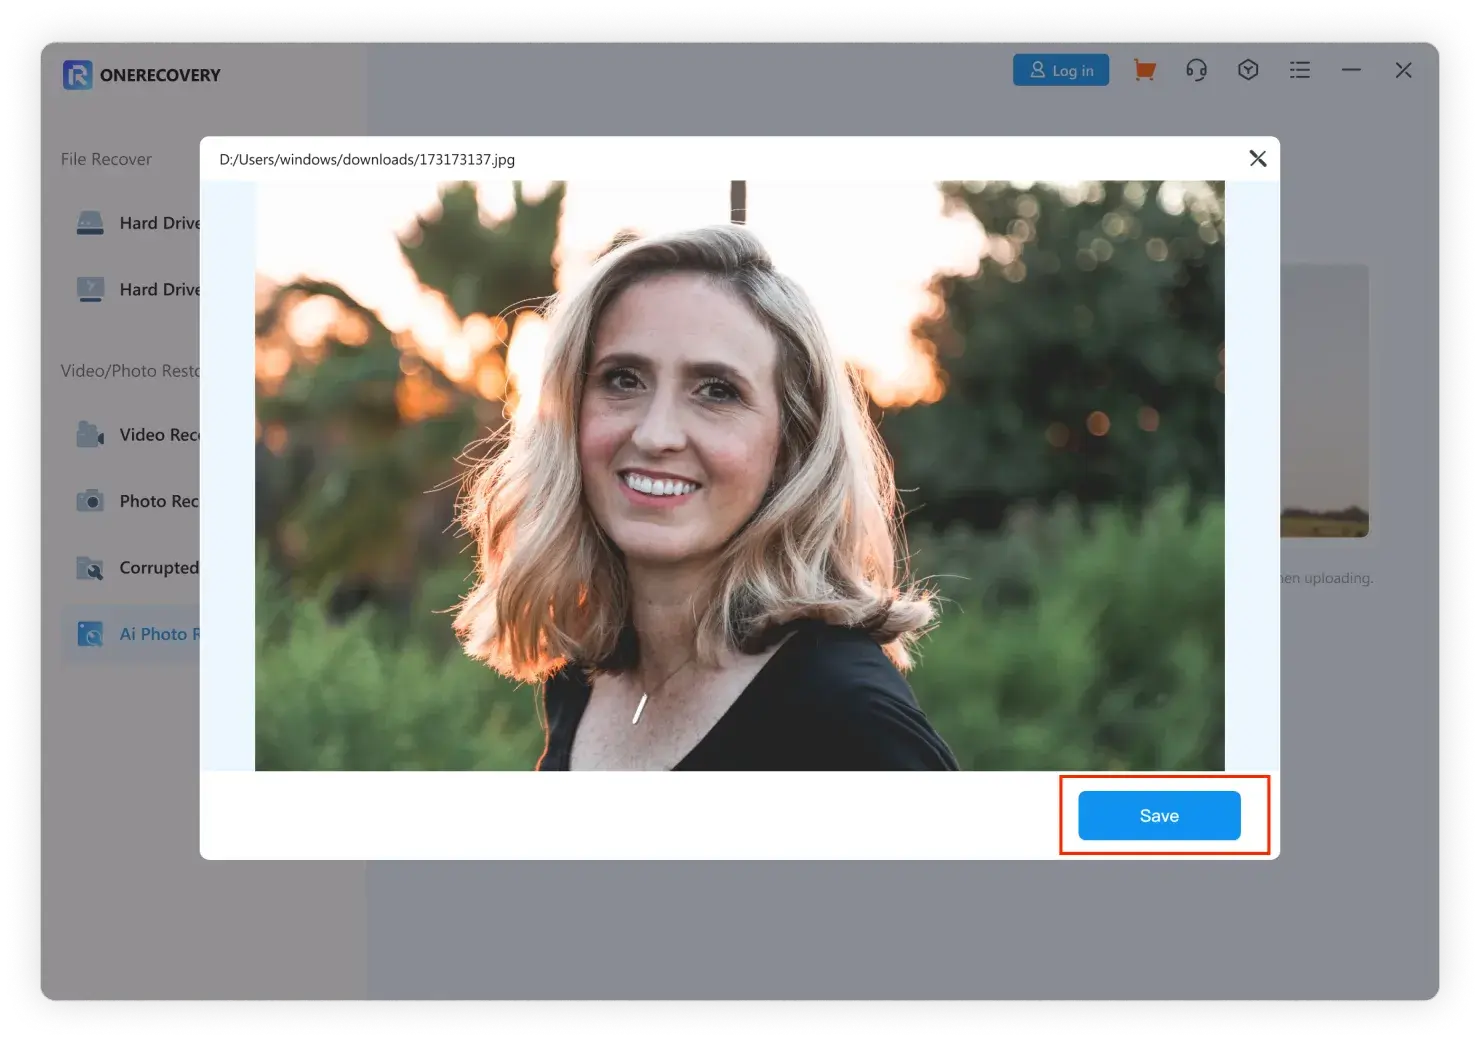
step 5
Click the “Save” button, and choose the location you want to save your repaired photo.
Notes:
The standard image formats like JPEG, JPG, TIF, TIFF, NRW are supported.
This function is in beta and can only recognize one image with human face. If your photos can’t be well repaired, or have other needs like removing the image background, please contact our customer service or technical support teams.
Why ONERECOVERY is Trustworthy?
The ultimate and professional data recovery tool is reliable and 100% safe. With the high-tech data recovery tool, you can retrieve data from all devices or media deemed unrecoverable by others.
1M
Based on superior data recovery technology, ONERECOVERY has accumulated more than one million users in over ten countries around the world. It helps you recover your lost data safely and quickly.
2000+
SSD, HDD, or other 2000+ external storage devices (such as USB flash drive, external hard disk, pen drive, drone, dashcam, camcorder, video/music player) are supported in ONERECOVERY.
1000+
ONERECOVERY supports over 1000 file formats, no matter whether it’s HFS+, APFS, or NTFS, all can be restored by the data recovery expert.
7
ONERECOVERY dedicates to being a user-friendly data recovery tool, it guarantees a 7-day money-back service if you have any problem with it.
24 x 7
We support 24 x 7 tech consult. So if you encounter any problems in the process of data recovery or loss, you can contact our technical support at any time and our technical specialist will answer your data questions one-on-one.
500+
Data loss caused by software crashes, malware attacks, and other 500 scenarios can be successfully recovered with advanced data recovery tech.


 My Account
 Sign Out
 Try It Free