My Account
 Sign Out

We use SD cards in many situations, like when utilizing cameras, game consoles, and phones. As a photo enthusiast or a photographer, we may often find out that the storage space of the SD card is running out or a file is corrupted when we are in the middle of shooting, and we cannot take more pictures and videos. It is urgent to free up more storage space for new memories of life. So, how to delete photos on an SD card? In this article, we will teach you to delete Pictures from SD cards in several ways. No matter if you want to manage your collection of pictures more effectively, or just want to delete useless images, you can find what you need in this article if you are searching for a better way to delete your pictures on your memory card.
What Does Deleting Photos on SD Card Mean?
When we say delete photos on an SD card, it means we erase the images out of this device to free up more storage space. We can just delete them or format them.
Deleting your photos on your SD card does not mean the data is removed immediately. The deletion just frees up the space so that you can write new data in it, and the deleted data is still potentially recoverable until the new data is written over.
Preparations before deleting pictures from SD card
Before deleting pictures from the SD card, we may need to prepare a few things in advance.
| Preparations | Descriptions |
| Backup before deletion | Before deleting the photos of your SD card, it is better to back up important photos for data security in case of any data loss. |
| Prepare a card reader | Prepare an SD card reader in advance to connect to the computer. |
| A Mac or Windows computer | Prepare a computer if you are comfortable using a computer to delete photos on an SD card. |
| A digital camera | A digital camera is needed if you’re more likely to use a portable device or you can’t get other devices. |
How to delete photos on SD card?
Method 1: Delete photos from SD Card by using computers
If you are unsure which photos to delete before looking at them, you can connect your SD card to the computer to check and then decide. But, this method will take too much time if you have massive photos.
On Windows:
- Step 1. Connect your SD card to your computer using an SD card reader. Once your SD card is recognized by your computer, it will be shown as a drive in My computer.
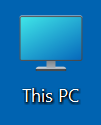
- Step 2. Click on My Computer or This PC. You will see a list of disks on the screen.
- Step 3. Find the SD card’s disk.
- Step 4. Double-click to open the disk and view your images.
- Step 5. Decide which images you want to delete.
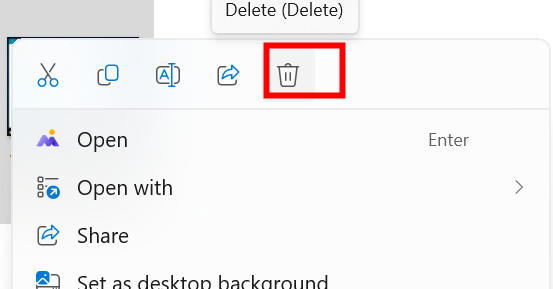
- If you just want to delete a few images, right-click the image. Then click on the Delete tap. Alternatively, you can press Del after selecting each image one by one.
- If you want to delete consecutive images, you can select the first image, hold the Shift key, and then select the end image. Then press Del to delete them all.
- If you want to delete all the images on the SD card, press Ctrl + A keys to select all images and then press Del to delete them.
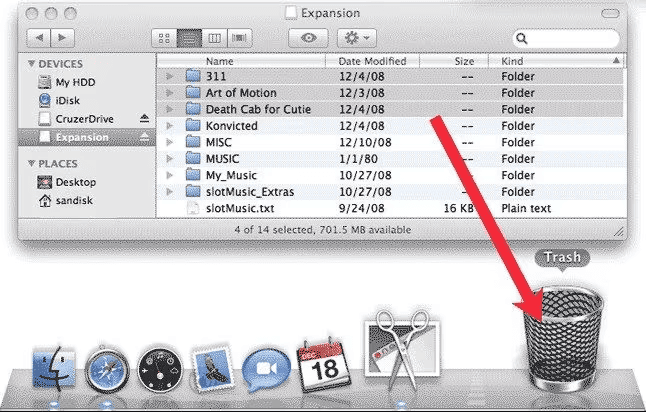
On Mac:
- Step 1. Connect your SD card to your Mac computer using a card reader, and you will see a new disk icon on the desktop.
- Step 2. Open the disk, browse the images, and decide what to delete.
- Step 3. You can either just drag the images to the Trash can or press the Command + Delete keys after selecting these images. Similarly, if you want to delete all contents of your SD card on Mac, use the Command + A keys to select them all and then delete.
Method 2: Delete photos on SD card by using the camera
There is a situation where you don’t have a computer or SD card reader during the shooting, and the urgent need is you want to free up your SD card to take more photos. In this case, you can use a digital camera to delete photos. But please note that deleting on camera is much slower than using a computer, and a time cost is inevitable.
- Step 1. Find and press the Menu button on the camera.
- Step 2. If you want to delete one photo at a time, press the Trash button on the camera after each view of the photo.
- Step 3. If you decide to delete multiple photos from the camera:
Find the Delete option on your camera. In some models of camera, it may be Erase. Press Delete or Erase, choose the Multiple images, select the images you want to delete, and press the trash can button again. To delete all the images, just choose All with this data option.
From the 20th second, delete a single photo. From the 42nd second, delete multiple photos at a time. Here you can watch this video as a reference:
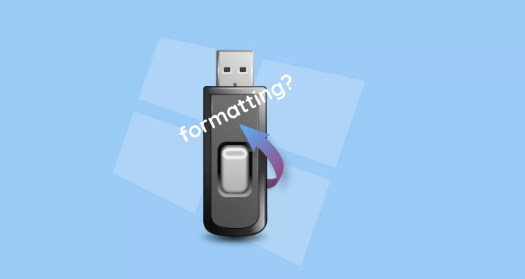
Method 3: Format the SD card
Browse the photos of the SD card and then decide to delete which photos are just taking too much time. In preparation, we suggested that backing up your important photos is better. If you have backed up or moved all your photos to another storage device or you don’t want to keep the photos on an SD card anymore, you can just simply format the whole SD card with ease, which is way quicker.
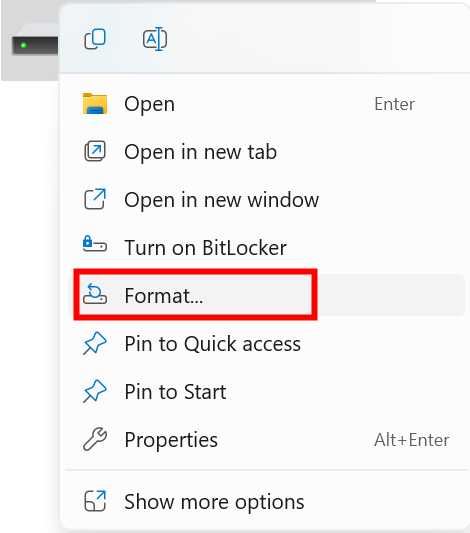
On Windows:
- Step 1. Open My Computer or This PC.
- Step 2. Find the SD card disk, and then right-click it.
- Step 3. Click on the Format option.
- Step 4. Choose the file system and check for the Quick Format option.
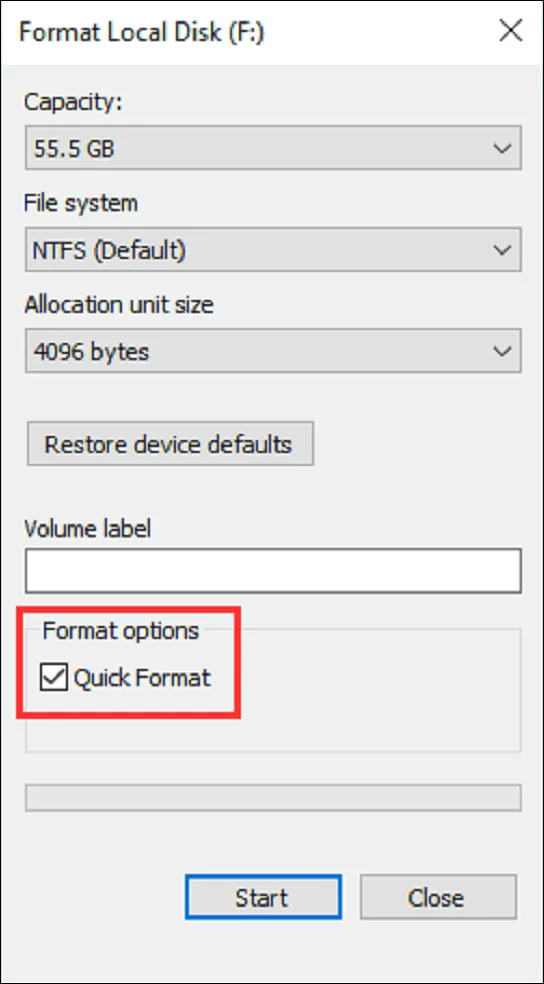
- Step 5. Click on the Start button to begin formatting the SD card.
ON Mac:
- Step 1. After connecting your SD card to your Mac, open Disk Utility from Applications.
- Step 2. In the left panel, find the SD card disk and click on the Erase tab.
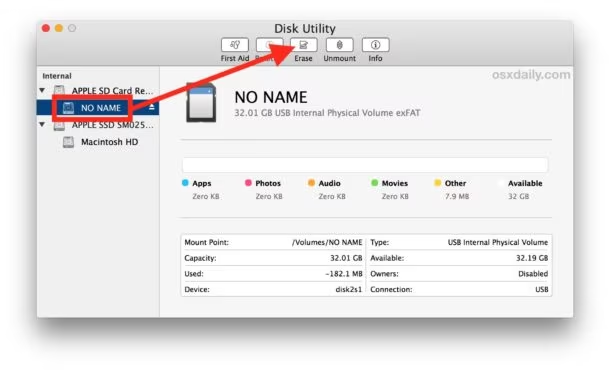
- Step 3. In the pop-up window, give the new name of the card in the Name bar.
- Step 4. In the Format bar, select a format you want to format to.
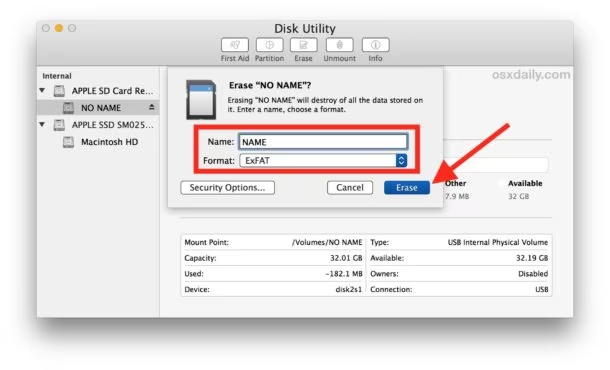
- Step 5. Click on Erase to start the process.
- Step 6. Wait a while, and your SD card will be new again.
From the 25th second, format an SD card on a Windows PC. From the 34th second, format an SD card on a Mac. Video tutorial:
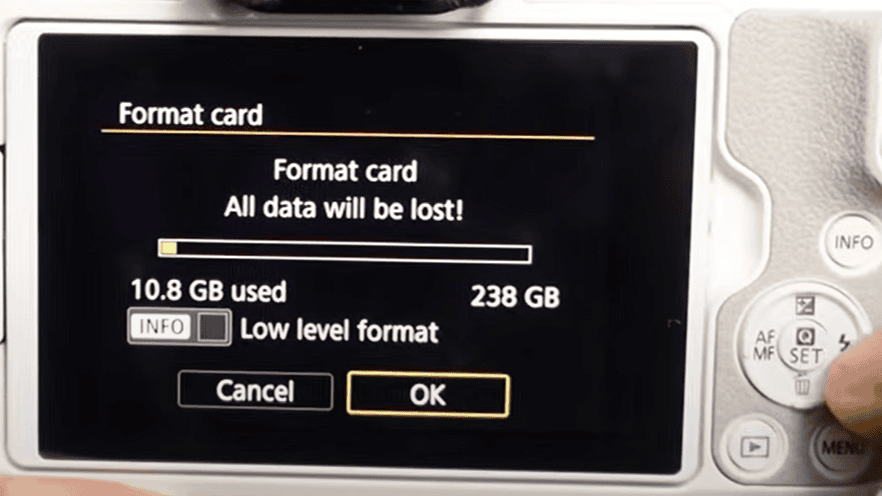
On camera:
- Step 1. Make sure your SD card is inserted into the camera.
- Step 2. Press the Menu button on your camera.
- Step 3. Find Format or Format the card in the configure section, which you can find in all cameras.
- Step 4. Confirm the format of the SD card that is inserted into the camera.
Problems when deleting photos on SD card
Here are some problems you may face during the deletion or formatting of the SD card photos.
| Problems | Potential reason | Solutions |
Photos of the SD card cannot be deleted or the card cannot be formatted on the computer.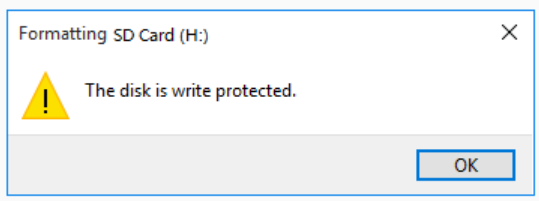 | The SD card is write-protected. | Check the physical write protection switch on your SD card. |
| Accidental data loss for wanted photos | Recover deleted photos from SD cards using third-party sd card recovery software | Recover deleted photos from SD cards using third-party SD card recovery software |
Solution 1: Check the physical write protection switch on your SD card
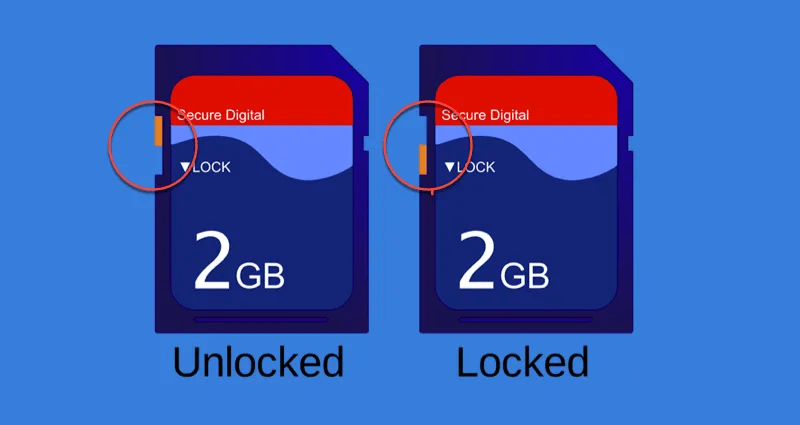
Some SD standard cards have a switch that turns on and turns off the physical write protection. You may sometimes not even notice that you have enabled the feature. So, when you can not delete the photos of the SD card, the first thing is to check the position.
- Step 1: Find the lock switch on your SD card.
- Step 2: Slide the SD card and write the lock to the unlock site.
- Step 3: Connect the write unlocked SD card to the computer to check if the problem is solved.
From the 40th second, remove the physical Write Protection on the SD card. Video tutorial:
Solution 2: Recover deleted photos from SD card using third-party software
If you find that your important photos have been accidentally deleted, professional recovery software can help you recover them.
ONERECOVERY is a practical and easy tool with an intuitive interface and a 95% success rate of data recovery. You can accomplish recovery in several steps: download > launch > scan > recover.
More features of ONERECOVERY:
- Ensure a 95% success rate.
- Various types of SD cards can be covered.
- It is compatible with Windows and Mac.
- Supports file filtering and previewing files before saving (free).
- Quick Scan and Deep Scan are two of the scan modes available.
Related articles:
How to Recover Lost Photos from Formatted SD Card
How to Recover Deleted Files from SD Card on Mac (2023)
Conclusion
For deleting photos of SD cards, you have many options. You can choose a way that meets your situation most. If you don’t have to delete multiple photos, deleting directly from the camera may be convenient. If you have many photos to delete and want to have a quick look at them, using a Windows computer or Mac is a better choice. If you don’t need all of these photos, formatting the card is for sure the best way to free up the space. But keep in mind, no matter what you choose to delete your photos, always backup important data.

I’m Woody, your go-to guide in the realm of data recovery and computer techniques. With a passion for unraveling tech intricacies, I’m here to share insights, tips, and solutions to empower you in the digital landscape. Feel free to ask me when you meet any problems on this fantastic journey!