


 My Account
 Sign Out

When you transfer data through a USB flash drive device, you may encounter a compatibility error occasionally. That is because Windows and Mac use different file systems for USB drives. As for Mac, it uses the HFS+ or APFS systems. In comparison, Windows uses NTFS or FAT32. Considering the compatibility issue, we sometimes need to format USB to NTFS. In this informative guide, learn the step-by-step guide on formatting USB to NTFS on Mac or Windows computer.
What is the NTFS File?
Microsoft first released the proprietary NTFS (NT file system), also known as the New Technology File System, with Windows NT 3.1. Windows uses it to manage, locate, arrange, and store files on both internal and external drives. This file system is compatible with the Windows operating system only.
The NTFS file system, which is the Windows operating system’s default file system, has many advantages, including:
- File compression: By using NTFS, you can enjoy more storage space on your flash drives by compressing your files.
- Journaling: Users can simply maintain and audit the file system log by utilizing the MFT log.
- Access permission: To improve data security, users can set permissions on particular files and folders.
❓Can a USB Flash Drive be Formatted to NTFS?
Yes. You can easily format a USB flash drive to NTFS on Windows. In addition, although MacOS cannot natively format your flash drive, USB stick, external hard drive, or SD card to an NTFS file system, you can still try its Disk Utility and Terminal features to format your USB device. Check how to format a USB flash drive to NTFS in the following section.
How to Format USB Flash Drive to NTFS on Mac
1️⃣Method 1. Format USB Flash Drive to NTFS with Disk Utility
The built-in Disk Utility app on the macOS system can be used to format an external or USB hard drive to NTFS format. Take the actions listed below.
- Step 1. Attach the external hard drive or USB flash drive to your Mac. A MacBook Pro/Air USB adapter may be required.
- Step 2. To open Disk Utility on your Mac, click Spotlight and search for it. The Disk Utility app can also be located and opened by going to Applications > Utilities.
- Step 3. Disk Utility’s left sidebar displays a list of all connected drives. Choose the external hard drive or USB flash drive that you wish to format in NTFS format. Be sure to choose the appropriate drive.
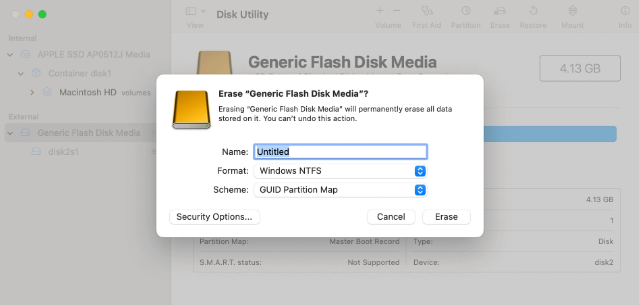
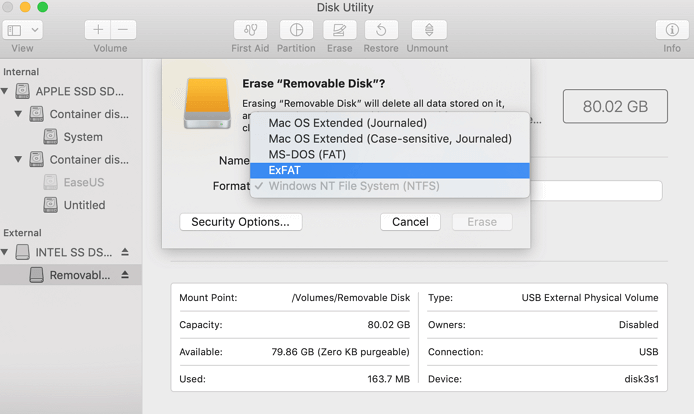
- Step 4. Select the Erase option from Disk Utility’s toolbar. Click the drop-down menu next to Format in the new window, then choose Windows NTFS format. Select the GUID Partition Map layout.
- Step 5. Click the Erase button to begin formatting the USB or external hard drive to NTFS on a Mac after configuring it.
2️⃣Method 2. Format USB to NTFS on Mac Through Terminal
Terminal, the Mac’s default gateway to all command lines, can be used to format a drive to an NTFS file system. It is not as user-friendly as Disk Utility’s graphical interface because to perform tasks like formatting a drive, you must enter the correct commands. Follow these steps to format your USB flash drive to NTFS through Mac Terminal:
- Step 1. Attach the external hard drive or USB flash drive to your Mac. Use Spotlight to open the Terminal application on your Mac.
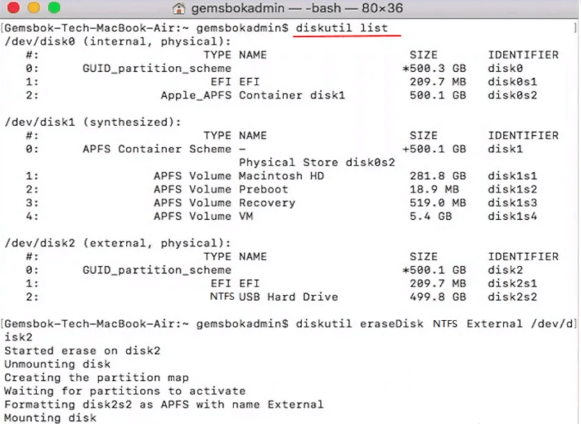
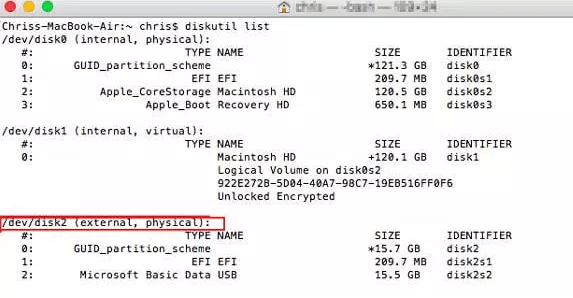
- Step 2. Type the command diskutil list and hit Enter. This will show you all of the drives that have been detected on your Mac. Make a note of the target drive’s identification.
- Step 3. Enter the diskutil eraseDisk NTFS LABEL command in /dev/diskx. Put the new name you want to give the drive in place of “LABEL.” Change “diskx” to the precise disk number, such as disk2. To begin using Terminal to format the USB or HDD to NTFS, press Enter.
How to Format USB Flash Drive to NTFS on Windows
1️⃣Method 1. Format USB to NTFS Via the File Explorer
To format your USB flash drive to NTFS, you can simply use the File Explorer on the Windows system. Just follow the steps here:
- Step 1. Connect your USB flash drive to your computer.
- Step 2. Open File Explorer by clicking the File icon on your desktop.
- Step 3. Click This PC and target your USB drive. Right click it and select the Format option.
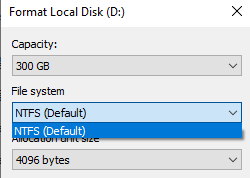
- Step 4. Dropdown the file system options and select NTFS.
- Step 5. Click Start to apply the change.
Apart from the File Explorer, you can also try to use CMD and Disk Management to format your drive to NTFS on the Windows operating system.
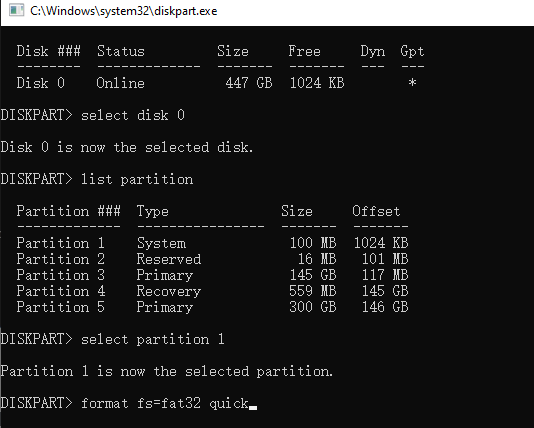
2️⃣Method 2. Format Drive to NTFS on Windows with CMD
Input these commands:
diskpart
list disk
select disk + USB drive number
list partition
select partition + USB drive number
format fs=ntfs quick
exit
exit
3️⃣Method 3. Format USB Flash Drive to NTFS on Windows with Disk Management
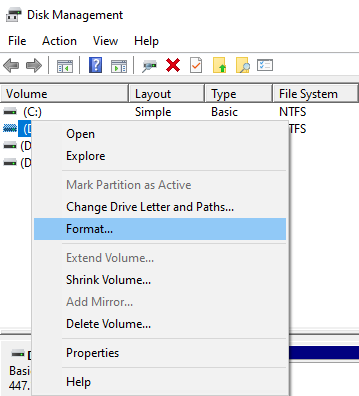
Launch Disk Management. Right-click on the drive and select Format. Choose NTFS as the partition format in the pop-up window.
For more detailed instructions and screenshots, you can refer to the steps in the “How to format USB to FAT32 on Windows” in the following section. You just select NTFS as the final file system, then you can format your drive to NTFS.
❓Can I Format USB to FAT32?
Yes. You are able to format a USB flash drive to FAT32 on both Windows and Mac systems. Check what are the easy solutions to format USB to FAT32 in the following:
How to Format USB to FAT32 on Windows
To format your USB to FAT32 on Windows, there are several solutions. You can utilize File Explorer, Disk Management, and Command to fulfill the USB formatting. See how to do exactly below.
1️⃣Method 1. Format USB to FAT32 with Windows File Explorer
- Step 1. Connect your USB flash drive to your Windows computer.
- Step 2. Open Windows File Explorer by clicking This PC.
- Step 3. Target the USB flash drive, right-click it, and choose Format.
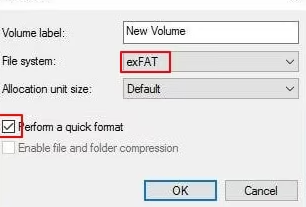
- Step 4. You can choose FAT32 under File system in the “Format” window. To initiate the format procedure, select the “Quick Format” option and click Proceed.

2️⃣Method 2. Format USB to FAT32 with Disk Management
Additionally, Windows has a free disk management tool integrated into it. See how to format a USB drive to FAT32 using the Disk Management tool on Windows below.
- Step 1. Connect the external drive to the Windows PC.
- Step 2. Press Windows + R, type diskmgmt.msc, and hit Enter to launch the Disk Management tool.
- Step 3. Right-click on the drive and select Format. Choose FAT32 as the partition format in the pop-up window.
- Step 4. To start the formatting process, click OK.
3️⃣Method 3. Format USB to FAT32 with CMD Command
Another easy way to format a USB flash drive to FAT32 on Windows is to use Command Prompt. Just follow the instructions here:
Step 1. Press Windows + R, type cmd, and then hit Ctrl + Shift + Enter to launch the administrator version of Command Prompt.
Step 2. Enter the following format commands one by one:
diskpart
list disk
select disk + USB drive number
list partition
select partition + USB drive number
format fs=fat32 quick
exit
exit
How to Format USB to FAT32 on Mac?
Data may be lost if an NTFS HDD, USB drive, or external hard drive is formatted to FAT32 on a Mac. It is crucial that you make a backup of the drive before formatting it. The Mac user can format NTFS to FAT32 using the Terminal Command Line. Let’s examine the procedures.
- Step 1. Attach the drive to your Mac (HDD, USB drive, or external hard drive).
- Step 2. Press “Command + Space” to launch the Terminal Command Line. Spotlight will open as a result. Look up Terminal and click on it.
- Step 3. Type “diskutil list” to examine the USB drive’s disk. All of the drives on your Mac will be listed. The attached drive that you wish to format from NTFS to FAT32 is visible.
- Step 4. Type “sudo diskutil eraseDisk FAT32 MBRFormat /dev/disk2” to convert NTFS to FAT32. The command processing will take some time. During this time, the user can use the command “diskutil list” to see if the formatting has finished.
How to Recover Lost Data from a Formatted USB Drive
After the disk formatting, the original data in your USB drive will be lost. What if your format for all data without backing it up? Don’t worry. You can use a professionally formatted USB drive recovery tool, like ONERECOVERY, to retrieve those lost files. It is sophisticated enough to retrieve lost, deleted, and formatted files from a USB flash drive. Within simple steps, you can find those formatted files and recover them effortlessly.
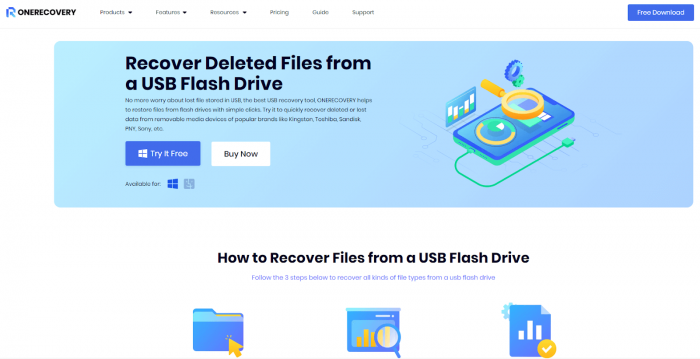
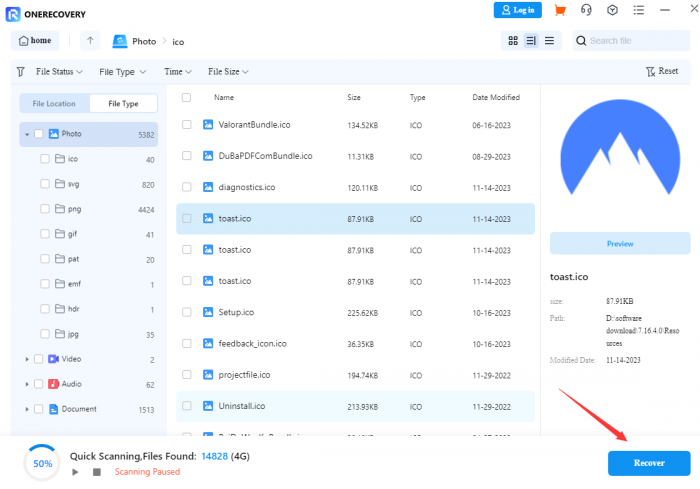
👉How to recover lost data from a formatted USB drive with ONERECOVERY
- Step 1. Download and install ONERECOVERY software on your computer, then open it.
- Step 2. Navigate to Hard Drives and Locations, then select your USB flash drive and scan it.
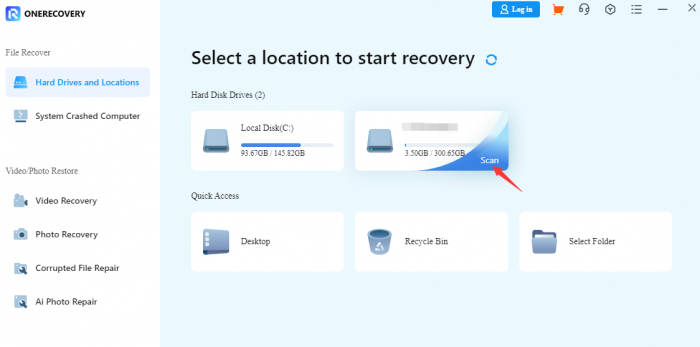
- Step 3. Pick the file you want to recover and preview it. Then press the Recover button to restore it to your local folder.
Bonus Tips: How to Reformat NTFS Drive to Other File System
If the NTFS is not the best choice in your mind, you can reformat it to other file systems. Check how to do that separately on Windows and Mac systems.
🖥️On Windows:
Try to use File Explore, Disk Management, or CMD to format the NTFS drive to another file system. Take the File Explore as an example, follow these steps:
- Step 1. Connect your USB drive and open File Explorer.
- Step 2. Right-click your drive and select Format.
- Step 3. Select other file systems under File System in the “Format” window. Then save your change.
💻On Mac:
To format NTFS to other file systems, like exFAT on Mac, follow these steps:
- Step 1. Connect USB to Mac. Then press Command + Space to launch Disk Utility.
- Step 2. Select your USB drive and click on Erase on the top menu bar.
- Step 3. Rename the drive and select the exFAT as the new file system format. Then hit Erase again.
FAQs on NTFS USB Format
Why Can’t I Write to NTFS USB on Mac?
The macOS fails to write to the NTFS drive. You can format the drive to exFAT or other compatible file system first, then open it on your Mac computer.
Can I Change NTFS to exFAT without Formatting on Mac?
No. To convert NTFS to exFAT, there needs a drive formatting process. You can back up crucial data in the first place and then format NTFS to exFAT.
Which Format is Better for USB Drive on Mac?
The exFAT file system is widely used on the Mac system. It is also a great option for cross-compatible roaming storage, for it is compatible with Windows, Mac, and Linux.
The Bottom Line
In this guide, we explained how to format a USB flash drive to NTFS or FAT32 on Windows and Mac. To ensure your computer can read your USB flash drive successfully, you need to format it to a compatible file system. Most importantly, remember to back up your data before formatting your disk. Or you can use ONERECOVERY to retrieve formatted data from a USB flash drive.
I’m a tech enthusiast specializing in computer repair and data processing. Outside of fixing gadgets, I love penning articles on computer science. Currently, I’m diving deep into AI and data recovery tech. I’m all about staying on top of the latest in these fields. Excited to bring my passion and skills to the table and collaborate on cool projects!

