My Account
 Sign Out

Hiding files on MacBook Air 2020 desktop. I honestly don’t know if I’m doing it right but I’ve tried continuously to hide my files. The Terminal doesn’t work and whenever I go on files click on the folder and press Shift+CMD+(.) nothing happens. Is there another way to hide it or am I doing it wrong?—–A question from the Apple Community:
Do you face the same issue of how to make files hidden on Mac? People value more and more of their data and files on the computer nowadays. They may hide files on a Mac to prevent accidental deletion of files or to keep the files and folders out of privacy. In this article, we will teach you several easy ways to hide a folder or file on Macs.
How to Hide Files and Folders on Mac?
Learning how to keep personal files hidden on a Mac is a great way to ensure your data privacy and security. Here are some reliable methods to hide files on a Mac.
| Solutions | Step-by-step guides |
| Make files hidden on Mac with Shortcuts | Step 1. Select the folder or file you want to hide…Full steps |
| Hide files in Macbook with Terminal | Step 1. Launch Terminal on Mac. You can use Spotlight search or click from the Launchpad… Full steps |
| Hide folder in Macbook using FileVault | Step 1. From the Apple menu, go to the System Preferences… Full steps |
| Hide Files on Mac with a user account | Step 1. Go to the System settings… Full steps |
| Use third-party apps to hide files and folders on Mac | Download one app to use |
Using shortcuts to copy and paste Mac files to the external hard drive is fast and easy. Here are the steps.
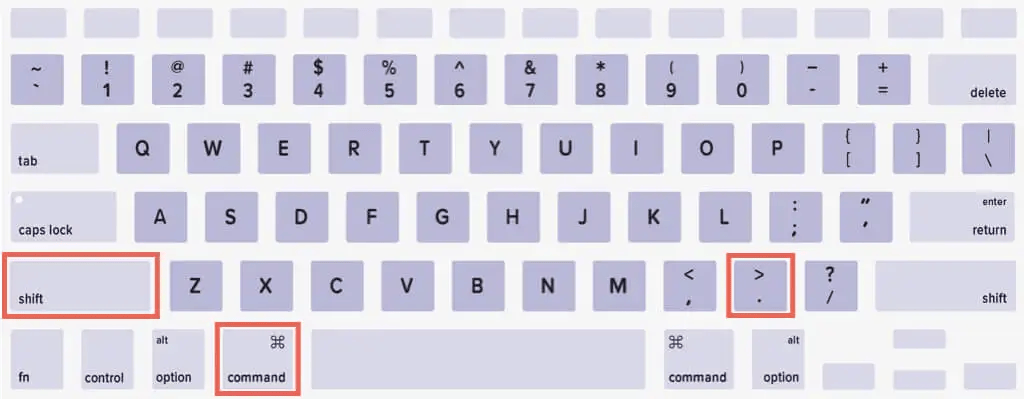
- Step 1. Select the files or folders you want to hide.
- Step 2. Press down the key combination of Command + Shift + Period “.” simultaneously, and your Mac fields will be hidden.
Pros: Easy way to perform.
Cons:
- It is only available above the macOS 10.12 version (macOS Ventura).
- Somebody else can use these shortcuts to unhide your files on Mac.
- You need to repeat shortcuts every single time when hiding files or folders.
❗Note: The hidden file or folder shows as half transparent. You can access, delete, and rename them as normal.
Method 2: How to hide files in Macbook with Terminal
Terminal is an advanced app for Mac users to deal with multiple tasks on Mac. You use command lines to instruct the operating system to run the related process. Here are the steps to hide files and folders on Mac using Terminal.
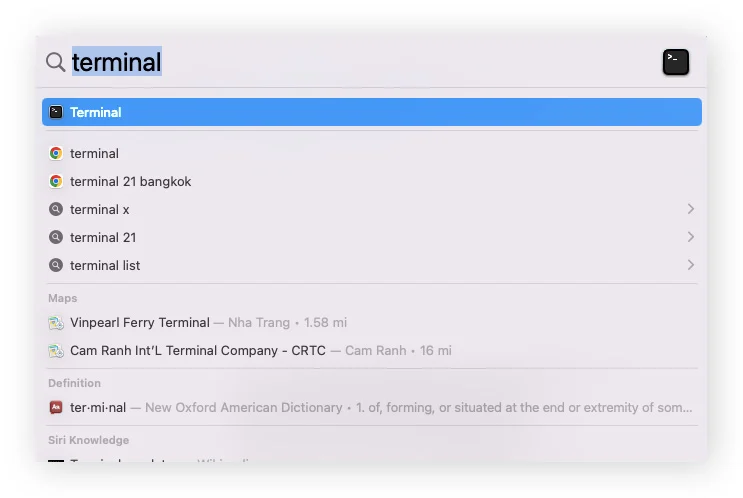
- Step 1. Launch Terminal on Mac. You can use Spotlight search or click from the Launchpad.
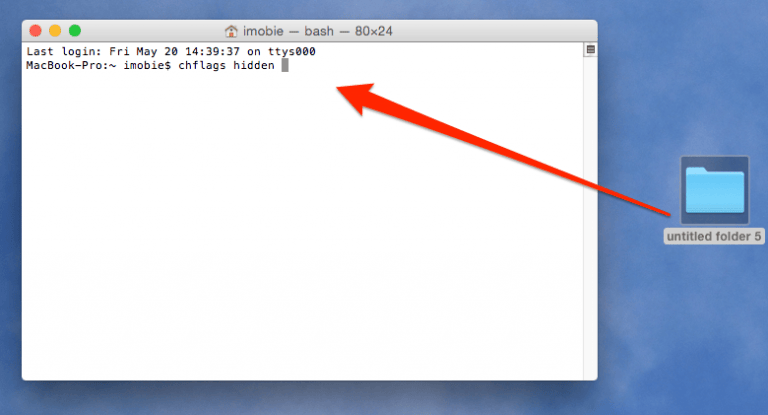
- Step 2. In the command window, enter the following words: chflags hidden and leave a space.
- Step 3. Then, locate the file or the folder you want to hide. Drag and drop the file or folder to the Terminal window.
- Step 4. Hit Return. You will see the file or folder disappear.
Method 3: Macbook hide folder using FileVault
FileVault on Mac is a powerful tool that keeps your data safe. It uses passwords to files and folders to hide them for data privacy. If you have stored any sensitive data on the computer, like financial data, using FileVault is the right choice. Here are steps to hide folders and files using FileVault.
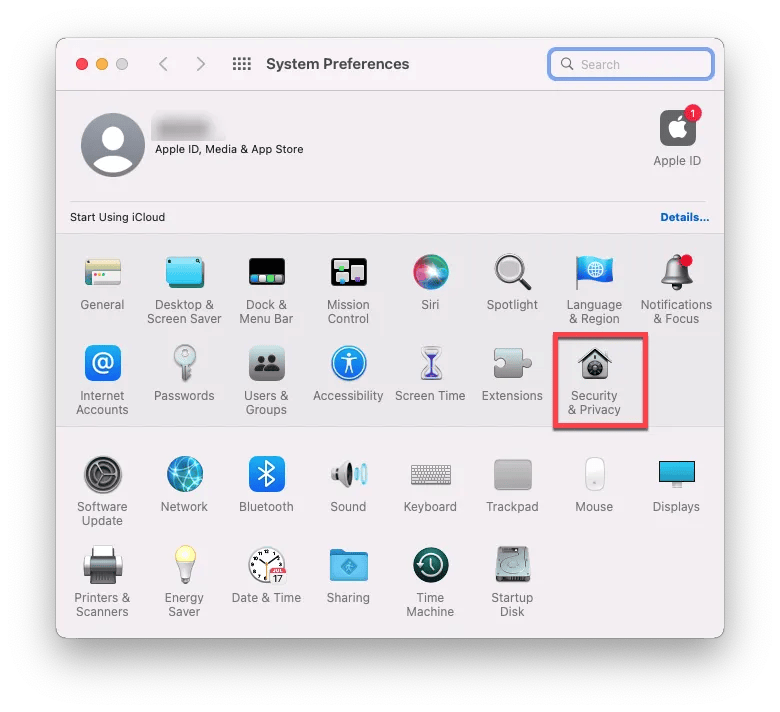
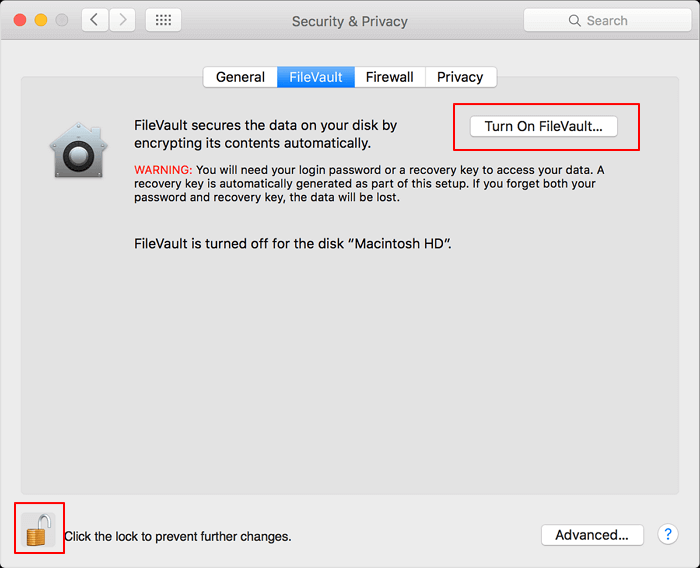
- Step 1. From the Apple menu, go to the System Preferences.
- Step 2. Click on Security & Privacy.
- Step 3. Click on FileVault at the top bar’s second option.
- Step 4. Click the padlock icon at the bottom left with words. Click the lock to make changes.
- Step 5. Log in and click the Turn on FileVault button.
- Step 6. You will be asked to choose a recovery method between the iCloud option and generating a local recovery key. Please, please remember the password you set in this section.
- Step 7. Click on Continue to start.
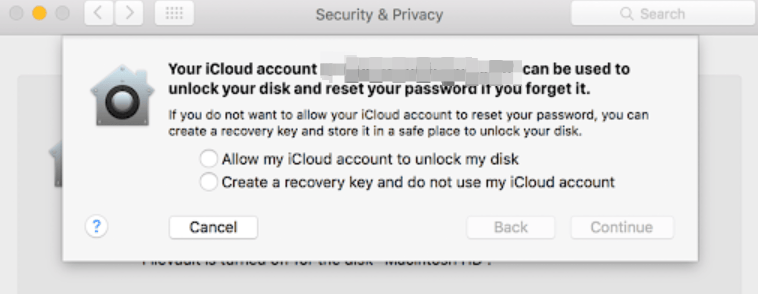
- Step 8. It will take some time for FileVault to hide the files.
Method 4: Hide files on a Mac with a user account
This method is similar to creating a guest account for the computer. Mac allows users to create and use multiple accounts in Mac. You can keep your data in a new account. It does not hide the files and folders on Mac. It’s just using a different bottle to keep the water, and you can show others the bottle you want to share.
To create a new account, here are the steps.
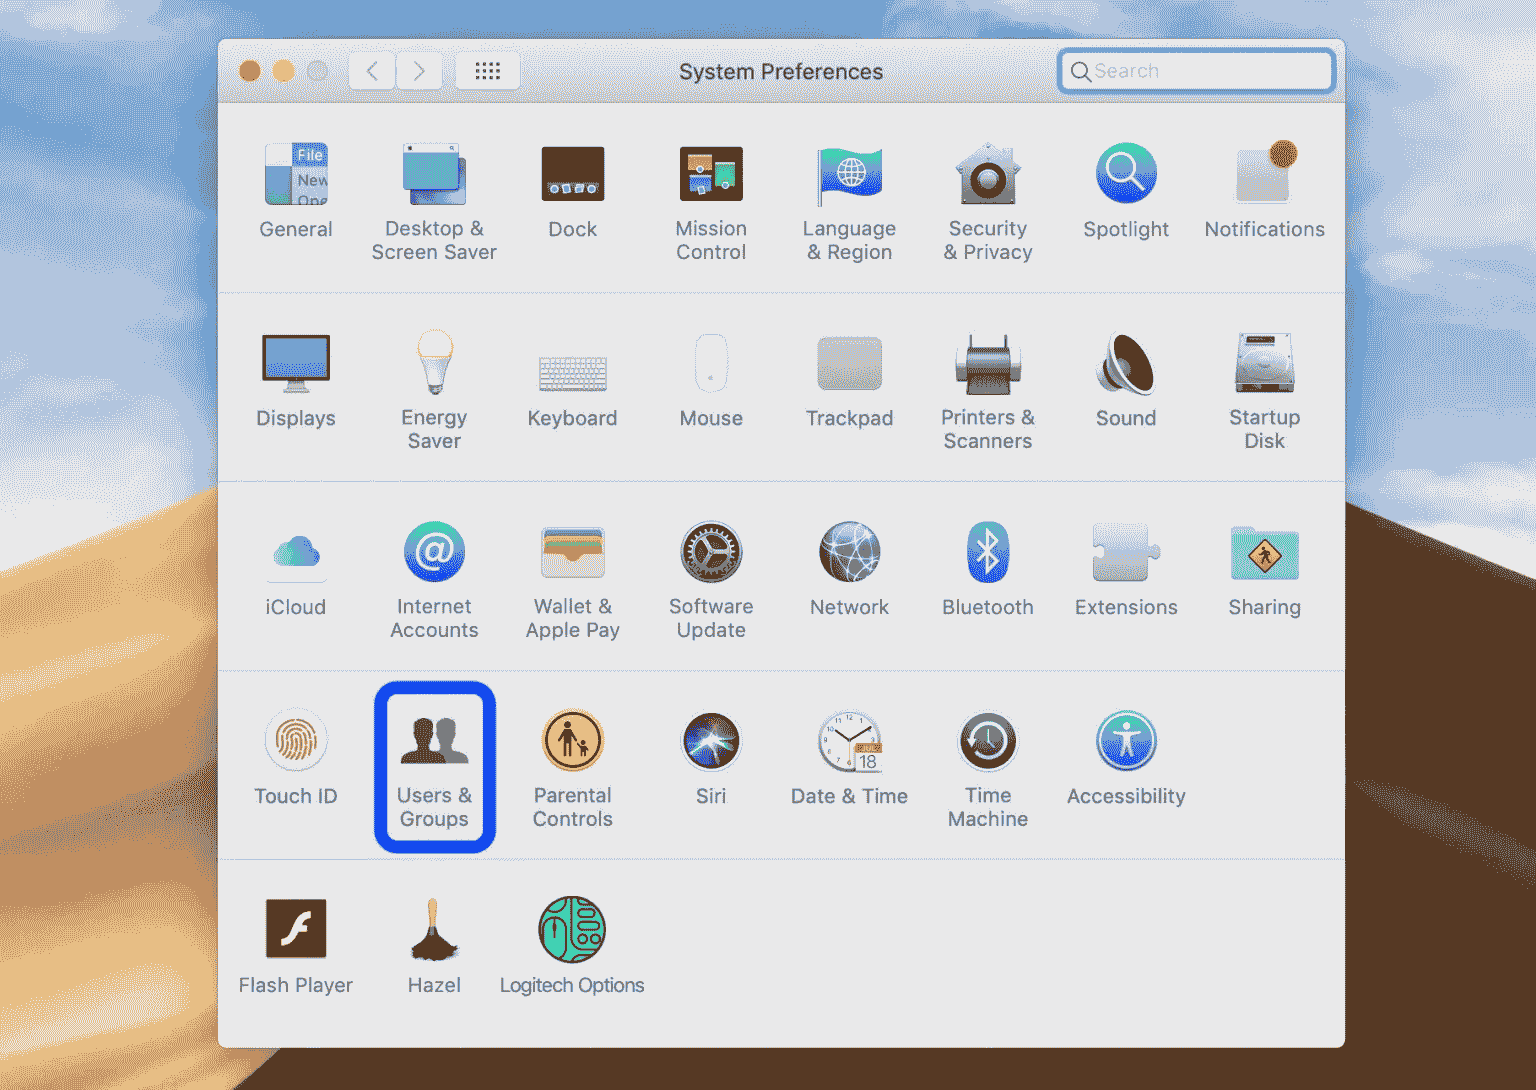
- Step 1. Go to the System settings.
- Step 2. Click on Users & Groups > Click Add Account.
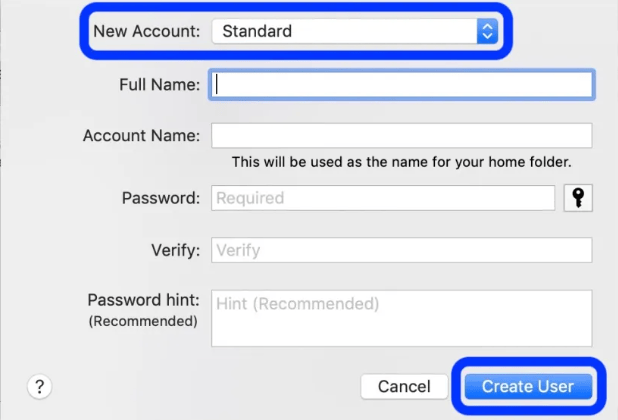
- Step 3. Enter your password to unlock the Mac.
- Step 4. Give the name of your new account and the following prompts.
- Step 5. Click on the Create User tap.
- Step 6. Now, you can store your files as hiding in the old account and use the new account to operate from switching between the different accounts.
Method 5: Use third-party apps to hide files and folders on Mac
Alternatively, you can use some third-party apps to hide your files on Mac. It is a more comfortable way to hide the file without using complicated commands or requiring more steps to create accounts. Plenty of excellent products on the market. You just need to download an app, and your files or folders will be hidden. It will minimize your time in hiding these files and simplify the steps. Here are some great apps for hiding files on Mac.
| Brand | Features | Pricing | User experience |
| Parallels Toolbox | 1. 56 utilities on Mac 48 on Windows 2. Available for both Mac and Windows 3. Support for cleaning and managing disk space 4. Intuitive interface | $24.99 per year | It offers a 7-day free trial. The hiding of files on Mac is efficient, but most average users don’t need so many utilities. |
| Forklift | 1. Multiple tools 2. Remote Connections of files 3. Dropbox Support 4. Syncing for favorites through iCloud. | Per year plan:Single user $19.95 Family $29.95S Small Business $69.95 | It has a dual-panel interface and is easy to use, considered an alternative to Finder. You can hide and unhide the files in Forklift 4. |
| F-Vault | 1. All files are saved locally, so there’s no cloud storage limitation 2. Password and Touch ID Support. 3. Easy to set and recover 4. Can hide all types of files | Free download. In-App Purchases 7 Days Free Trial $9.99 VIP for lifetime $19.99 Monthly auto-renew VIP $3.99 Yearly auto-renew VIP $9.99 | It is easy to use. Dragging and dropping the files will hide them in an encrypted vault. |
| Altomac | 1. Customization for files: files can be marked that appear as deleted or be hidden completely. | Pro version Single user licence $29.95 Organisation user licence $49.95 Upgrade to latest version needs to $19.95 | The hiding feature for Mac files is free to use. If files are made invisible and not moving completely, there is a change that programmers, experienced users and some apps can make them visible. |
Bonus tips: How to unhide Files and Folders on Mac?
Ok, we have learned how to hide the files on Mac. But what if there is data hidden already because of multiple reasons like computer crashes, wrong computer settings, system bugs, errors, or you just forget you have hidden the files? How do we unhide or recover these files? There are many methods to recover these hidden files or folders on Mac.
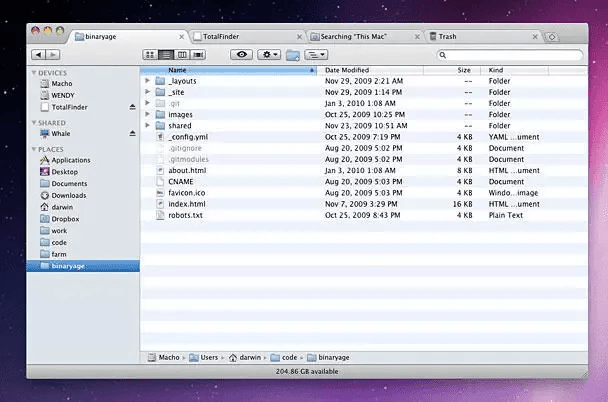
Method 1: Unhide your files using Finder
Finder is the home base for your Mac computer. You can use Finder to access almost everything on your Mac, including unhiding them. As we have taught you how to hide files by using shortcuts, this is the way to use the same shortcuts to unhide these files but in Finder.
- Step 1. Open Finder on your Mac.
- Step 2. Press the Command + Shift + Period (.) keys at the same time, and it will unhide all the files and folders.
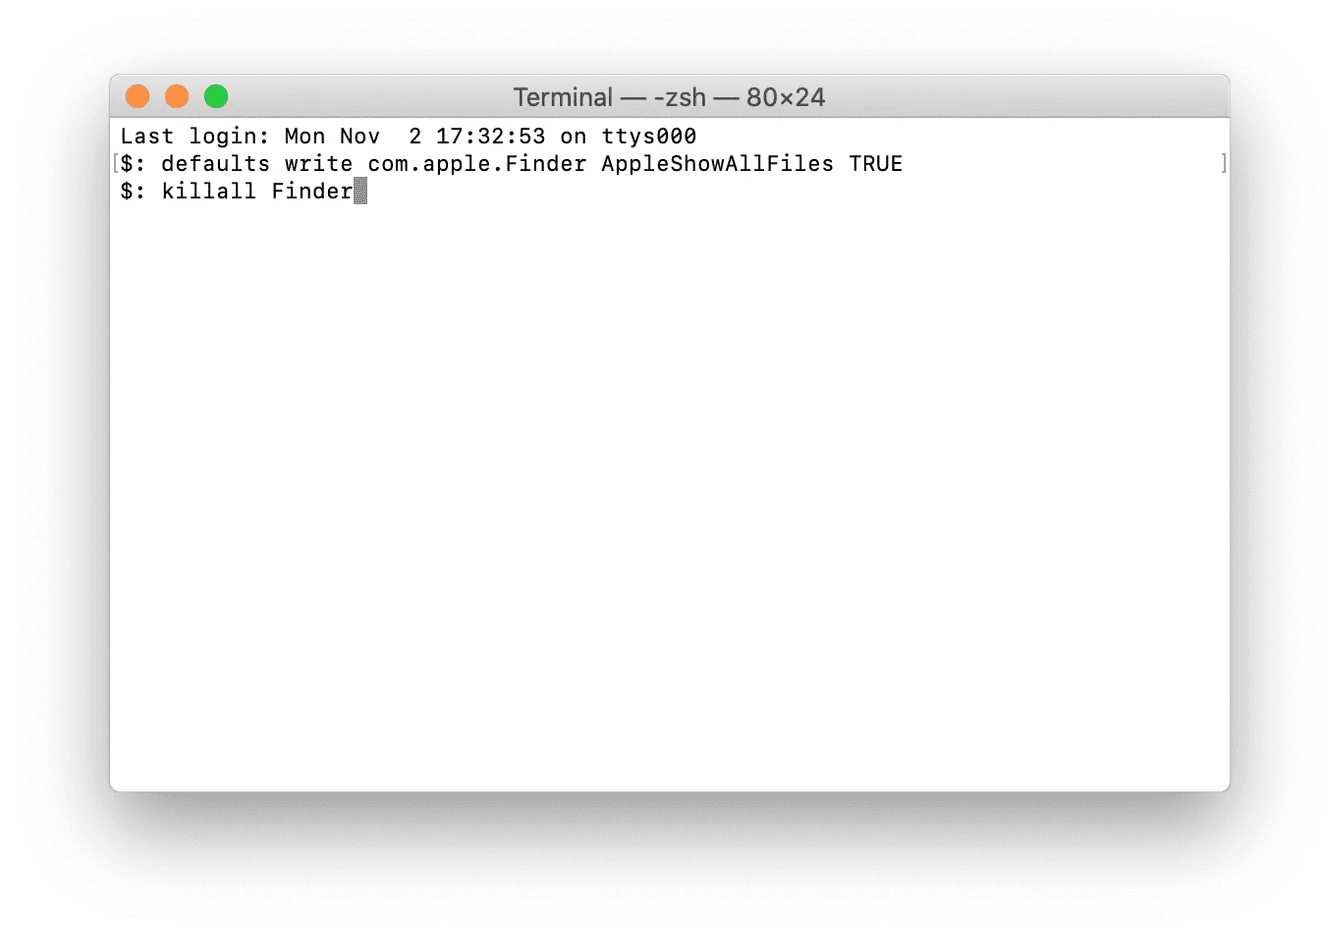
If the easy shortcuts do not work, use Terminal to unhide the files. Just like how you hide your files using Terminal, we unhide these files with Terminal but using different commands.
- Step 1. Open Terminal.
- Step 2. Enter the command: defaults write com.apple.Finder AppleShowAllFiles TRUE. This command instructs Terminal to reveal the hidden files on your Mac computer > Hit Enter.
- Step 3. Input $ killall > Hit Enter again. This is to apply the changes and restart Finder.
- Step 4. After all these processes are done, you may see your files on Mac.
If you failed to unhide your files on your Mac and cannot find them anyway, there is a possibility that your files are missing due to the data loss.
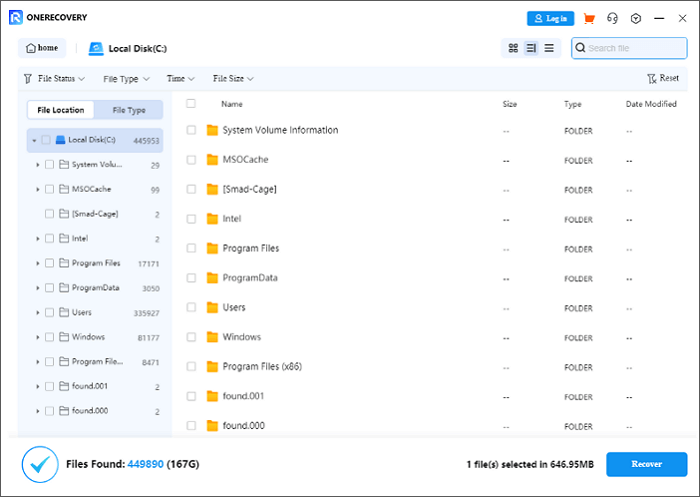
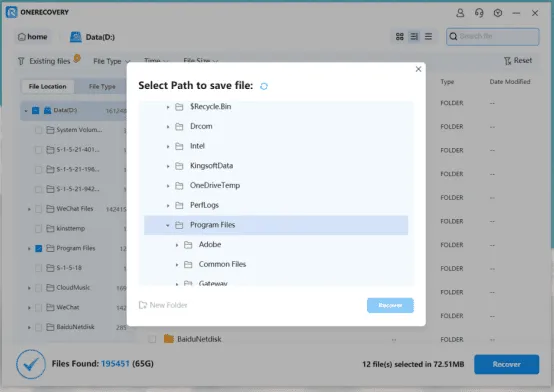
You can consider utilizing data recovery software, for example, ONERECOVERY, which is a practical and professional software to get your valuable files right back within three steps.

- Step 1. Download and install ONERECOVERY.
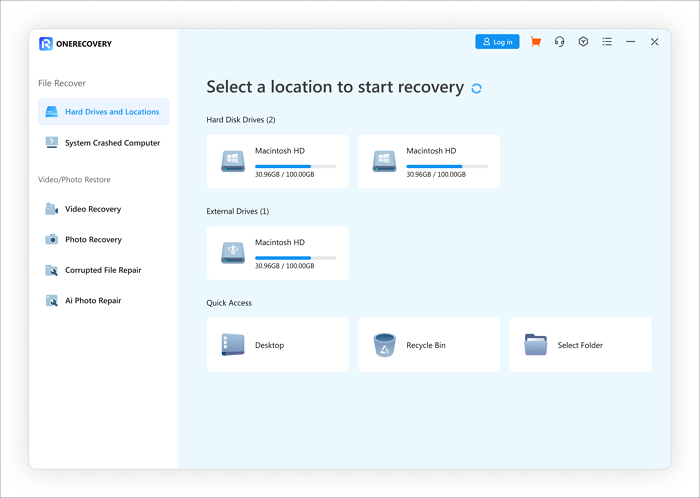
- Step 2. Scan your Mac computer. The program will run both a deep scan and a quick scan to find your files.
- Step 3. Preview the results and choose what to recover. ONERECOVERY will generate many thumbnails for you to preview, which is good for you to decide what should recover.
- Step 4. Save the target files to new locations. After deciding what you want to recover, pick a location to restore these files.
Conclusion
Data security is essential for every computer user. If you have long struggled with how to hide files and folders on a Mac, these five methods above will be helpful to keep your sensitive data from being prying. And how to unhide or recover your files, I think you will learn them well too. If you have any further problems, please feel free to let us know.

I’m Woody, your go-to guide in the realm of data recovery and computer techniques. With a passion for unraveling tech intricacies, I’m here to share insights, tips, and solutions to empower you in the digital landscape. Feel free to ask me when you meet any problems on this fantastic journey!