


 My Account
 Sign Out

Recycle Bin is one of the most commonly used programs for Windows users, if you use a Windows PC or laptop, I guess you must be familiar with it.
However, due to some reasons, Some people may want to hide the recycle bin icon from the desktop. If you are one of them, this blog is for you. We will offer you the methods to hide the Recycle Bin icon from your desktop, as well as provide you the tutorials on emptying and accessing the Recycle Bin.
You can also get the solution if you delete the files in the Recycle Bin by mistake. Let’s get into the details to learn more about it!
How to Remove Recycle Bin from Desktop on Windows [4 Methods]
Windows Recycle Bin allows you to conveniently and temporarily store and recover deleted data, whatever files or folders. However, if you prefer a more concise desktop, you can easily hide it by figure the desktop icon settings.
There are 4 solutions on how to remove Trash Bin from desktop. Choose the most suitable one according to your condition.
Method 1. Unpin Recycle Bin
Unpinning the Recycle Bin may be an intuitive way to remove it from the Start menu. Simply follow the procedure below to complete the process.

How to remove the Recycle Bin from desktop by unpinning it:
Step 1. Open the Start menu and then right-click the Recycle Bin icon.
Step 2. Choose the option “Unpin from Start” from the popup list.
Step 3. Then, the icon of Recycle Bin will be unpinned and removed from your desktop.
Method 2. Hide Recycle Bin in Desktop Icon Settings
Hiding the Recycle Bin icon in Icon Settings is also a commonly used method. You need to change some settings on the Windows PC. Simply follow the procedure below to complete the process.
Steps to remove Recycling Bin from desktop in icon settings:
Step 1. First, you need to click on the “Start” button in the bottom left corner of your desktop. Then, choose the “Settings” option.
Step 2. There is a “Themes” option in the “Personalization” part, click on it.
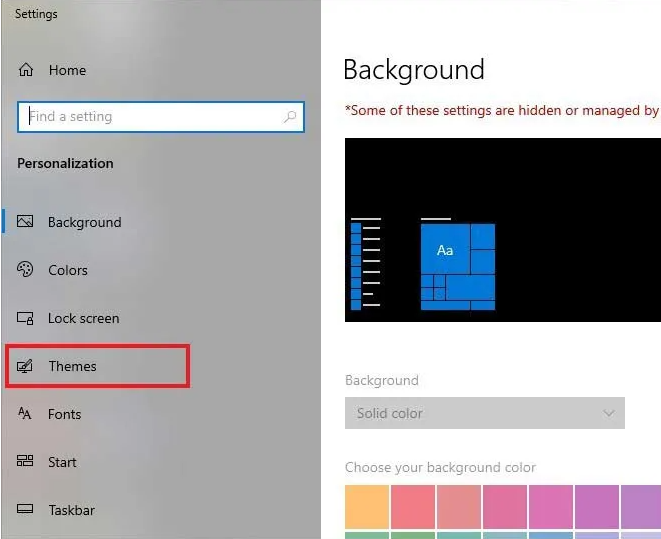
Step 3. On your right side, there is a “Desktop icon settings” option, click on it to continue.

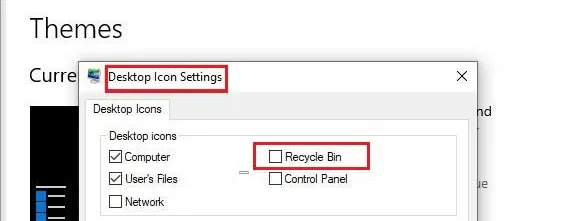
Step 4. When the Desktop Icon Settings window pops up, you need to unselect the Recycle Bin checkbox. Then, choose “OK” to confirm your settings.
Method 3. Hide Recycle Bin in File Explorer
Furthermore, if you want to hide the Recycle Bin from the File Explorer, you can use these steps as a reference.
How to get rid of Recycle Bin on desktop by hiding it in File Explorer:
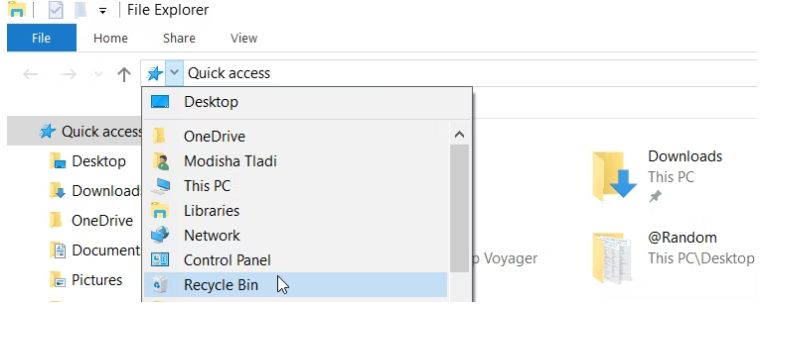
Step 1. Open the File Explorer on your Windows PC. You can do that by pressing “Win + E” to open the File Explorer.
Step 2. Navigate to the Recycle Bin using the Quick Access.
Step 3. Then, you need to choose the icon’s context menu and then choose “Unpin from Quick Access”.
Step 4. The Recycle Bin will be hidden from the File Explorer.
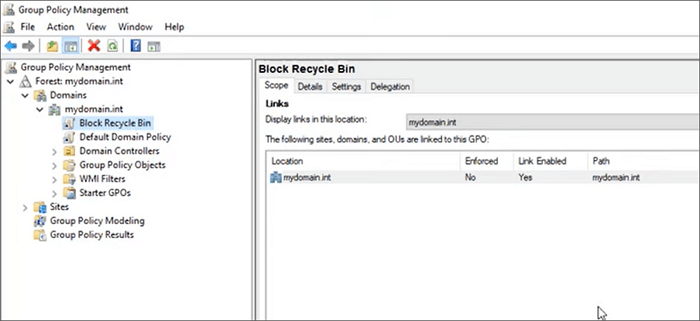
Method 4. Hide Recycle Bin in the Group Policy
The last method we want to cover is the use of Group Policy, which follows the steps below.
How to hide recycling bin in the Group Policy:
Step 1. Begin by clicking the Start on the bottom-left-hand corner of your Desktop.
Step 2. Click Run on the Start menu.
Step 3. When the white box appears, enter “gpedit.msc” into it and confirm it.
Step 4. Then welcome to the Group Policy Window! Click the “+” sign to expand User Configuration. Under User Configuration expand Administrative Templates. Next, under Administrative Templates, click Desktop.
Step 5. On the right side of the Group Policy window, the Desktop submenu will appear. Now, you need to right-click the desktop and choose the option “Remove Recycle Bin”. Then left-click Properties and select the “Properties” button.
Step 6. Now, a new window will open. And it will ask you if you want to Remove the Recycle Bin icon from desktop properties. Choose “Enabled” > “OK” to complete.
Warm tip: If you cannot complete steps 5 and 6 (they are gray), please confirm that you are logged in as the local administrator of this computer, if not, you will not be able to make these changes.
| Note: If your Recycle Bin still appears on the desktop after trying these methods, left-click on an empty space on the screen and press F5 to refresh the desktop, and the recycle bin should be gone. |
How to Access Recycle Bin After Hiding the Icon
Most users will not be able to find the Recycle Bin location when newer versions of Windows are updated. Instead, unlike other operating systems, Windows 10 does not display the Recycle Bin on the desktop by default. Here, we provide some methods to help you access the Recycle Bin on Windows 10.
Method 1. Using File Explorer
Step 1. Log in to Windows.
Step 2. Open File Explorer from the Start Menu. You can do that by pressing “Win + E” to open the File Explorer.
Step 3. In the File Explorer window, click the right-pointing arrow on the far left of the address bar. You should now have a downward-pointing arrow with some menu options.
Step 4. Select Recycle Bin in the Address Bar, and press the Enter button.
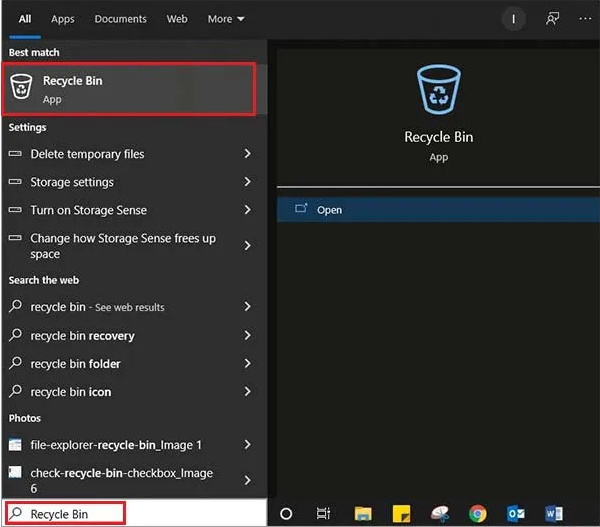
Method 2. Using the Cortana Search Bar
Step 1. Log in to Windows.
Step 2. Click on the Cortana Search Bar on your Windows 10.
Step 3. Type Recycle Bin and then press Enter. And the Recycle Bin Folder will show on top of the search results.
Method 3. Using Run Prompt
Step 1. Log in to Windows.
Step 2. Press the Win + R keys at the same time to open the Run command.
Step 3. Enter the “shell:RecycleBinFolder ” after opening the Run prompt.
Step 4. Press Enter.
How to Show the Hidden Recycle Bin on Windows
This part will guide you through showing the hidden Recycle Bin on your desktop, whether you hide the icon by yourself or it disappears due to some unexpected system error or system update.
Method 1. Recycle Bin in Desktop Icon Settings
Step 1. Right-click anywhere on the Desktop of your Windows PC. It’s also possible to press the Win on your keyboard and then choose the “Settings” option from the popup menu.
Step 2. In the “Personalization” part, there is a “Theme” option. Click on it.
Step 3. Then, choose the “Desktop Icon Settings” option on your right side.
Step 4. Then, you need to tick the checkbox for “Recycle Bin” on the Icon Settings window.
Step 5. Then, select “OK” to complete the process.
Method 2. Disable the Tablet Mode on Windows 10
Tablet mode makes Windows 10 more touch-friendly when using your device as a tablet. When this mode is enabled, the app will open in full screen. This ultimately reduces desktop icons and taskbars. In this case, you may find it difficult to access the Recycle Bin. To disable Tablet mode, follow these steps:
Step 1. Click on the Notification icon (next to the date and time) on the bottom right of the Desktop.
Step 2. Click on the Tablet Mode option to turn it off (the icon will turn faded grey means the mode
Step 3. Your Recycle Bin icon will appear on the desktop.
There is another way to access the Tablet Mode, see the steps below for details.
Step 1. Select the “Windows + I” keys to automatically open settings.
Step 2. Go to “System”.
Step 3. Choose “Don’t switch to Tablet mode” under the “When I use this device as a tablet” menu.
Method 3. Use the Command Prompt to Repair the Hidden Recycle Bin
You can repair any unexpected Recycle Bin error by using the Command Prompt. Follow the below steps to operate.
Step 1. Click on the Search Bar at the bottom left, next to the Start Menu.
Step 2. Type cmd and right-click on the Command Prompt option.
Step 3. Select the Run as administrator option.
Step 4. Insert the command rd /s /q C:\$Recycle.bin in the Command Prompt and hit Enter.
Warm tip: This method will permanently delete all files and folders that have been sent to the Recycle Bin before. If you don’t want to lose files, install Data Recovery Software on your desktop to recover your recently deleted files (Read the next section for details).
How to Empty Recycle Bin on Windows
Emptying the Recycle Bin on your computer can help to free up some hard drive space. Follow these steps to empty the Recycle Bin.
Step 1. Find the Recycle Bin icon on the desktop.
Step 2. Right-click (or press and hold) and select Empty Recycle Bin.
How to Recover Data from Recycle Bin on Windows
If you delete a file on your computer, it will be moved to the Recycle Bin. When the Recycle Bin is not emptied, you only need to use the built-in feature to restore your data. However, after the Recycle Bin is emptied, you have to use third-party software to get your file back.
Method 1. Restore Data from the Recycle Bin Before Emptying it
It needs to be noted that the deleted file goes to the Recycle Bin for 30 days duration on Windows. Users can browse the deleted content and restore it by using the below method.
Step 1. Double-click the Recycle Bin on the desktop and find your files.
Step 2. Then right-click on each file and choose “Restore” to put them back to the original location.
Method 2. Restore Data from the Emptied Recycle Bin
When the files are deleted permanently from Recycle Bin, they are not removed from the drive, your files are still present unless overwritten, so you also can use professional data recovery software to recover the deleted file data. Here we recommend the ONERECOVERY for Recycle Bin data recovery on Windows.
| ONERECOVERY is an efficient and professional software to get back your valuable files in data loss scenes. This tool is compatible with Windows, without any complicated steps, making you experience the satisfaction of regaining. Moreover, the advanced features of this software allow you to recover deleted file not in Recycle Bin. |

Download and install ONERECOVERY Recycle Bin Recovery software on Windows and follow the steps to get back your deleted files.
Step 1. Launch ONERECOVERY software on the PC. Double-click the ONERECOVERY on the desktop or enter “ONERECOVERY” in the search bar and open it.
Step 2. Select the “Recycle Bin” location to start. The ONERECOVERY will start scanning the disk to search for the lost data and files.
Step 3. After the scanning, you can check all recovered files. Preview and select your recovered files by clicking the “Recover” button.
Step 4. Finally, save the recovered files on a safe hard disk or other devices.
Read More: How to Fix Corrupted Recycle Bin in Windows
Conclusion
This blog offers you the solution on how to remove Recycle Bin from the desktop and how to access, empty, and show it.
In addition to a full guide on the usage of the Recycle Bin, we also offer you the solution for the recovery of data in the Recycle Bin. With the powerful third-party software ONERECOVERY, files in various formats can be retrieved without effort.
Vanessa is a professional editor with a strong foundation in computer information technology. Since graduating, she has dedicated her career to create content in IT fields. In the past three year, she has accumulated sufficient knowledge in data recovery, computer problems troubleshooting and application of multimedia software.
She has been trying her best to bridge the gap between complex technical concepts and accessible, reader-friendly content.

