


 My Account
 Sign Out

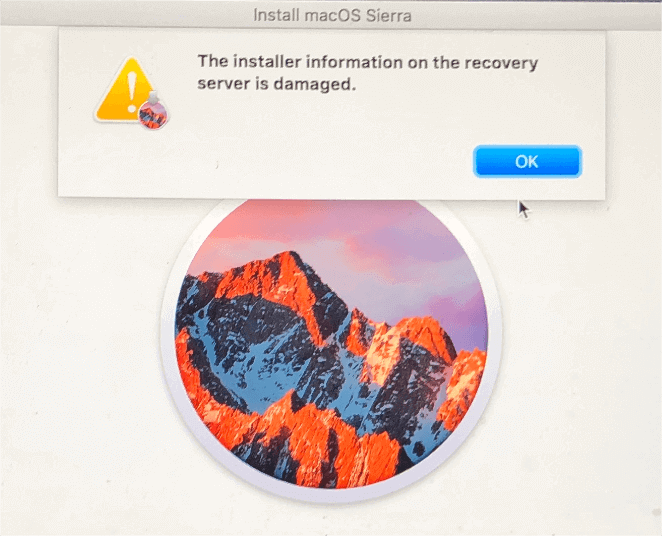
Error Message – “The installer information on the recovery server is damaged” OS is Sierra
When I try to reinstall the OS after erasing the HD I get the error message “The installer information on the recovery server is damaged” OS is Sierra, Machine is a 2017 i5 iMac. What is wrong and how do IO fix it?”
—Question from user gregdw on discussions.apple.com
Well, we notice that quite a few Apple users have faced the error message “The installer information on the recovery server is damaged”, and most of the users encountered this error when they were reinstalling macOS, often in old versions like macOS Sierra, macOS High Sierra. You are in the right place if you are one of these users. This article is here to provide a few methods to help you fix this error and extra methods to recover your important data because these methods probably lead to the possibility of data loss.
What Is ‘Installer Information on the Recovery Server is Damaged’ Error?
It is a common problem for Apple users, and it indicates no severe potential issues. There could be different causes for the error. Here we have listed the most possible reasons:
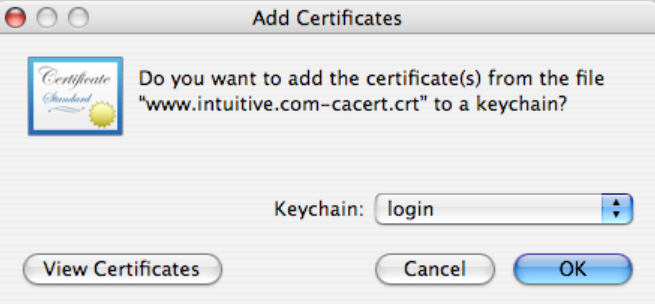
Mac Certificate Has Expired
A Mac certificate is like a digital passport for your online activities, ensuring secure transmission of information over the Internet. These certificates have specific uses, like digital signatures or encryption, called “key usage” restrictions, for enhanced security. This unique certificate allows you to use Apple’s features fully. However, they come with an expiration date. If the certificate is expired, Apple can not verify your digital identity, thus limiting your reinstalling of the macOS. Hence, they must be replaced with a new version, or the certificate agent may revoke it earlier.
Incompatible Disk Format with the Want-to-install MacOS
After the version macOS Sierra, the brand new Mac models use APFS format as the new hard disk format. The old HFS hard disk format can not allow you to install new macOS. That is to say, you can only install the macOS version after macOS Sierra on Mac with APFS hard disk format, e.g., Sierra cannot be installed on an APFS formatted disk.
How to Fix “Installer Information on the Recovery Server is Damaged”
Reinstall macOS from Internet Recovery
It is a main and should-first-try method to fix the “Installer information on the recovery server is damaged” error. If this does not work, then try other ways. Before trying this method, make sure your Mac has a stable internet connection and sufficient battery power, and remember do not shut down the Mac before the process is done, otherwise, the device will be unusable, which will make the situation even worse.
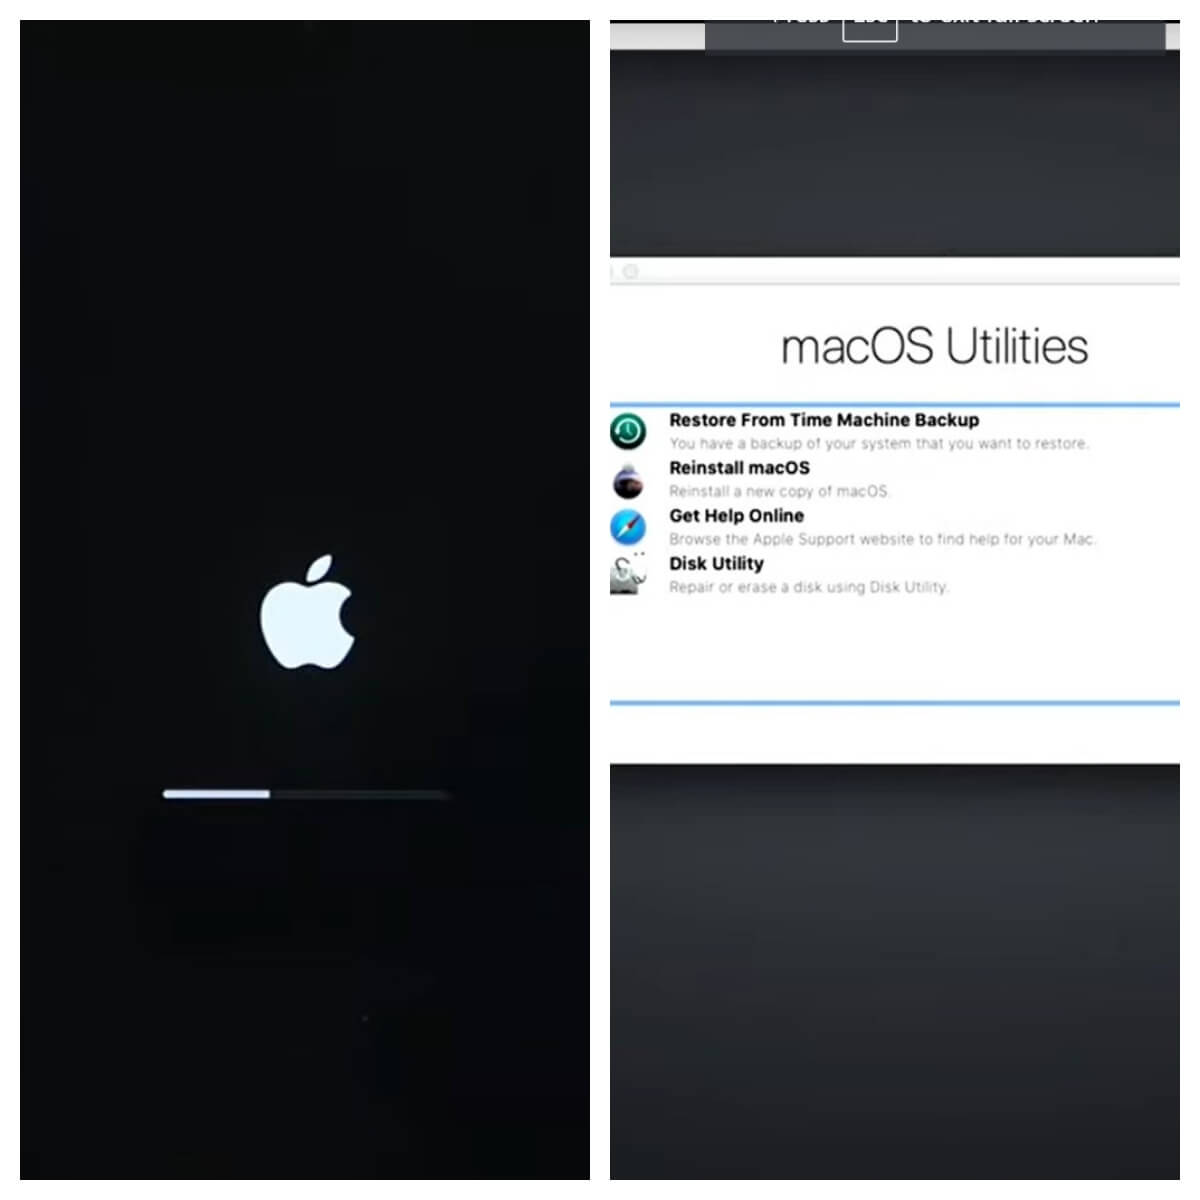
Step 1. You need to shut down your Mac computer and press the short keys to boot into Recovery Mode.
💡 There are three key combinations you should learn if you are using an Intel-based Mac:
- Command+R: Press these two keys, and the Recovery will bring you to the current macOS version. (in most cases, use Command + R)
- Option+Command+R: Press these three keys, and the Recovery will bring you to the latest macOS that is compatible with your Mac.
- Shift+Option+Command+R: Press these four keys, and the Recovery will bring you to the original macOS that came with your Mac or the closest version that is still available. Not available on macOS Sierra 10.12.4 or later.
Step 2. Press and hold the power button, then immediately press the command+R keys until you see the Apple logo and wait for your computer to start in recovery mode (For Intel-based Mac).
Press and hold the power button until you see the options on the screen > click Continue under Option (Mac with Apple silicon).

Step 3. If you want to erase or format your hard disk, start with step 3: select Disk Utility from the screen menu > click Continue.
If you don’t want to erase your hard disk with your Mac (the system files will be overwritten), go to step 5.
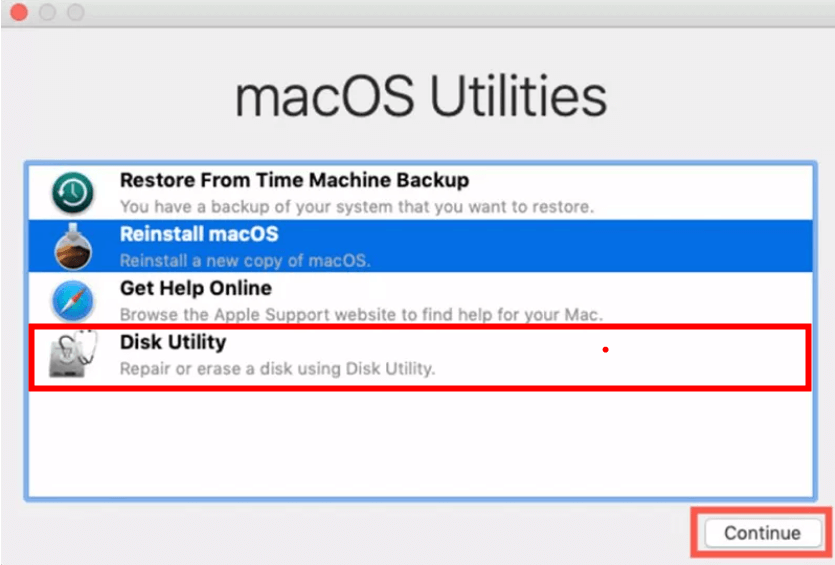
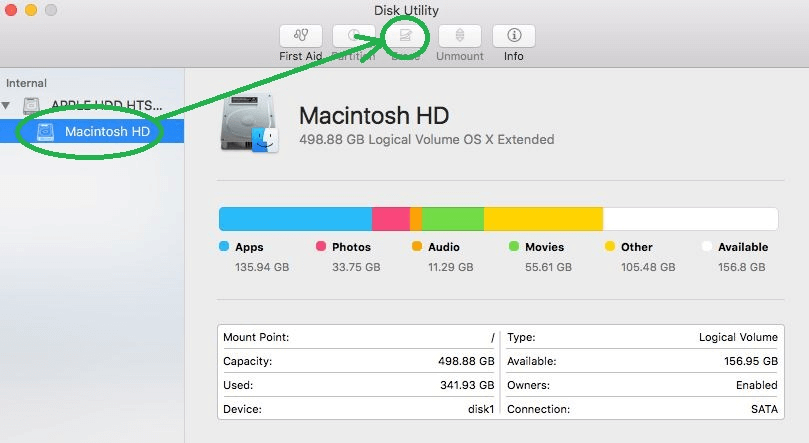
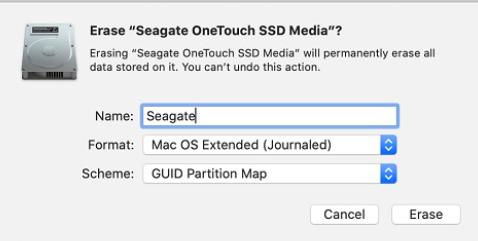
Step 4. Select Erase from the Disk Utility Macintosh HD hard disk page. >Select the macOS Extended (Journaled) format in the Format box. > click on Erase >Quit Disk Utility.
Here watch a how-to-do video:
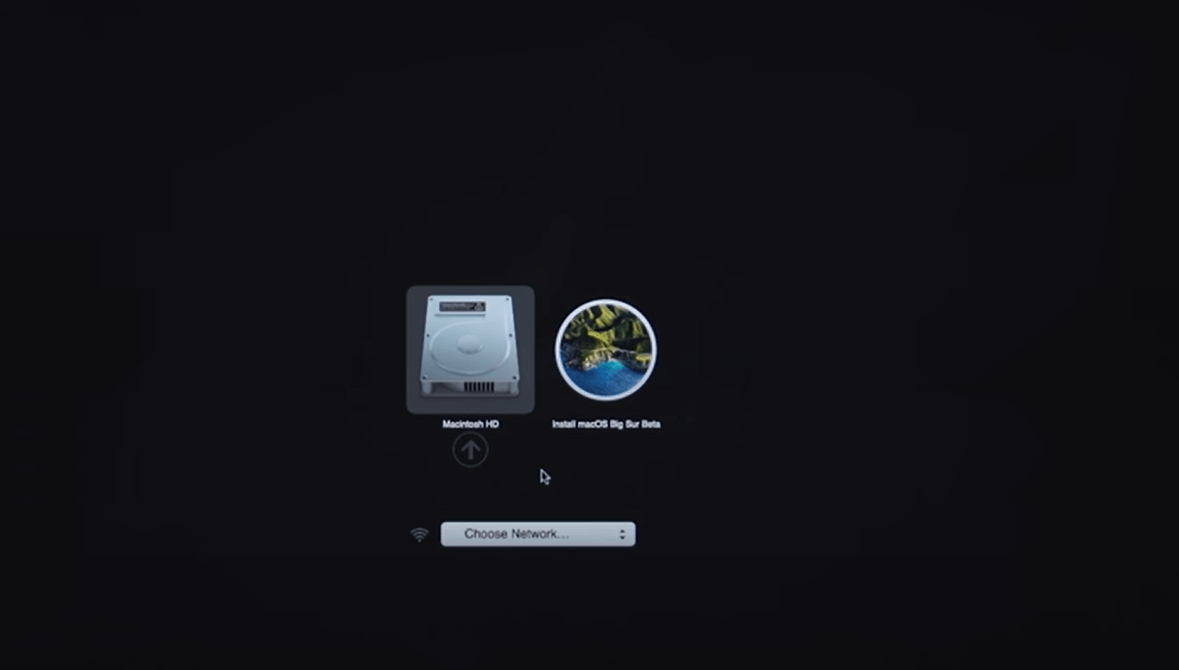
Step 5. Choose Reinstall macOS. Click Continue on the screen.
Step 6. Click on Continue > follow the instructions to start the installation. Select the disk you want to install macOS on.
Step 7. If you are asked to unlock the hard disk, just enter your password that locks your Mac. Then you can complete the following process. But, if the process can not be finished, the problem may be caused by your hard disk. You may need to erase your hard disk still, then go back to step 3 and try again.
See details on:
Change Time and Date in Terminal
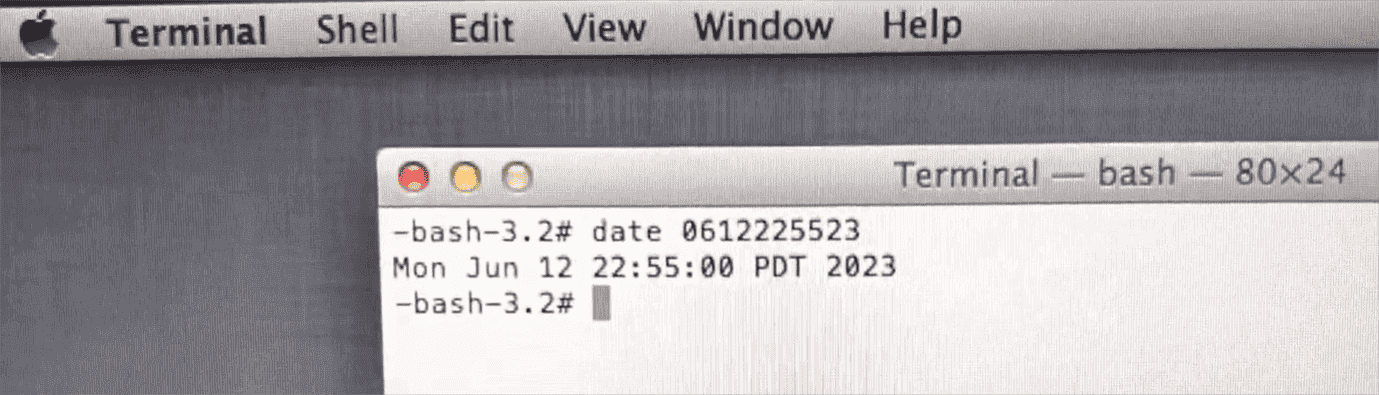
If this error still shows up after you try to reinstall macOS in recovery mode, try to check the data and time. The certificate that you want to install macOS may expire, but it may not be updated with a valid certificate by Apple on the recovery server. So, you may try to bypass this problem by setting the time and data before the expiry date of the certificate on your Mac. Better change the time and data that is close to the release time of the macOS version. For example, if the release date of macOS High Sierra (version 10.13) is released on September 25, 2017, you can then change the time and date to October 25, 2017. The version macOS Sierra release time is September 20, 2016, but you can change it to October 20, 2016. After the change of time and date, you may try to reinstall macOS.
Step 1. Restart into Recovery Mode.
Step 2. Select Utility > Terminal.
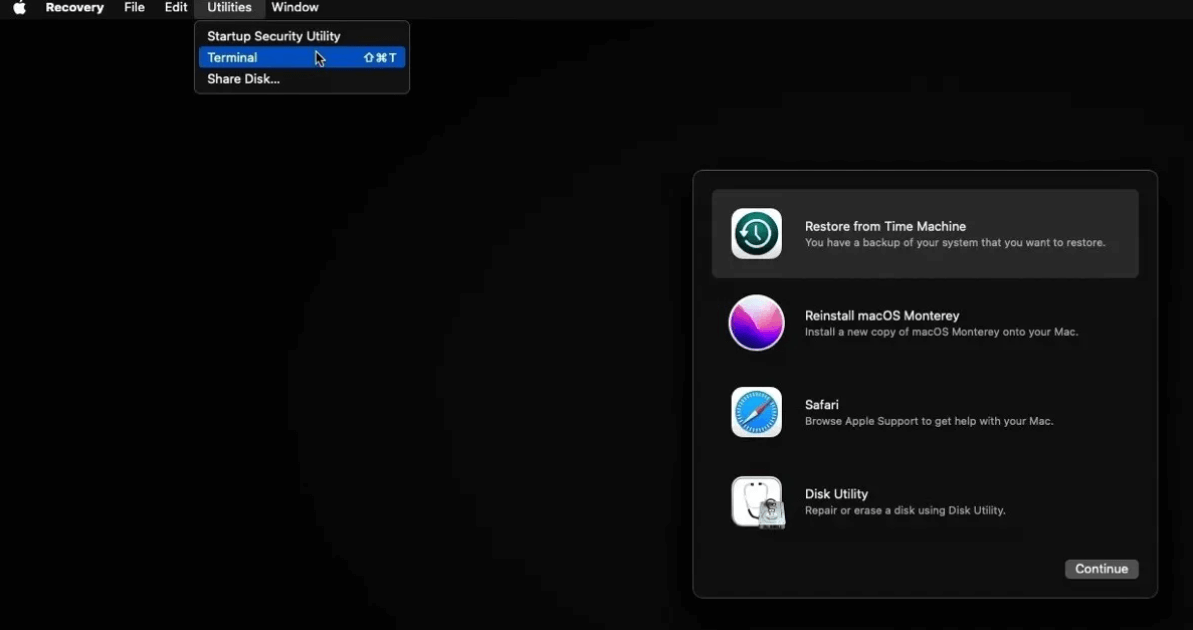
Step 3. Enter data MMDDHHMMYY (e.g., 0612225523 means June 12, 22:55, 2023) > press Return.
Watch the video:
Reinstall macOS from Bootable Installer
This is an alternative way to fix the “installer information on the recovery server is damaged” error. Try to reinstall macOS from a bootable installer like from a USB. What you need is another functional Mac and a USB that has at least 14 GB of storage space. And if you have any data on the USB, you may better backup it cause this will wipe out all the data in the USB.
Step 1. Get macOS installer files on USB.
You need to use a Mac that is in macOS High Sierra or later, the latest version of macOS Sierra, or the latest version of OS X El Capitan. The Mac needs to be compatible with the macOS installing file that you are going to download. Look and find the version of macOS you want to reinstall. You can find the versions on the Apple page How to download and install macOS.

Step 2. Create a bootable installer for macOS
After you download the installation file, you need to create a bootable installer for macOS using Terminal, and this will wipe out all the data of your USB or the external drive you are using.
1. Insert your USB into the functional Mac.
2. Open Disk Utility.
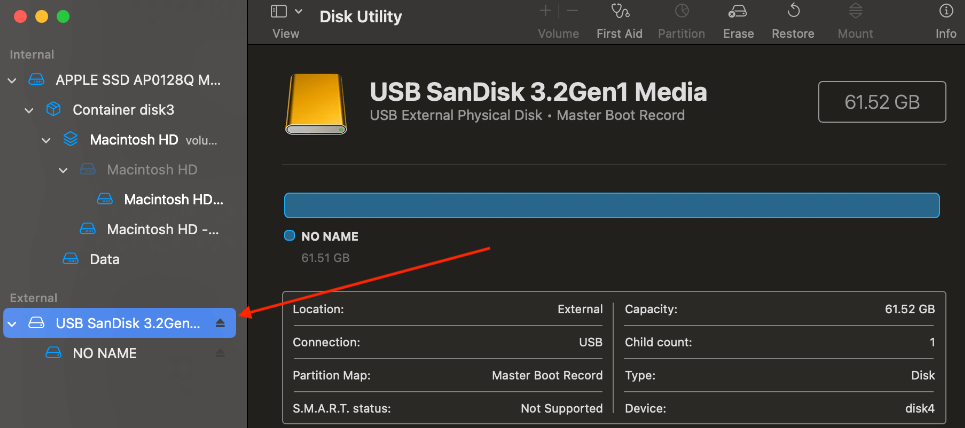
3. Click on View > click Show All Devices.

4. Choose the USB from the left menu.
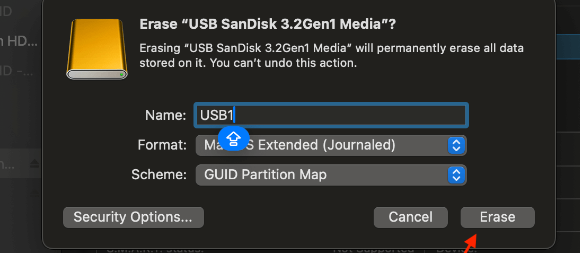
5. Click Erase.
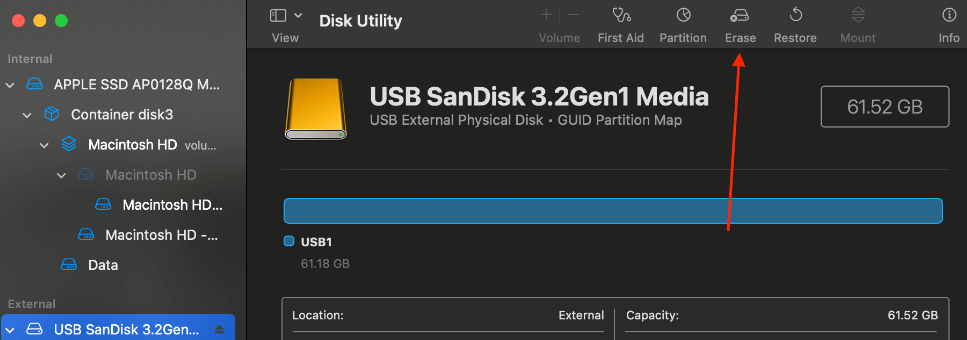
6. Select Mac OS Extended (Journaled) as the format.
7. Choose GUID Partition Map as the Scheme.
8. Name your USB, such as USB1 or whatever you like. If not, the name may by default.
9. Click Erase. > Copy the installer file into your USB.
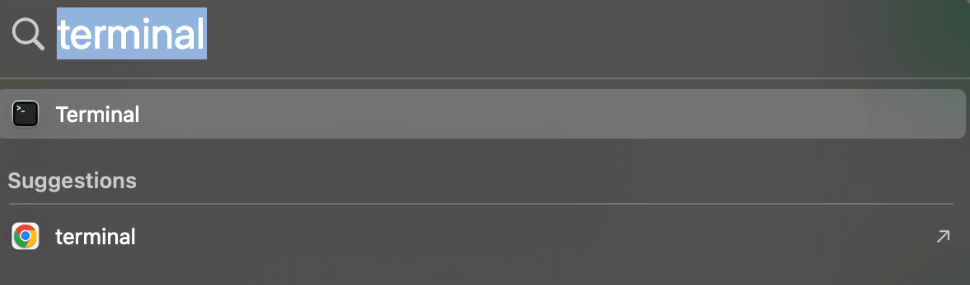
10. Open Terminal.
11. You need to enter the commands belonging to the macOS version that you want to install. Find the one you need in Create a bootable installer for macOS. > Enter your password if needed.
| macOS Version | Commands | createinstallmedia Command |
| Sonoma | sudo /Applications/Install\ macOS\ Sonoma.app/Contents/Resources/createinstallmedia –volume /Volumes/MyVolume | /Applications/Install\ macOS\ Sonoma.app/Contents/Resources/createinstallmedia |
| Ventura | sudo /Applications/Install\ macOS\ Ventura.app/Contents/Resources/createinstallmedia –volume /Volumes/MyVolume | /Applications/Install\ macOS\ Ventura.app/Contents/Resources/createinstallmedia |
| Monterey | sudo /Applications/Install\ macOS\ Monterey.app/Contents/Resources/createinstallmedia –volume /Volumes/MyVolume | /Applications/Install\ macOS\ Monterey.app/Contents/Resources/createinstallmedia |
| Big Sur | sudo /Applications/Install\ macOS\ Big\ Sur.app/Contents/Resources/createinstallmedia –volume /Volumes/MyVolume | /Applications/Install\ macOS\ Big\ Sur.app/Contents/Resources/createinstallmedia |
| Catalina | sudo /Applications/Install\ macOS\ Catalina.app/Contents/Resources/createinstallmedia –volume /Volumes/MyVolume | /Applications/Install\ macOS\ Catalina.app/Contents/Resources/createinstallmedia |
| Mojave | sudo /Applications/Install\ macOS\ Mojave.app/Contents/Resources/createinstallmedia –volume /Volumes/MyVolume | /Applications/Install\ macOS\ Mojave.app/Contents/Resources/createinstallmedia |
| High Sierra | sudo /Applications/Install\ macOS\ High\ Sierra.app/Contents/Resources/createinstallmedia –volume /Volumes/MyVolume | /Applications/Install\ macOS\ High\ Sierra.app/Contents/Resources/createinstallmedia |
| El Capitan | sudo /Applications/Install\ OS\ X\ El\ Capitan.app/Contents/Resources/createinstallmedia –volume /Volumes/MyVolume –applicationpath /Applications/Install\ OS\ X\ El\ Capitan.app | /Applications/Install\ OS\ X\ El\ Capitan.app/Contents/Resources/createinstallmedia |
12. Rename your USB letter with MyVolume in the commands, which you named earlier in Disk Utility. After entering the command > press the Return key.
13. Type Y to confirm you want to erase your USB > Hit Return.

14. Wait until the process is done and you will see Copy complete and Done.
Step 3. Use the USB installer to install macOS on your Mac.
Insert the USB with the installer to your original Mac with an internet connection.
👉 For Mac with Apple Silicon
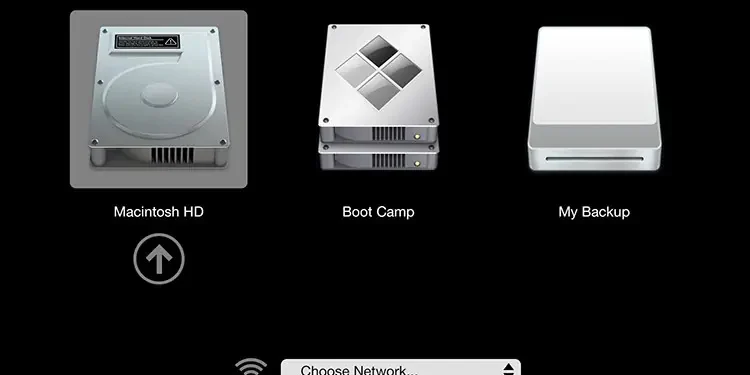
1. Start up the Mac. > Press hold the power button. > You will see the Startup Options Window.
2. Choose the volume containing your bootable installer > click Continue.
3. Follow the prompts to complete the installation on your Mac.
👉 For Intel-based Mac
1. Start up the Mac by pressing the power button and immediately hold on the Option key until you see the bootable window.
2. Choose the volume containing your bootable installer > hit Return.
3. Choose your language if you are asked.
4. Click Install macOS > Click Continue. > Follow the prompts to complete the installation on your Mac.
Watch the video tutorial:
Renew Your Mac Certificate
Renewing a Developer’s Certificate for iPhone and iPad Development is a crucial step to ensure the continued functionality of your applications. Follow these detailed steps to successfully renew your Mac certificate:
Step 1. Open Keychain Access
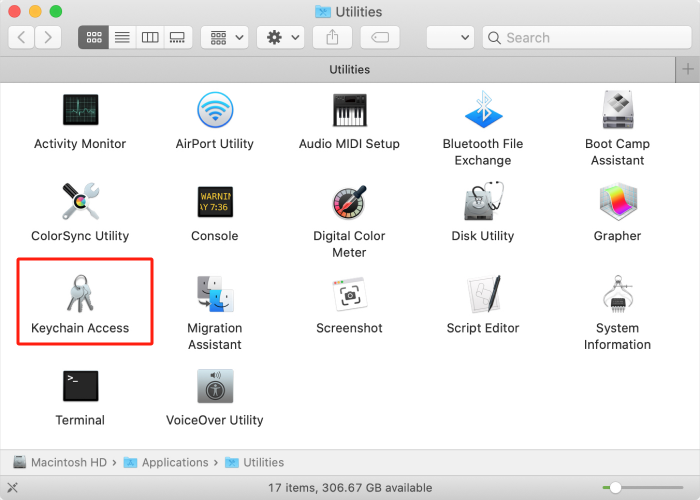
Launch the Keychain Access application on your Mac. You can find it in Applications > Utilities.
Step 2. Delete Expired Certificates
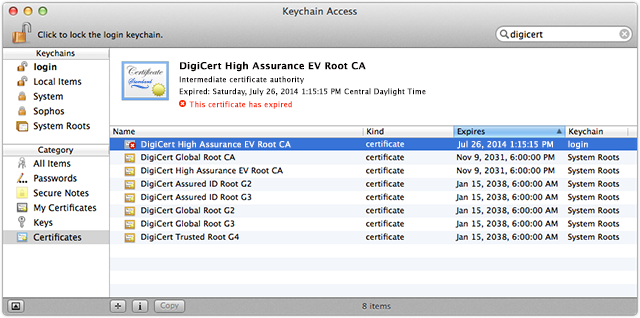
Identify any expired certificates marked by a red circle with an X. Typically named “iPhone Developer: [name]” or “iPhone Distribution: [name].” Delete these expired certificates.
Step 3. Request a New Certificate
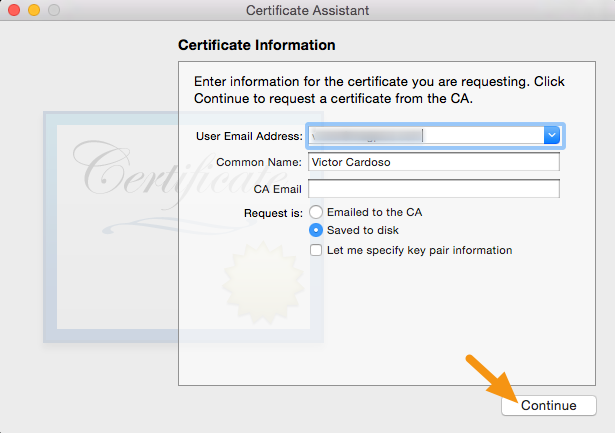
In the Keychain Access menu, select “Certificate Assistant” > “Request a Certificate from a Certificate Authority.” Enter a valid email address and your name, choosing “Saved to disk” as the option. Click Continue and save the Certificate Signing Request (CSR) file to your Mac.
Step 4. Upload CSR File
Visit the Certificates section of the iOS Provisioning Portal. Upload the CSR file and wait a few minutes for the valid certificate to be issued. Do the same for the Distribution tab to ensure a certificate for distributing apps.
Step 5. Modify Profile
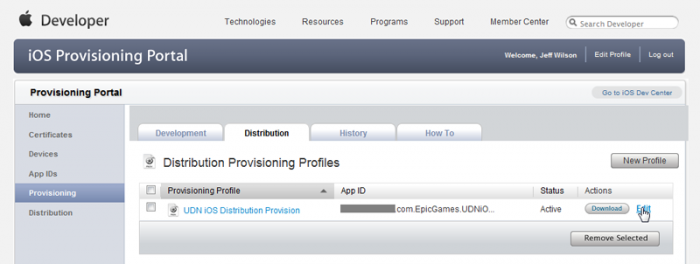
In the Provisioning section of the iOS Provisioning Portal, choose “Edit” and “Modify” for the profile you intend to use for code signing. Ensure a checkmark next to your new certificate and submit the changes. Repeat the process for the Distribution tab.
Step 6. iPhone Configuration Utility
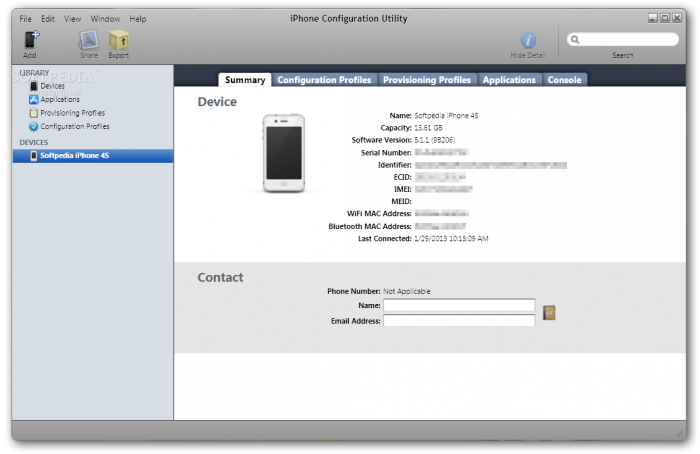
Launch the iPhone Configuration Utility. In the Provisioning Profiles screen, remove your current provisioning profile and distribution profile, even if not expired. This step prepares for the installation of new profiles.
Step 7. Download New Profiles
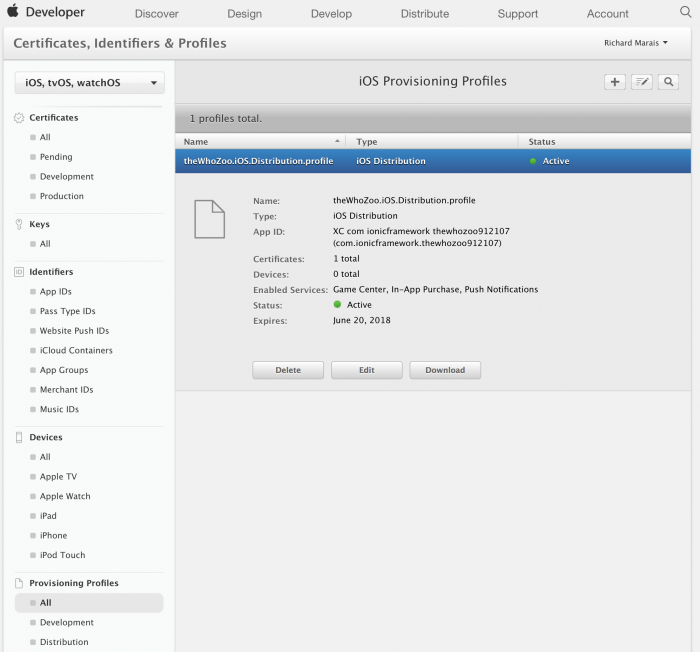
Go back to the Provisioning section and download both your provisioning profile and distribution profile. Double-click the downloaded files to install them in the configuration utility.
Step 8. Download New Certificates
Return to the Certificates section and download the new certificates for development and distribution. Double-click the files to install them in Keychain Access.
Step 9. Finalize Installation
With the new certificates and profiles installed, you are now ready to install test apps on your iPad and submit them to the Apple App Store. Cleaning up old files ensures a smooth transition and avoids confusion during troubleshooting.
How to Recover Lost Data When Reinstalling MacOS?
After reinstalling the macOS to your Mac, there is the possibility of data loss. Then, here is a backup method to recover your important data. Using recovery software can solve your problem. ONERECOVERY is the best data recovery software for Mac to recover lost data on your Mac with an intuitive interface and simple steps. Here is how to use it.

Step 1. Launch ONERECOVERY.
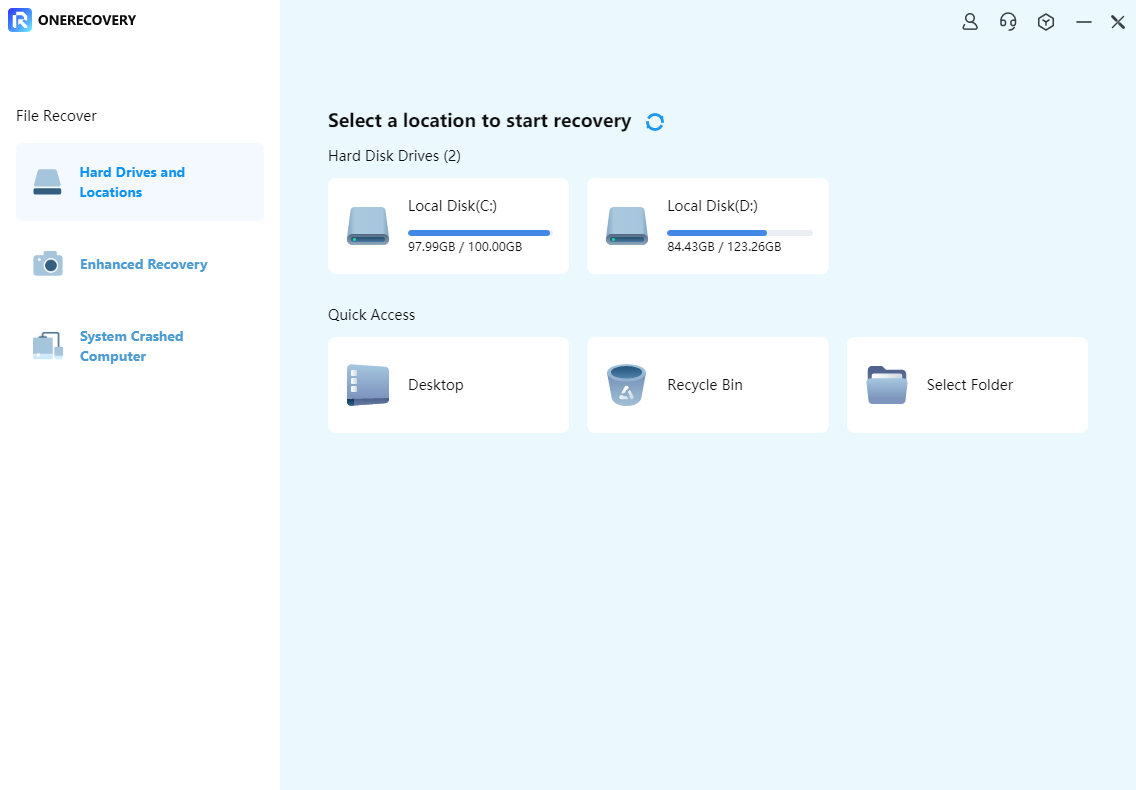
Step 2. Locate the destination of lost data and scan the drive.
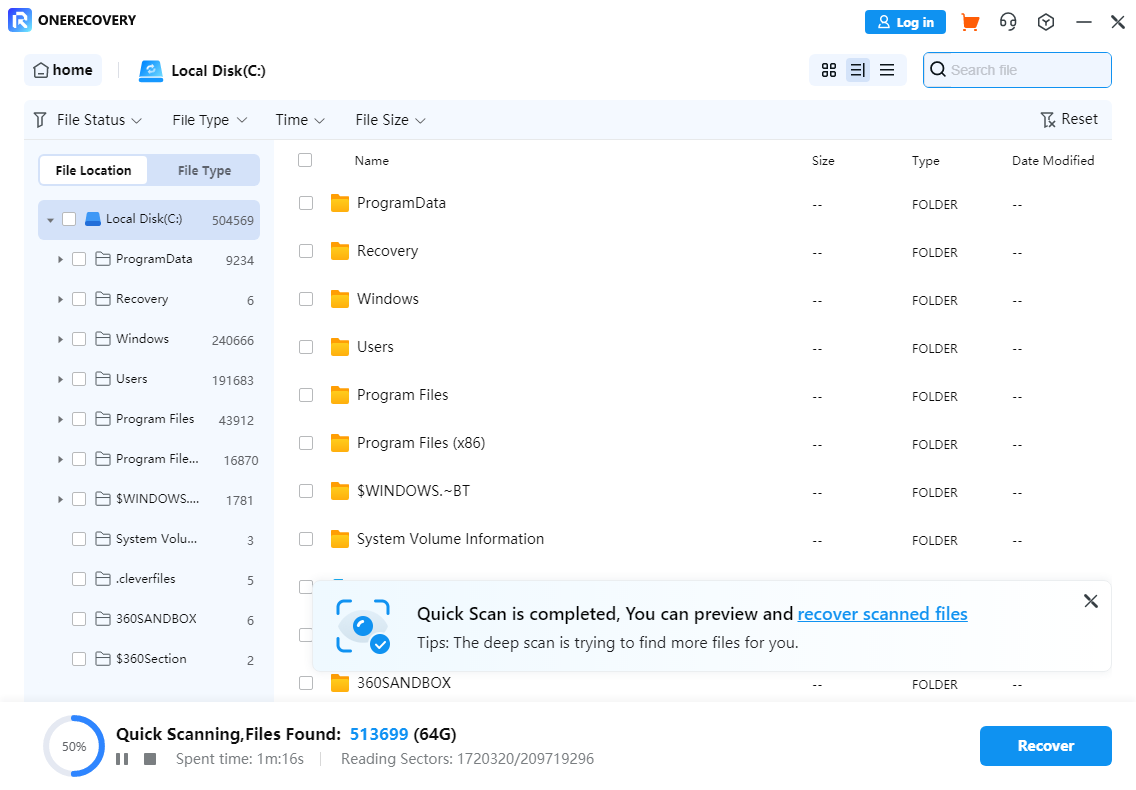
Step 3. Choose what to recover and click Recover.
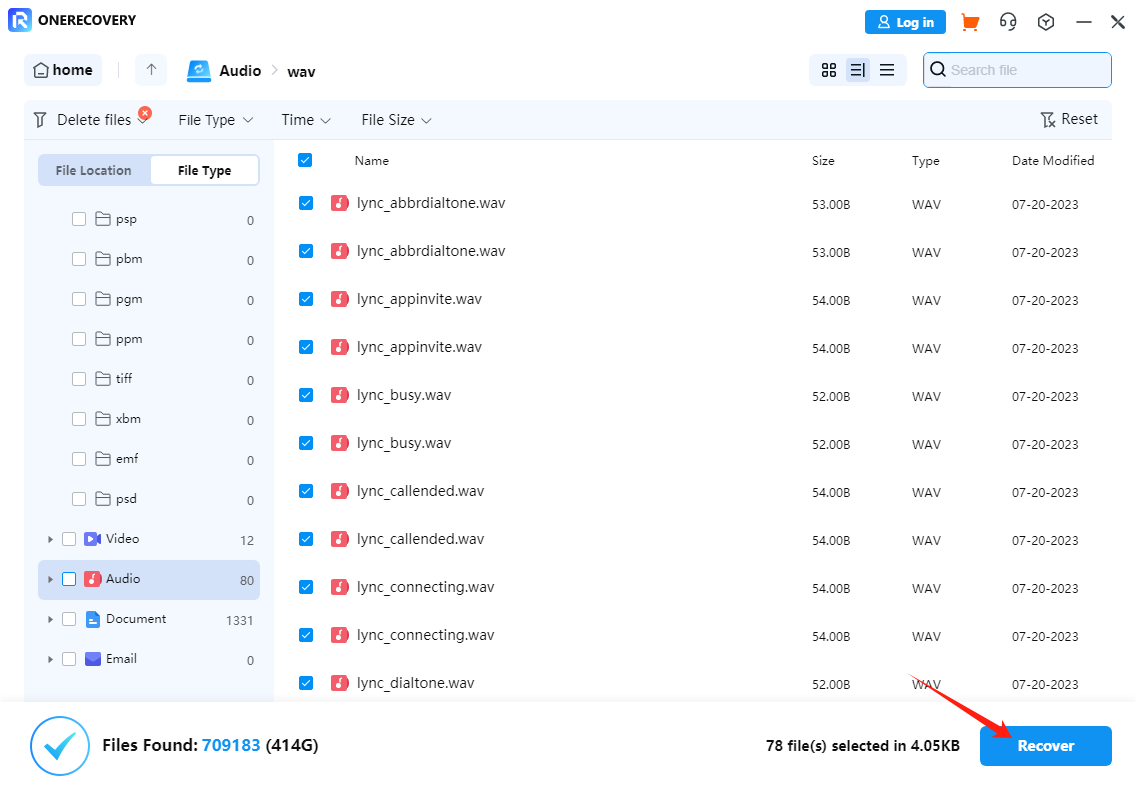
Step 4. Save your received file to a location.
Conclusion
When you encounter the “Installer information on the recovery server is damaged” error, you can try to use these methods to fix it. And, if you can’t do this on your own, you can still find professional help from any Genius bar in the Apple store. Also, let us know if you have any other solutions.
I’m thrilled to be part of the OneRecovery team as a writer. I’m passionate about simplifying the complex world of data recovery and making it easy for everyone to understand. My focus? Well, I love diving into tutorials on hard drive recovery, crash computer data retrieval, photo repair, and many more. But that’s not all—I’m all about exploring the creative side too, so expect plenty of engaging and imaginative posts on various aspects of data recovery software. Join me on this journey as I share insights, tips, and tricks that make data recovery a breeze!

