My Account
 Sign Out

Today, solid-state drive (SSD) is one of the most used tools for storage, nearly every businessman is likely to use it as the primary drive for their system since it has fast read and write speeds while consuming less power. Setting up an SSD on your Windows 11 is not an easy process, however, there is nothing to worry about, as this article proposes several ways to install a new SSD on your desktop. Let’s get into the details to learn more about it!
Why You Need to Format A New SSD
Generally speaking, when you buy a new SSD, you need to format it before setting it up on Windows 11.
Here we provide some common reasons to explain why we need to do it:
- Formatting a new SSD will guarantee your operating system is compatible with itself. Because SSD drives can be used on various systems, including Windows, Mac, and Linux. It is needed to format it to various file systems such as NTFS, HFS+, Ext3, Ext4, etc. before use.
- Formatting a new SSD will guarantee your storage space. If you are using the SSD from one device to another, formatting ensures that any data on it will be erased before you save your new files.
- Formatting a new SSD can improve your operating performance and improve efficiency.
How To Set Up New SSD Windows 11
In this section, we will provide you with step-by-step instructions, including physical installation and software configuration. Before we start the setup process, it’s significant to note that to have a backup of your important data as performing a format would cause data loss.
Step 1: Physically Install the SSD into Your Computer
At first, you should use a screwdriver to remove any screws and open the computer case, insert the SSD into the mounting bracket or a drive bay, then connect the SATA and power cables to the new SSD. Finally, make sure that are in a secure place then carefully put back the panel.
Step 2: Format and Partition the New SSD
Once the new SSD is installed, you’ll need to configure it using the following methods. Because this way will guarantee your drive is recognized by the operating system and can be as a storage device. Furthermore, make sure you have backed up all files from the SSD drive before formatting the drive. There are four methods available for you, you can take it as your actual needs.
Method 1: Format New SSD Using Disk Management
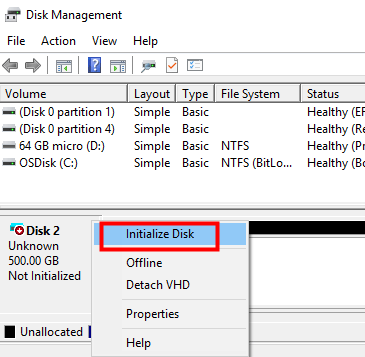
1. Press Windows + X simultaneously to open the menu and then choose Disk Management to open it.
2. Navigate the newly installed SSD drive that you want to format.
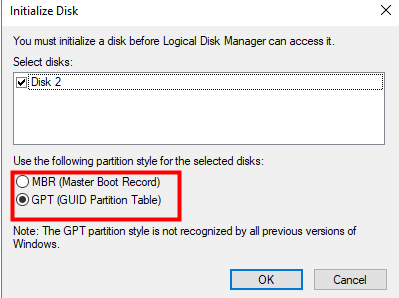
3. Right-click the SSD and select Initialize Disk. Then select the disk type (MBR or GPT) and click on OK.
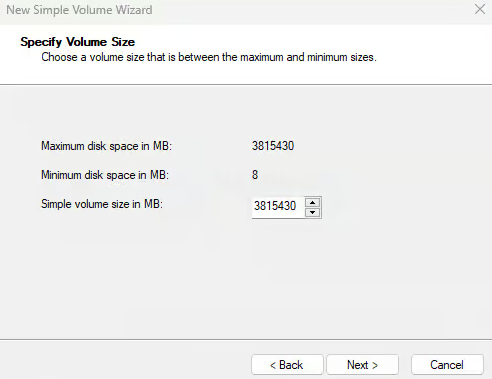
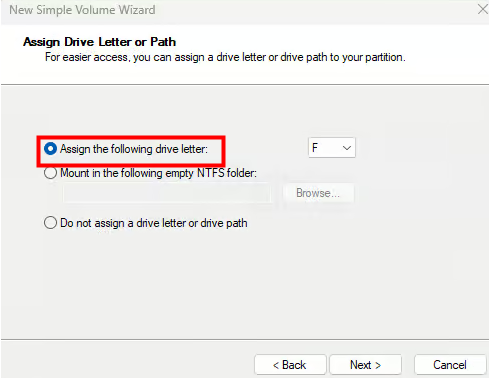
4. Then right-click on the Unallocated space. Choose the New Simple Volume option, then specify the volume size and assign a drive letter. Click on Next.
5. Choose the File System (usually NTFS in Windows) in the window and determine the Allocation Unit Size, then make sure to tick the “Perform a quick format”. And click on Next.
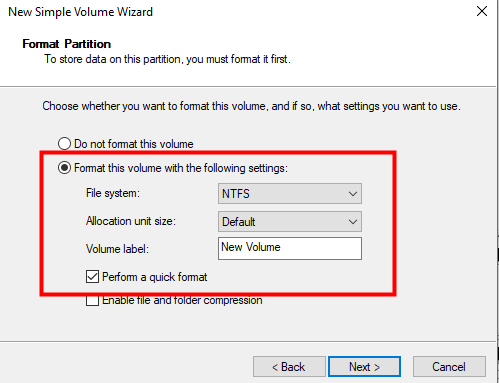
6. Click on “Next” to confirm the formatting.
Method 2: Format and Initialize New SSD Using Windows Settings
1. Press Windows + I simultaneously to open the settings and then choose System to open it.
2. Choose Storage on the left-hand side.
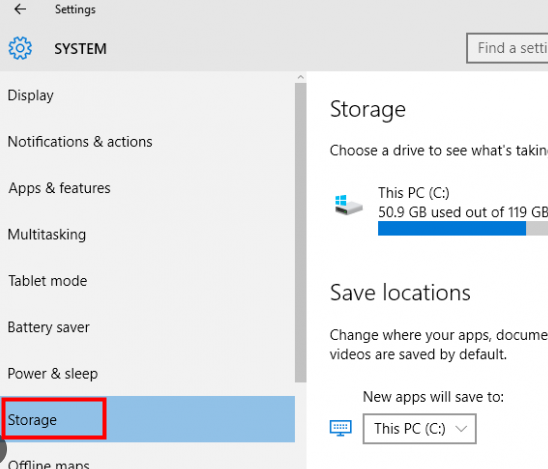
3. Then click on Advanced storage settings.
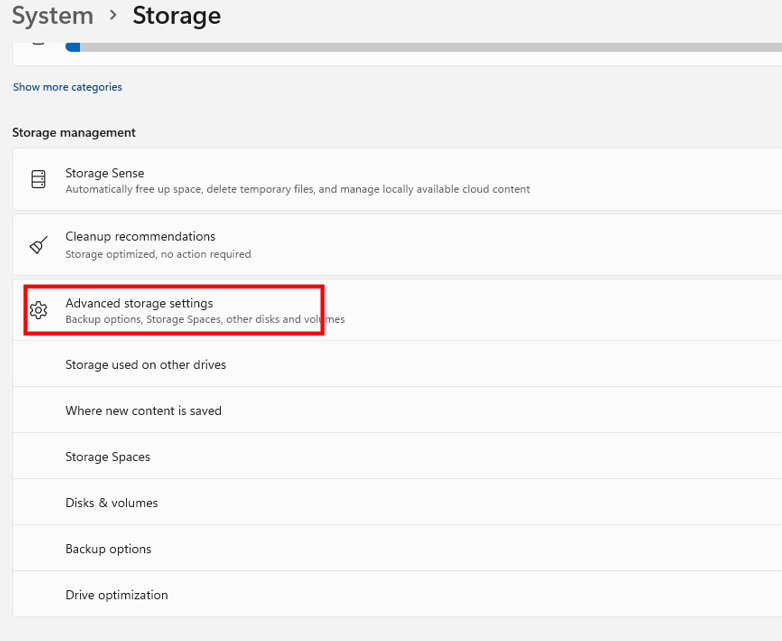
4. Scroll down and choose Disks & volumes, now you will see all the drives listed on your PC.
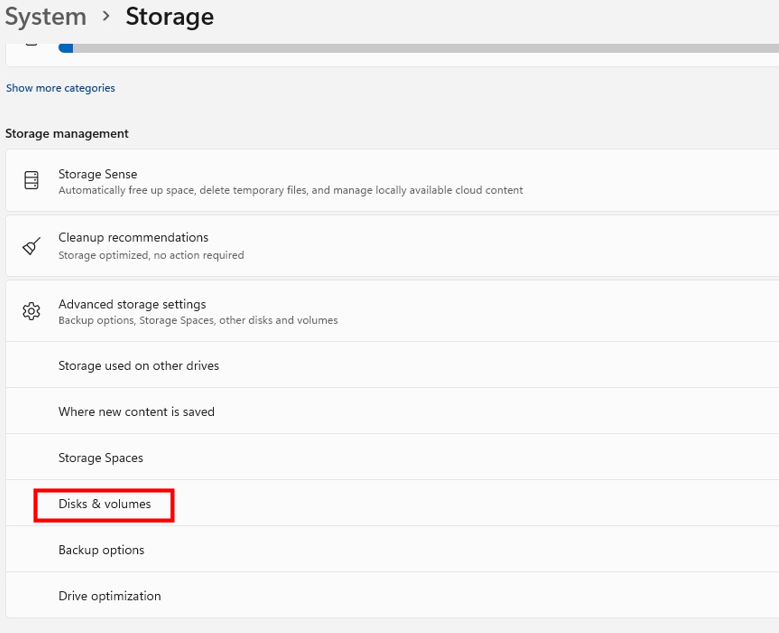
5. Locate your newly installed SSD that should display ‘Not initialized’. Then click on Initialize to perform.
6. Then select the disk type (MBR or GPT) and click on Initialize.
7. Then click on Create volume in the drive listing, and choose the label, drive letter, file system, and size respectively.
8. Click on Format and wait for the formatting.
Method 3: Format New SSD Using Command Prompt
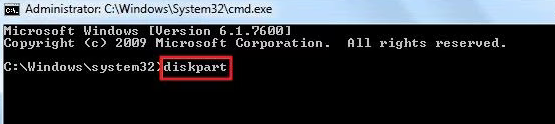
1. Press Windows + X simultaneously to open the menu and then choose Command Prompt (Admin) to open it.
2. Input “diskpart” in the command prompt window, then press Enter. This will launch the DiskPart utility.
3. Type “list disk” and press Enter to show all the available disk drives on your PC.
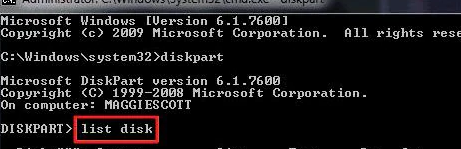
4. Identify your new SSD in the list and remember its Disk Number.
5. Type “select disk + disk number” to select the drive and press Enter. Make sure you put the right number else you will end up cleaning the wrong drive.
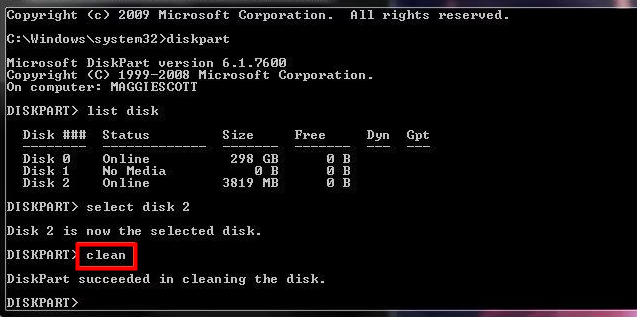
6. Input “clean” and press Enter to clean up all the data on the selected disk permanently.
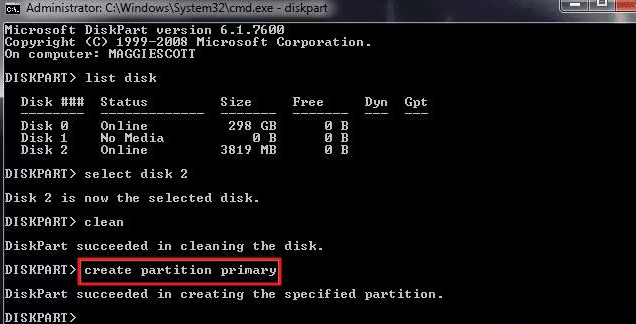
7. Input “create partition primary” and press Enter to create a new primary partition on the SSD.
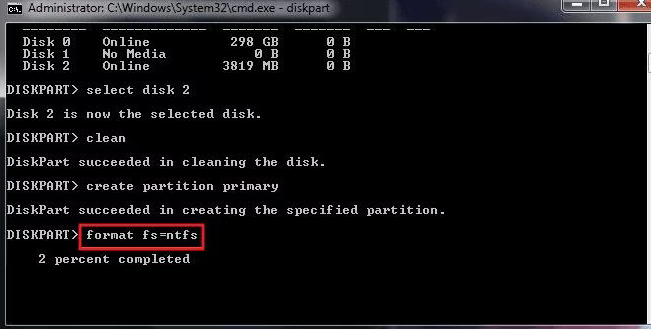
8. Then type “format fs=ntfs quick” after a new primary partition is created, and press Enter to format the new partition using a file system like NTFS, or exFAT.
9. Finally, assign the driver letter to the new partition by inputting “assign” and press Enter.
Method 4: Format and Partition New SSD Using Third-Party Software
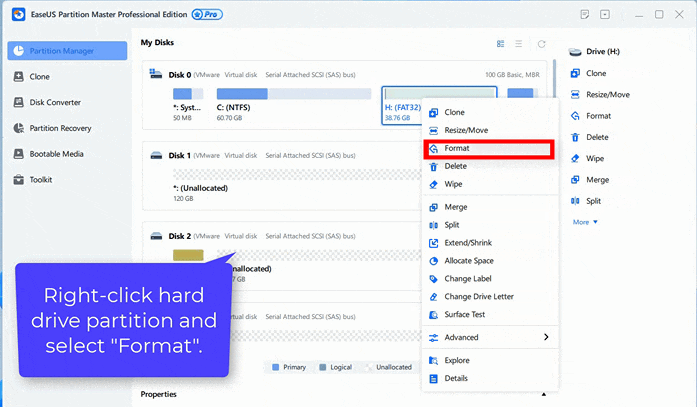
1. Download and launch partition management software, such as EaseUS Partition.
2. Launch the software and locate your new SSD in the list of drives.
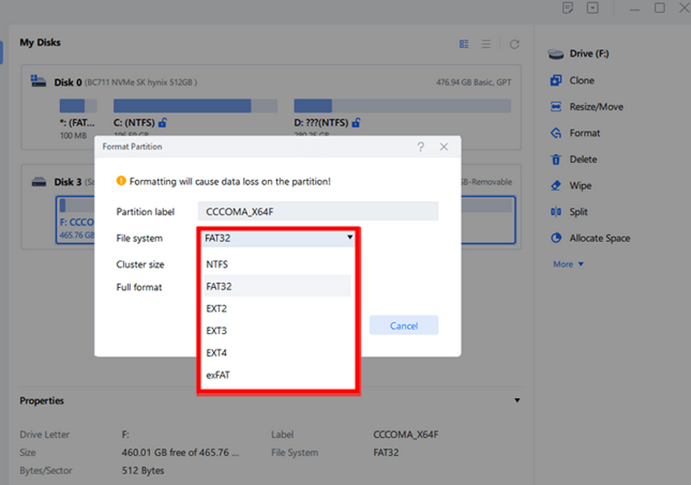
3. Right-click on the SSD that you want to format it and select the “Format” option.
4. Choose the partition label, file system, and cluster size in the Format Partition window. Click on OK to continue.
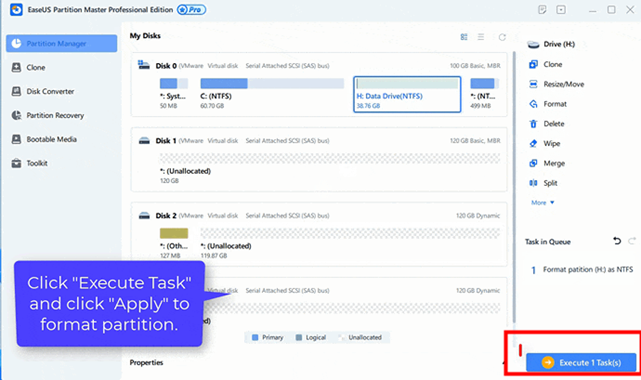
5. Click “Execute Task” to confirm the formatting process.
Pros and Cons of Different Methods
Like anything else, the methods discussed above have their advantages and disadvantages.
Let’s take a closer look at some of the pros and cons of helping you explore its limitations and capabilities and make it easier for you to use accordingly.
| Methods | Cons | Pros |
| Disk Management | ▪ Built-in utility in Windows, which is free and convenient. ▪ Assign the desired size for a new SSD. ▪ Provide file system selection for optimal performance. ▪ Allow assign a drive letter or path to the new volume. | ▪ Plenty of steps and procedures and require some time to format. ▪ Limited options. |
| Windows Settings | ▪ System Settings lallows you to customize the storage settings of all your drives. ▪ Allow assign label, drive letter, file system, and size to a new volume. ▪ Less cluttered interface compared with Disk Management. | ▪ Plenty of steps and procedures and require some time to format. ▪ It may take some time to find the newly installed SSD. |
| Windows Command Prompt | ▪ Access commands or command options in the command line which aren’t available to the GUI. ▪ Provide with more advanced selection for disk. ▪ Allow to specify partition sizes, file systems, and drive letters. ▪ Suitable for advanced and professional users as it offers more precise control. | ▪ It is difficult for users or beginners who are unfamiliar with the command line. ▪ Plenty of commands need to be input, it may cause error if not used properly. |
| Third-Party Software | ▪ Convenience and intuitive interface. ▪ Provide more features other than formatting. ▪ Provide a faster formatting process. ▪ Allow to specify partition labels, file systems, and cluster sizes. ▪ Provide more file systems to select compared with other methods. | ▪ Need to download. ▪ Free trial offers limited functions. ▪ Need to be paid if you want a more advanced function. |
Step 3: Install Windows 11 on the New SSD
Once you formatted and partitioned the new SSD, it is necessary to install Windows 11 on it. Here is the completed guide for you to go through.
Step 4: Update the Drivers and Transfer Your Data to the New SSD
After installing Windows 11 on the new SSD successfully, it is time to update your drivers from the Windows Updates for optimal performance. Additionally, now you can transfer your important data to the new SSD as it has fast read and write speeds compared with other drivers.
Step 5: Optimize Your New SSD
The final step is to check if you need to install any available applications on the new SSD and check the power settings, as well as keep the firmware up to date, etc. for a smooth operation and optimal performance.
For more tips and tricks on how to set up your SSD on Windows, check out the following video.
What to Do if You Can’t Format Your New SSD
Some errors are prone to occur when you are using an SSD, and on some occasions will hinder you from formatting your SSD successfully. In general, SSD formatting failure is mainly caused by the following factors:
🔹 Factor 1: The SSD is infected with the virus.
🔹 Factor 2: The SSD is physically damaged.
🔹 Factor 3: The SSD enables the write-protected feature.
For the factor 3, here are the solutions to remove write protection from SSD:
Step 1: Press Windows + R simultaneously to open Run.
Step 2: Type “diskpart” and press Enter to run Diskpart as administrator.
Step 3: Input the following command “list disk” and press Enter.
Step 4: Type the following command “select disk n” and press Enter. (Note: Where X is the name of your SSD)
Step 5: Run the command “attributes disk clear readonly” and press Enter.
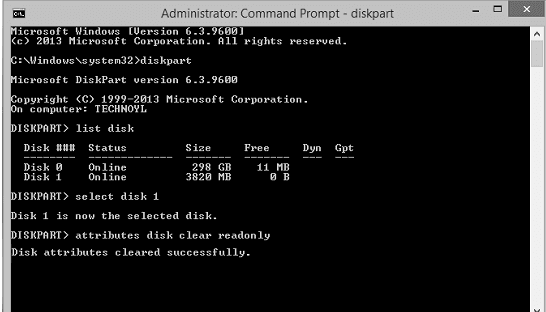
Step 6: When Diskpart shows that attributes cleared successfully, input exit and press Enter to close the window.
Step 7: Now you can try formatting your SSD once again.
Comparison of SSD VS. HDD
Nowadays, SSDs and HDDs are both popular storage devices in your new desktop or laptop. The main difference between an SSD and an HDD is how data is stored and accessed.
Here we provided the comparison of an SDD and HDD, you can choose a drive that is right for you.
| SSD | HDD | |
| Access Time | Take about 35-100 microseconds to access data | Without mechanical parts and use flash memory to store data and provide better performance |
| Price | More expensive | Cheaper |
| Heat, Electricity, Noise | With moving parts and magnetic platters, an HDD is less reliable than an SSD | Hard disk drives use more electricity to rotate the platters, generating heat and noise. |
| Reliability | Without mechanical part and use flash memory to store data and provide better performance | With moving parts and magnetic platters, a HDD is less reliable than an SSD |
| Power | Use less power | Use more power |
| Capacity | 64 GB to 256 GB are common | 500 GB to 1 TB are common |
| Texture | Shock-resistant | Fragile |
| Best for | Best for storing operating systems, game applications, and frequently used files | Best for storing extra data, such as movies, photos, and files |
In general, SSDs are faster, more shock-resistant, and use less power than an HDD, which is best for those who like to use resource-intensive programs, however, when it comes to price and capacity, HDDs are the way to go.
Tips for Protecting Your Data on an SSD
By taking the following tips and having a backup plan in place, you can ensure that your important data in the SSD is always safe and accessible.
- Use a unique password to protect your accounts and files on the SSD.
- Use the full-disk encryption feature to encrypt all the data on your SSD.
- It’s crucial to regularly back up your important data to an external storage device or a cloud service.
- Update the operating system of your SSD and keep your SSD has the latest security features.
- Use antivirus and firewall software for malware and avoid clicking on suspicious links.
- To protect your disk from accidental formatting, you can set up write protection.
- Avoid extreme temperatures.
- Avoid sudden power failure as it may cause data corruption.
- Make sure to leave some space on your SSD to keep it functioning correctly.
Conclusion
After reading this article, several ways are available for you to set up your new SSD on your PC, you are free to use either method. More importantly, before starting the setup process, it’s crucial to note that to have a backup of your important data as performing a format would cause data loss. Finally, hope this article helps you!
I’m thrilled to be part of the OneRecovery team as a writer. I’m passionate about simplifying the complex world of data recovery and making it easy for everyone to understand. My focus? Well, I love diving into tutorials on hard drive recovery, crash computer data retrieval, photo repair, and many more. But that’s not all—I’m all about exploring the creative side too, so expect plenty of engaging and imaginative posts on various aspects of data recovery software. Join me on this journey as I share insights, tips, and tricks that make data recovery a breeze!