My Account
 Sign Out

Solid-state drives or SSDs have been a popular option for people to improve disk performance, reading and writing speed as well as durability. Thus more and more people choose to clone their smaller SSD to a larger one due to the good efficiency. In this way, they can move all the required data from the old SSD to the new one and the transferred OS and programs can load up as usual. But there are many dos and don’ts in the process of cloning. This post is going to guide you through how to correctly clone your SSD to a larger SSD. If you have such a plan, please move forward and check the important details.
Preparations You Need to Do Before Cloning
Before commencing cloning the data and files on the current SSD, you should make some preparations so as to achieve a successful outcome and avoid different potential risks as much as possible. The preparations that you need to do are as follows:
Connect the Two SSDs to Your Computer
To transfer the data of your previous SSD to a new drive, you should first plug the two drives to your PC simultaneously. If you are running a desktop computer that can contain your new hard drive, you can connect it to the M.2 or SATA port and mount it into your computer.
Notice that if you are using a laptop or there is not enough space, you will need the help of some kind of hard drive enclosure to attach the new drive to your computer’s USB port. For example, a SATA to USB 3.0 enclosure is enough for a SATA SSD drive of 2.5 inches.
Initialize the New SSD
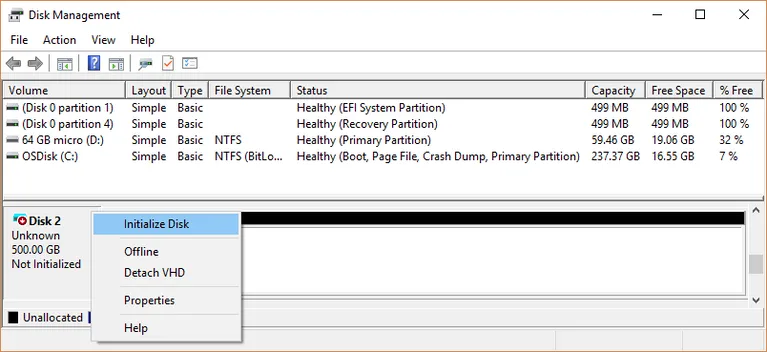
If your computer does not display a new drive letter standing for your new SSD after it is plugged, you have to launch Disk Management to initialize the drive and create a new volume on it. Follow these steps and then the new drive will show up:
Step 1. Open the Run dialogue box by hitting the Windows and R keys (Win + R) on your keyboard.
Step 2. Type in “diskmgmt.msc” and press Enter to run the Disk Management tool.
Step 3. Locate and right-click on the new SSD. Select the “Initialize Disk” option from the drop-down menu and follow the on-screen instructions to initialize it.
Back up Important Data
In many cases, cloning an SSD to a larger one will erase all the files on the latter device. Therefore, if important data exists on the new disk, you should back it up before you start to transfer the files on the old hard drive, so as to avoid data loss or deletion. Also, you can create a reliable backup of critical data on the old disk so you do not need to worry that it will be missing unpredictably in the process of clone.
How to Clone SSD to Larger SSD
After making the above preparations well, you can start the cloning process on your PC. To accomplish this task, it is recommended that you use some professional third-party software to help you. Here we will test and review two tools for you – EaseUS Todo Backup and AOMEI Backupper Standard. Move on to see how to use the two programs to clone your SSD to a larger SSD.
Clone SSD with EaseUS Todo Backup
EaseUS Todo Backup is powerful and reliable software specialized in disk cloning. Follow the steps below and you can easily migrate the contents of your SSD to a new and larger one:
Step 1. Download the EaseUS Todo Backup program from its official website and open it.
Step 2. In the primary interface, click on the “Tools” tab at the top right corner.
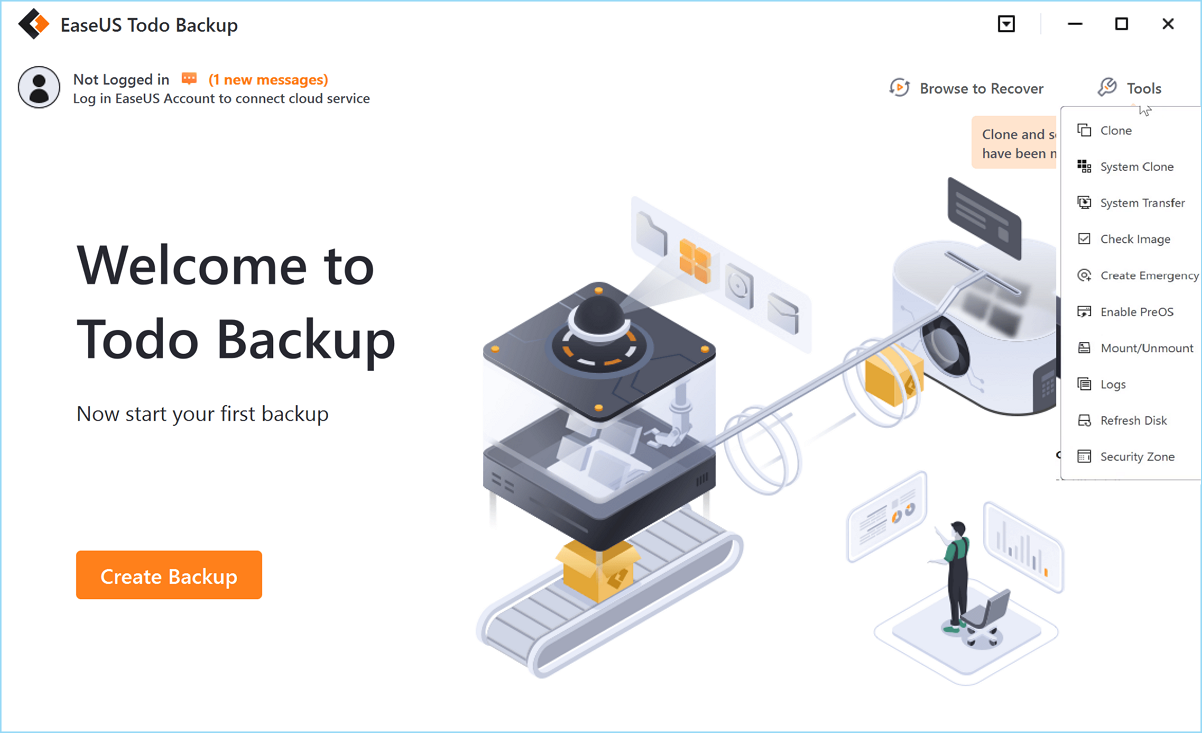
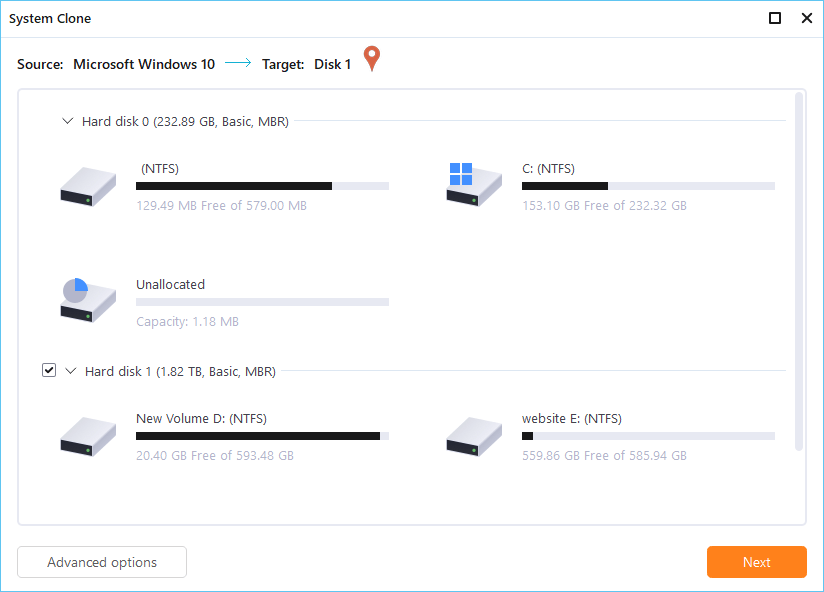
Step 3. If you want to clone the whole system, select the “System Clone” option from the drop-down menu. Then choose your destination drive and click the “Next” button to start the cloning process.
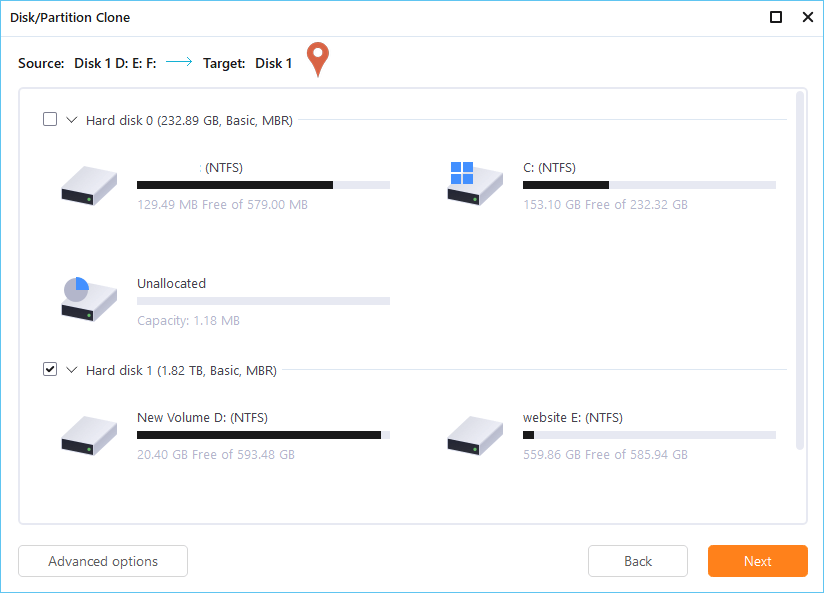
Step 4. If you are just going to clone a disk or partition, simply click the “Clone” option from the menu of Tools. After that, select your source disk or partition and then choose the target drive. Finally, press “Next” to initiate the process.
Step 5. Once the clone is done, unplug the old SSD and keep the new one well-connected. Next, restart your computer to boot the newly-cloned hard drive.
Clone SSD with AOMEI Backupper Standard
Apart from EaseUS Disk Copy, AOMEI Backupper Standard is also a strong and professional program that can help you finish disk cloning easily. Below are the steps to use this tool:
Step 1. Download AOMEI Backupper Standard from its website and launch it after installation.
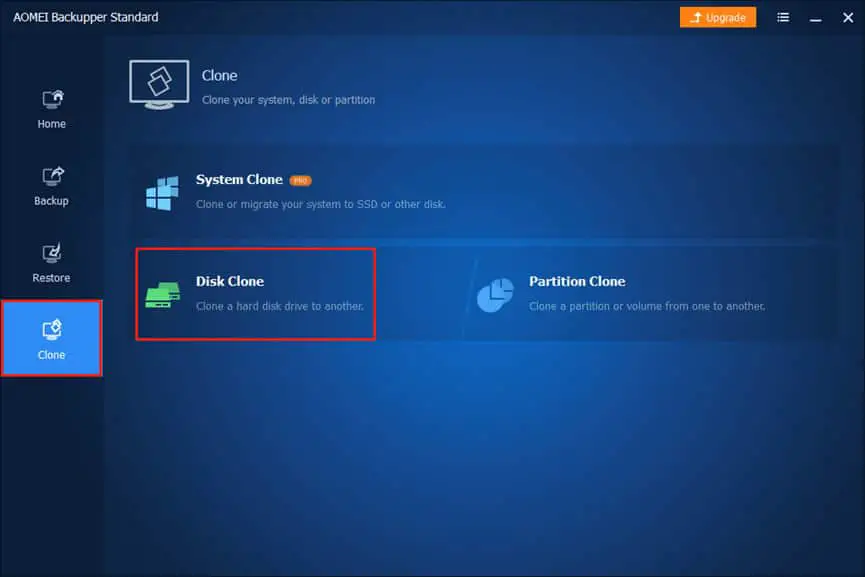
Step 2. When you enter the primary interface, select the “Clone” tab on the left sidebar and then click “Disk Clone”.
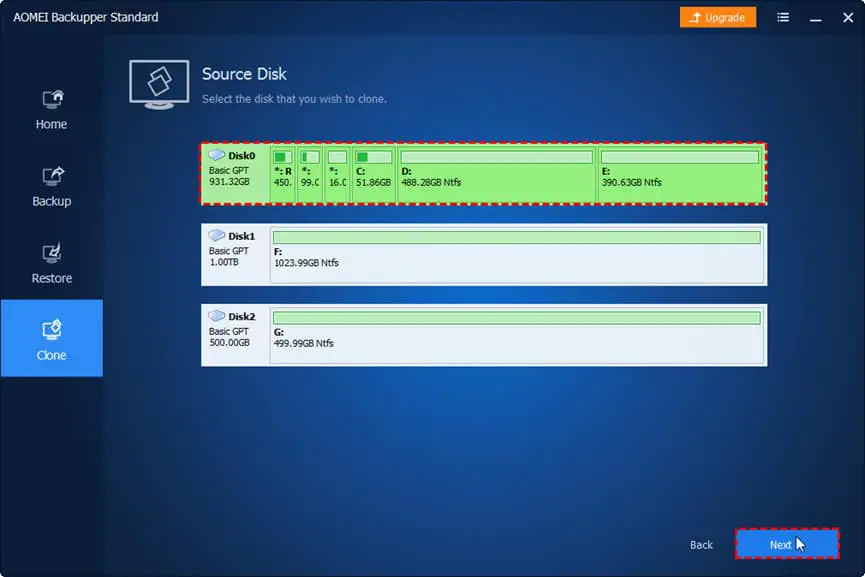
Step 3. Now select the hard drive you would like to clone and press the “Next” button.
Step 4. Choose the target disk and click “Next”.
Step 5. Then your screen will show a message that indicates the data on the destination drive will be erased. Click the “Yes” button to continue.
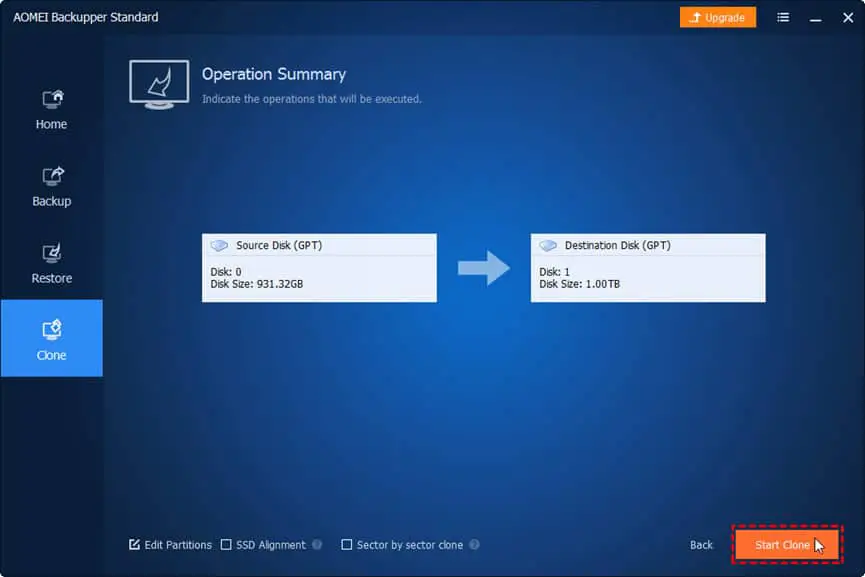
Step 6. Check if everything is right. After that, click “Start Clone” and wait for the process to be finished.
Pros And Cons of the Two Software
Considering that you may not know which of the aforementioned programs to choose, there is a simple chart to clearly present their pros and cons in different aspects so that you can decide according to what you like.
| EaseUS Todo Backup | AOMEI Backupper Standard | |
| Pros | It has a user-friendly interface. It has a wide range of cloning options, including disks, partitions, and systems. It features email notifications. | It has a slick interface. It is of strong security. |
| Cons | Its system clone utility is paid only. | It can only back up partitions and disks. |
| Pricing | Standard – Free Professional – $39.95 (Free Trial) Workstation – $49.95 (Free Trial) | Standard – Free Professional – $39.95 (Free Trial) Workstatiton – $49.95 (Free Trial) |
Practical Tips on SSD Cloning
Although you can draw support from specialized disk cloning software, there are still points you should take care of while cloning your old hard drive. Here we would like to share some useful tips to increase the success rate of SSD cloning.
💡 Make sure the larger SSD you will migrate data to is compatible with your system.
💡 Before initiating disk cloning, you must take serious consideration of your data requirements and the needed capacity of the new disk.
💡 It is important to erase the unnecessary files and organize data on your existing drive, and thus the storage usage can be optimized and the system performance can be enhanced.
💡 If required, you can update your system drivers after cloning. This will enable your cloned disk to run more smoothly.
A Lager SSD vs. HDD, Which One to Choose?
Some people will move their files and folders on an SSD to an HDD (Hard Disk Drive) rather than a larger SSD. You may be doubtful about that. Since HDDs are magnetic storage devices with mechanical parts while SSDs are flash storage devices without moving parts, the latter are smaller than the former in both size and capacity. However, in some cases, an SSD essentially has a huge advantage. To know which one you can check the following comparison chart:
| HDD | SSD | |
| Speed | Slower (30-150 MBps) | Faster (>500 MBps) |
| Lifespan | Shorter (3-5 years) | Longer (for years) |
| Consumed Power | More (2-6 W) | Less (2-3 W) |
| Structure | Mechanical (moving parts) | Non-Mechanical (flash) |
| Hardness | Fragile | Shock-Resistant |
| Pricing | Cheaper (less than $50 for 1TB HDDs) | More expensive ($90-$130 for basic SSD) |
If you only aim to store extra data, for example, music, movies, pictures as well as documents, you should choose HDDs as your storage. On the contrary, if you wish to find a storage device to store your operating system, applications, and frequently-used files, SSDs are a better choice for you. Generally speaking, a larger SSD is more practical in our daily lives as it can contain a variety of contents and has better performance in terms of speed, lifespan, consumed power and durability.
How to Choose a Reliable SSD
Assuming you may have not had a desired new SSD, here are several essential points to let you know how to select a reliable drive.
✅ Capacity
Capacity means the maximum amount of data that can be stored on an SSD, which usually ranges from 120 GB to 30 TB. Due to the number of memory modules, low-capacity drives have slower performance and less space so high-capacity drives are more recommended.
✅ Size
The size of an SSD has an impact on its compatibility. You can check with the manual that comes with your device or the official website to confirm the most suitable size of your disk. 2.5 inches is the most common size in general, which is in line with the size of a conventional HDD.
✅ Port
There are six kinds of SSD ports, which are SATA, mSATA, PCIe, M.2, USB, and NVMe. NVMe, USB, and SATA are the fastest interfaces among them. To make clear what type your PC supports, you need to read your computer’s manual or search in a database, such as the Crucial Memory Finder.
✅ Read and Write Speed
The read and write speed of an SSD largely affects anything you do on your device. Typically, it is between 200 MB/s and 550 MB/s. The faster speed can let you spend much less time waiting for your system to boot up and load up different tasks.
✅ Data Security
If you attach great importance to information security, an encrypted SSD is absolutely the best choice for you. It allows your data to be inaccessible to anyone if he or she does not have the proper security clearance.
FAQs
🔸 Can you clone a 500GB SSD to a 1TB SSD?
Yes, it’s entirely possible to clone a 500GB SSD to a 1TB SSD. However, during the cloning process, the software used should ensure that the target SSD’s capacity can accommodate all the data from the source SSD. Most cloning software allows you to clone smaller drives onto larger ones without any issues. After cloning, the remaining space on the 1TB SSD will be unallocated, which you can utilize later for storage or partitioning.
🔸 How do I move my OS to a bigger SSD?
Moving your operating system (OS) to a larger SSD also involves cloning. Several software options, such as EaseUS Todo Backup, Macrium Reflect, or the cloning software provided by SSD manufacturers, facilitate this transfer. Here are the basic steps:
- Backup Important Data: Before starting, ensure you back up important data from the source SSD.
- Connect the New SSD: Install the new, larger SSD alongside the existing one in your computer.
- Cloning Process: Use the cloning software of your choice to clone the entire contents of the smaller SSD to the larger one. Follow the software’s instructions carefully.
- Set New SSD as Boot Drive: Once cloning is complete, shut down your computer, disconnect the old SSD, and ensure the new SSD is connected in its place. Boot up your PC to check if everything works fine.
- Format Old SSD (Optional): If you wish, after confirming the new SSD works well, you can format the old SSD for extra storage.
🔸 Can you have 2 SSDs in a PC?
Yes, modern PCs often have multiple slots for SSDs, allowing users to have more than one SSD installed simultaneously. These slots might be SATA ports or M.2 slots on the motherboard. You can easily connect and use multiple SSDs on your PC. This setup is advantageous for increased storage, running programs from separate drives, or setting up RAID configurations.
🔸 Can you use mixed SSD brands?
Absolutely! You can use SSDs from different brands on your PC without major issues. Different SSD brands can coexist in the same system as long as your motherboard has compatible slots and connections (SATA or M.2). However, when configuring RAID arrays or for the best performance in some cases, using SSDs with similar specifications might be preferred. Otherwise, mixing brands typically poses no compatibility problems.
Conclusion
This post has guided you through everything important in cloning SSD to larger SSD, and now it is time for you to take action in reality. If you encounter other problems or have any questions, please feel free to leave a comment and we will reply to you as soon as possible.
I’m thrilled to be part of the OneRecovery team as a writer. I’m passionate about simplifying the complex world of data recovery and making it easy for everyone to understand. My focus? Well, I love diving into tutorials on hard drive recovery, crash computer data retrieval, photo repair, and many more. But that’s not all—I’m all about exploring the creative side too, so expect plenty of engaging and imaginative posts on various aspects of data recovery software. Join me on this journey as I share insights, tips, and tricks that make data recovery a breeze!