


 My Account
 Sign Out

Why are videos sent to me blurry or unclear? This is a frustrating problem that commonly happens in our daily lives. Thankfully, with advanced technology, there exist some solutions to resolve it. So to help you gain a clear version of your video, this post is going to discuss how to fix blurry video on Android and iPhone. Now go on and find the fixes!
Why Are Videos Sent to Me Blurry on iPhone and Android
To address this video issue, the first thing you should do is to understand why a video will get fuzzy when you receive it. Generally speaking, the common causes that can lower video quality are as follows:
- Compression
When a video is sent by email or text message or transferred through some social media platforms that often drop the content quality, it will be compressed before you receive it so that you find it very blurry when it is loaded and opened. This is because some video data is likely to get lost during the process, leading to poor video quality.
- Low Resolution
The differences between resolutions of various devices can be a reason for your fuzzy video. If a video is transferred from a device with a low-resolution to a high-resolution display, it tends to blur on the destination device because it is recorded in a low resolution at the beginning.
- Low-Light Environment
When a video is shot in a low-light environment, the camera sensor usually increases the ISO to compensate for the lack of light. In this way, the resolution of the video will be reduced and the pixels will be less sharp. Finally, it turns blurry after being sent to you.
- Transfer Format
Video formats vary depending on dissimilar systems and this can have an impact on video quality. For example, the iPhone 12 Pro Max uses a high-efficiency format and its videos may appear fuzzy or even invisible on other devices like some Android phones, whose operating system does not support them.
How to Fix Blurry Videos Sent to Me on iPhone and Android
Now that you have learned about the potential reasons for blurry videos sent to you, it is time to explore the possible solutions. Here we provide you with effective methods to unblur a video on both iPhone and Android devices. They do not require any professional skills at all.
Use an Editing App
If the changes on the video playback settings cannot help you, you may need a video editing application to improve the video quality by adjusting various settings like brightness, contrast as well as sharpness. A professional video editing app capable of finishing this task for you, such as Adobe Premiere Rush and InShot available on both Android and iPhone. Below are the common steps to adopt these programs.
1. Download the video editing app you like and install it on your mobile device.
2. Import the blurry video to be repaired into the app.
3. Use the video enhancement features to adjust the parameters of the video as required.
Source: Adobe
4. Preview the enhanced video to check the effect before it is saved on your system.
5. When you confirm everything is OK, export the repaired video and specify a location to save it on your device.
Use Online Video Fixer
There are several free online video fixers in the market, which can efficiently fix the blurriness issue as well. You will not need to download any programs on your system with the help of these tools. Any credible online video clearer can help you cope with the trouble. To provide a demonstration, we will take Clideo Video Clearer for instance in this section.
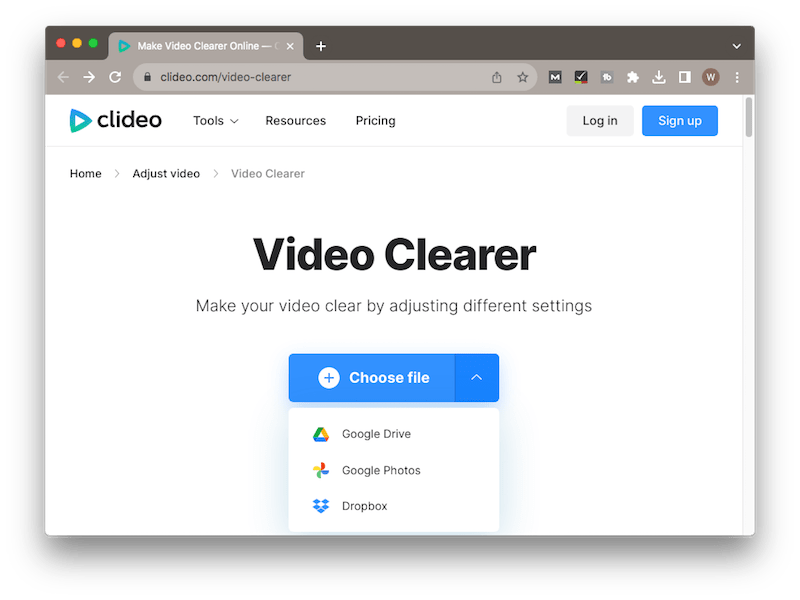
1. Visit the official website of the tool that you choose.
2. Press the “Choose file” button to upload your fuzzy video.
3. Then the fixer will show up an editing interface. You can adjust the settings on the right sidebar to unblur your video as you want.
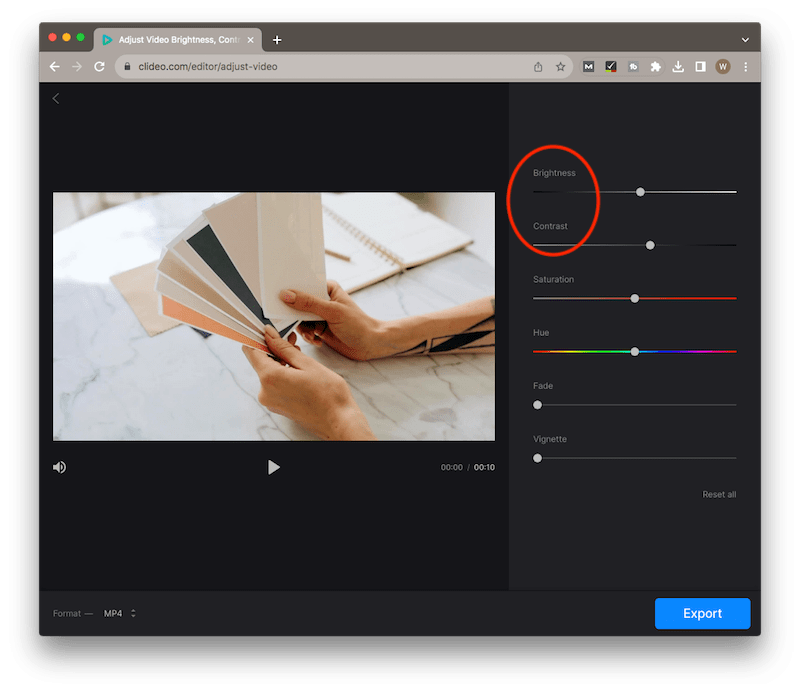
4. After that, select your desired output format in the bottom left corner of the screen.
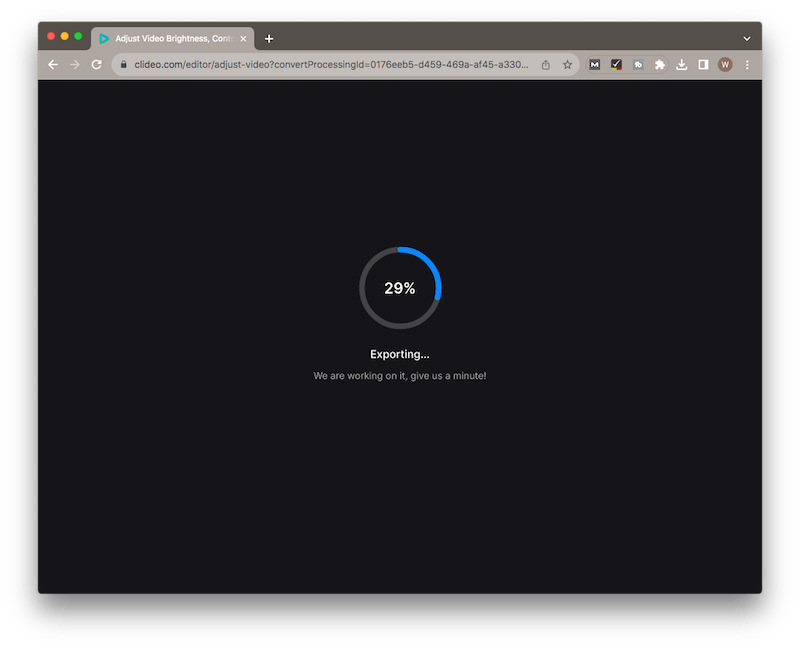
5. Click on the “Export” button on the right side. Once done, the video clearer will start the adjustment process.
6. Wait for the process to be accomplished, and then click “Download” on the left pane to save your edited video on your device.

Source: CISDEM
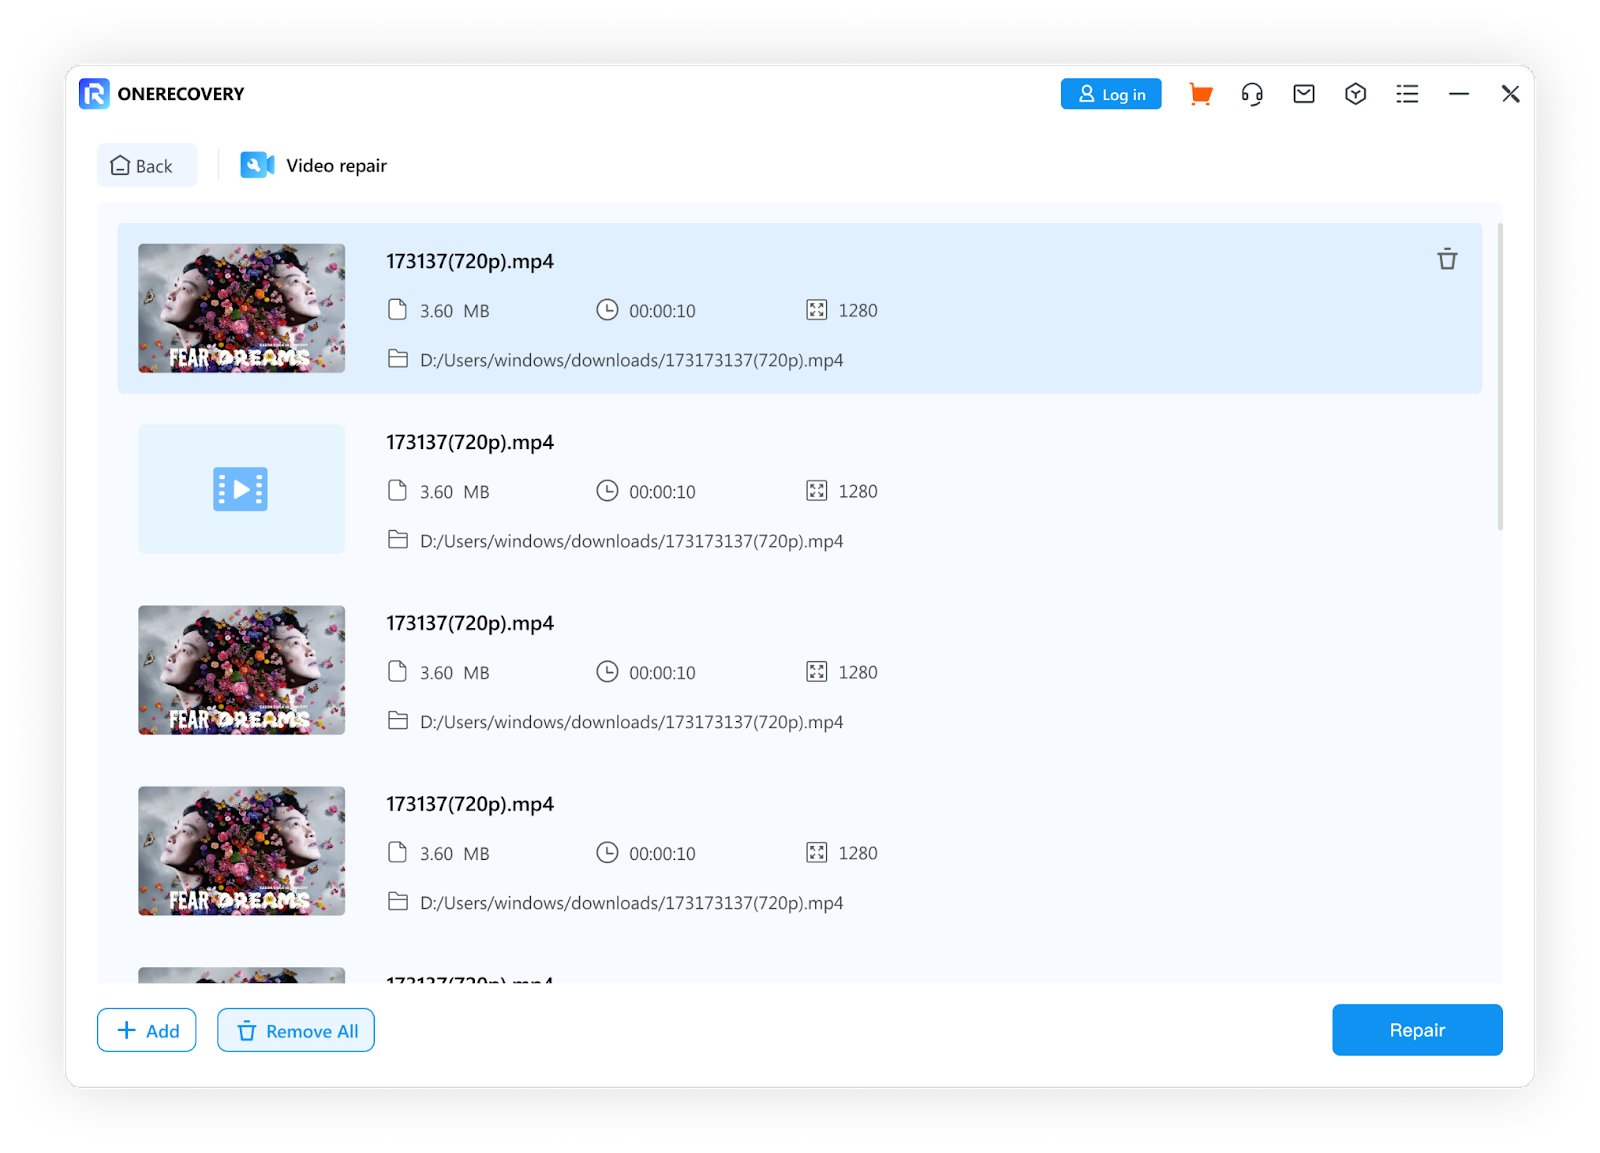
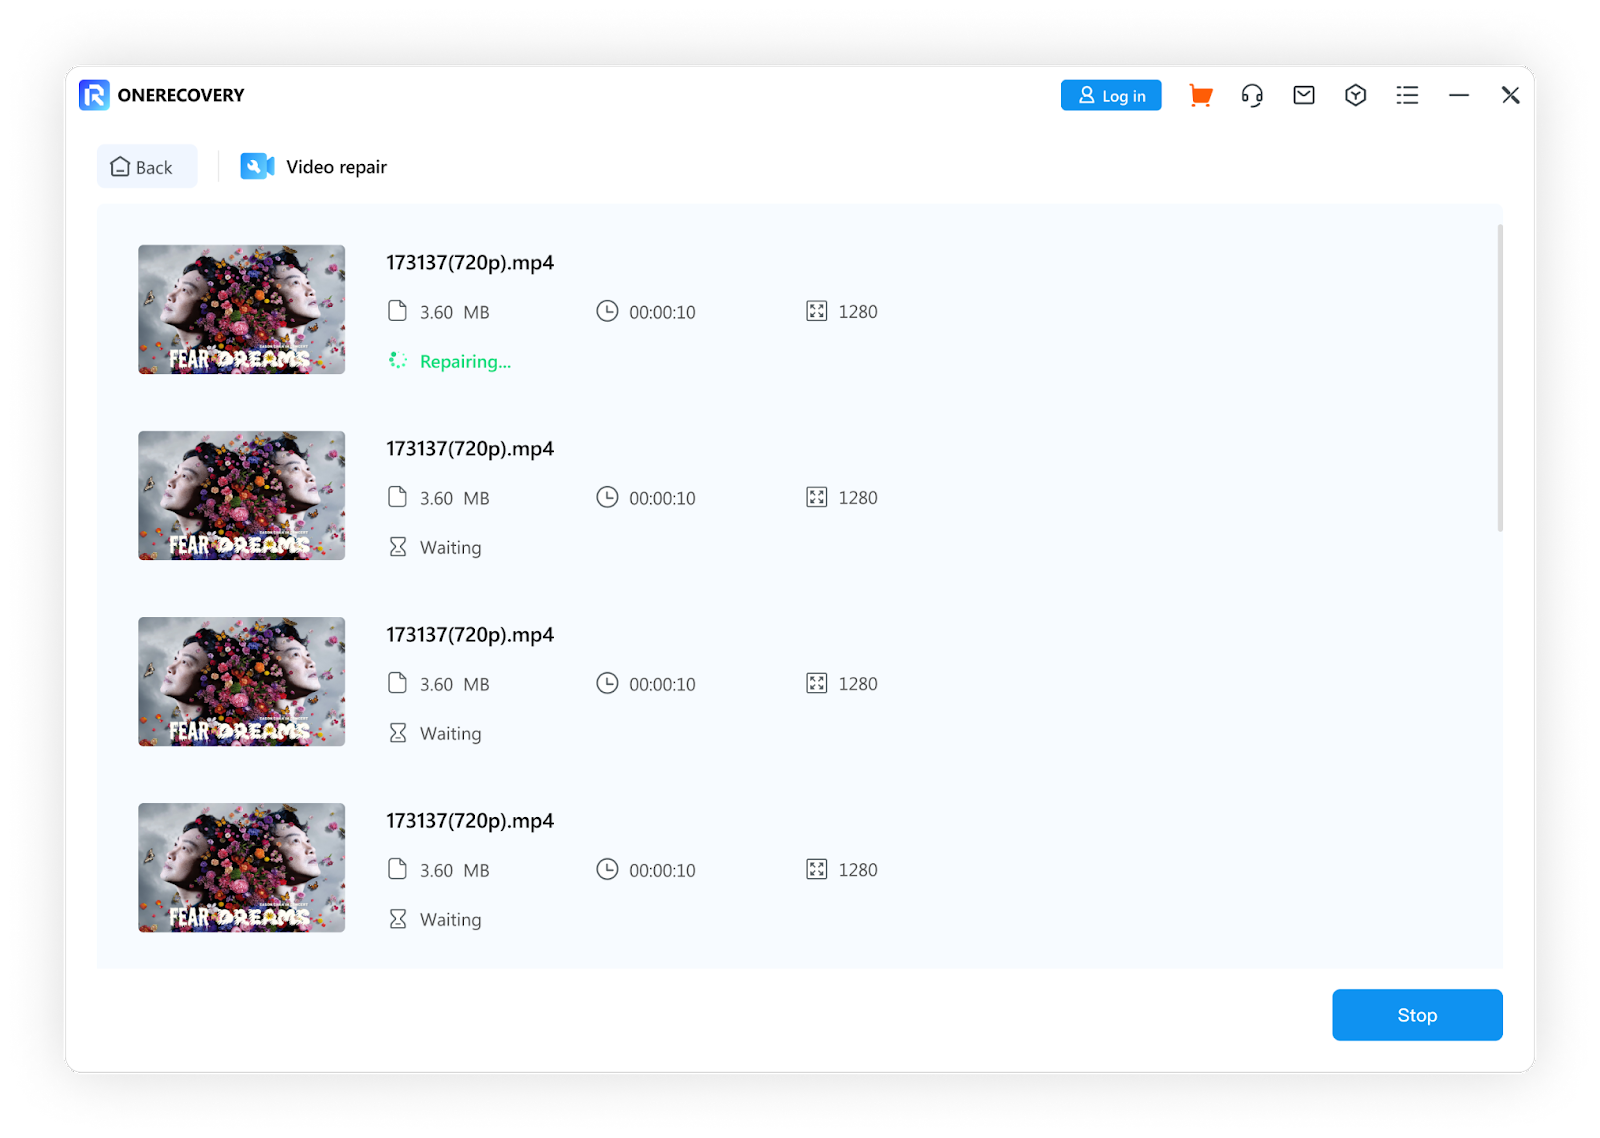
Use Video Repair Software
In case the online video fixer tool can not unblur a video sent to you, the desktop version of OneRecovery can be your next go-to solution. It works seamlessly on both Windows and Mac devices and repairs blurry, choppy or unplayable videos caused by corruption. Its intuitive interface makes it easy to navigate through and bring blurry video back to life effortlessly, without limitation to file length and size. Key features of this video repair software:
- Supports video formats in MP4, MOV, MKV, M2TS, AVI, 3GP, M4V, MXF, etc.
- Works with computer, phone, SD card, USB flash drive, famous camera brands including Canon, GoPro and DJI.
- Support batch video repair, allowing you to fix up to 10 videos at once.
- 100% secure and AI repair
Follow steps below to unblur a video:
1. Launch the video fixer software by OneRecovery on your computer. (Connect your iPhone or Android phone to computer, if needed)
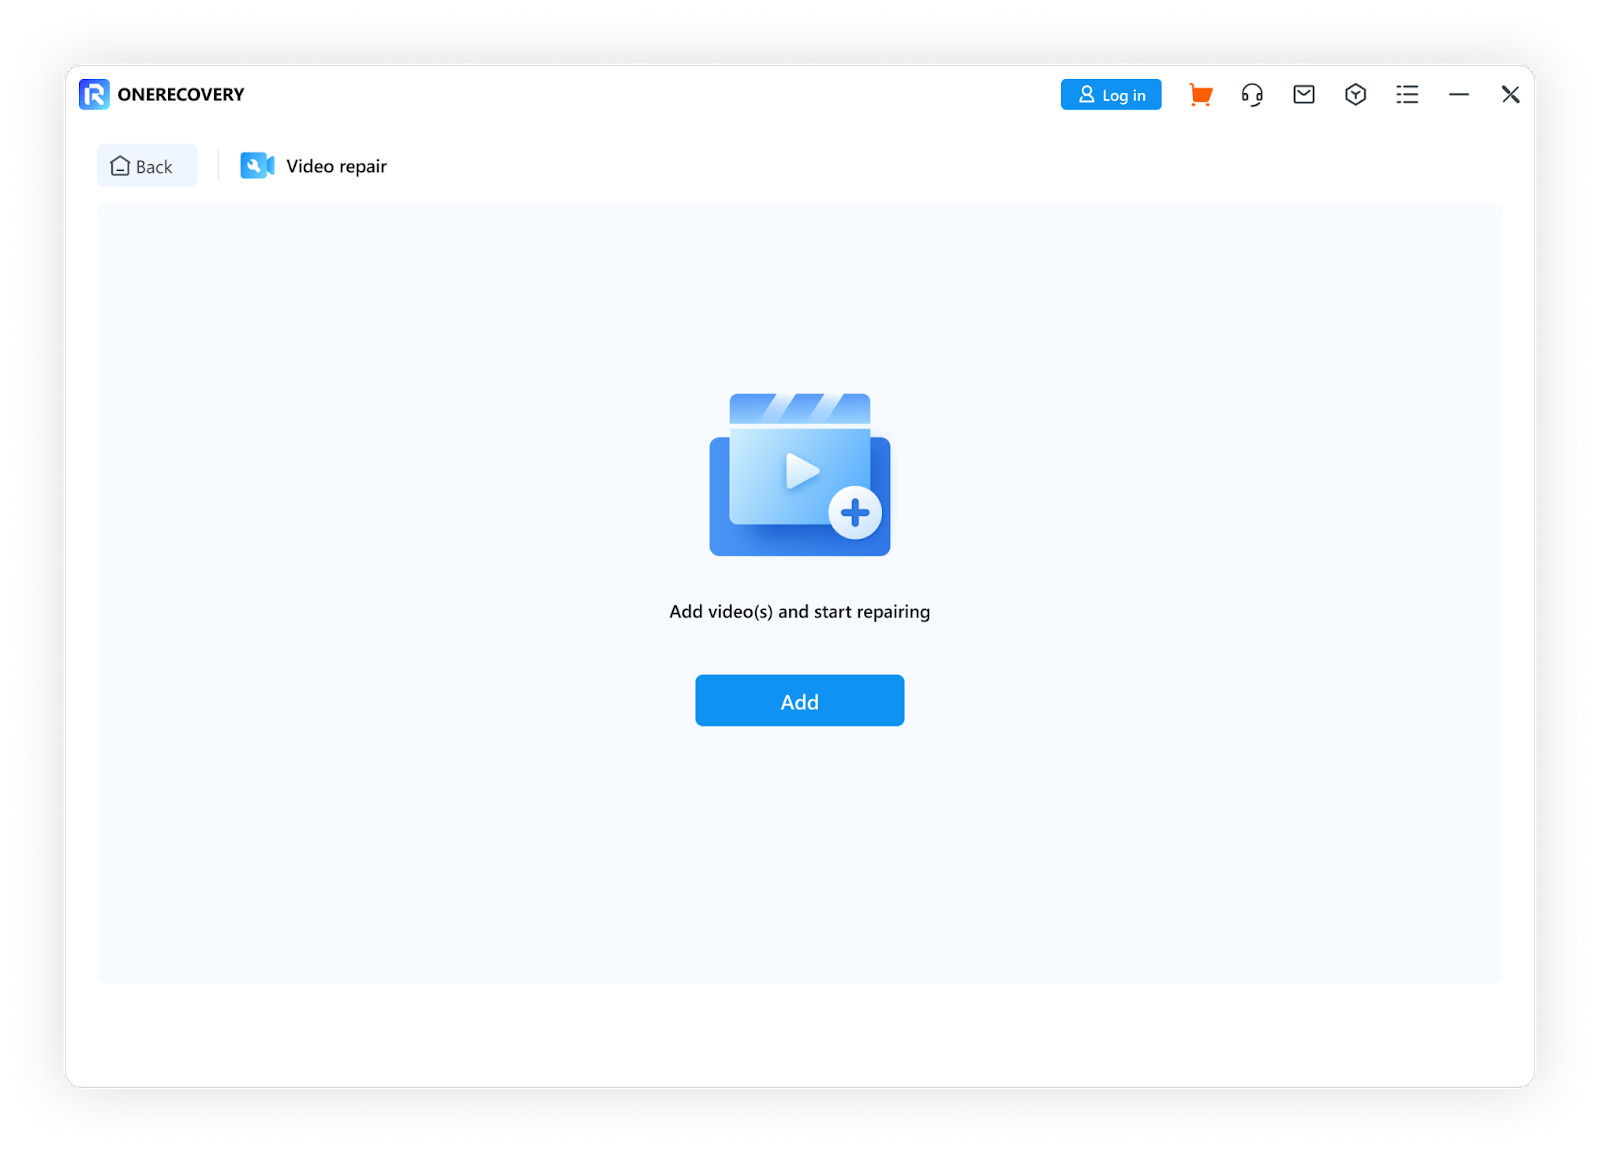
2. Navigate to “Video repair” in the interface.
3. Click the “Add” button to upload the video you wish to repair. Also, you are allowed to add 10 video files to fix.
4. After selecting the video, press “Repair” or “Recover All”.
5. Wait for the AI restoration to repair the selected video.
6. When the process is complete, you can preview the recovered video. If you think it is OK, click on the “Save” button.
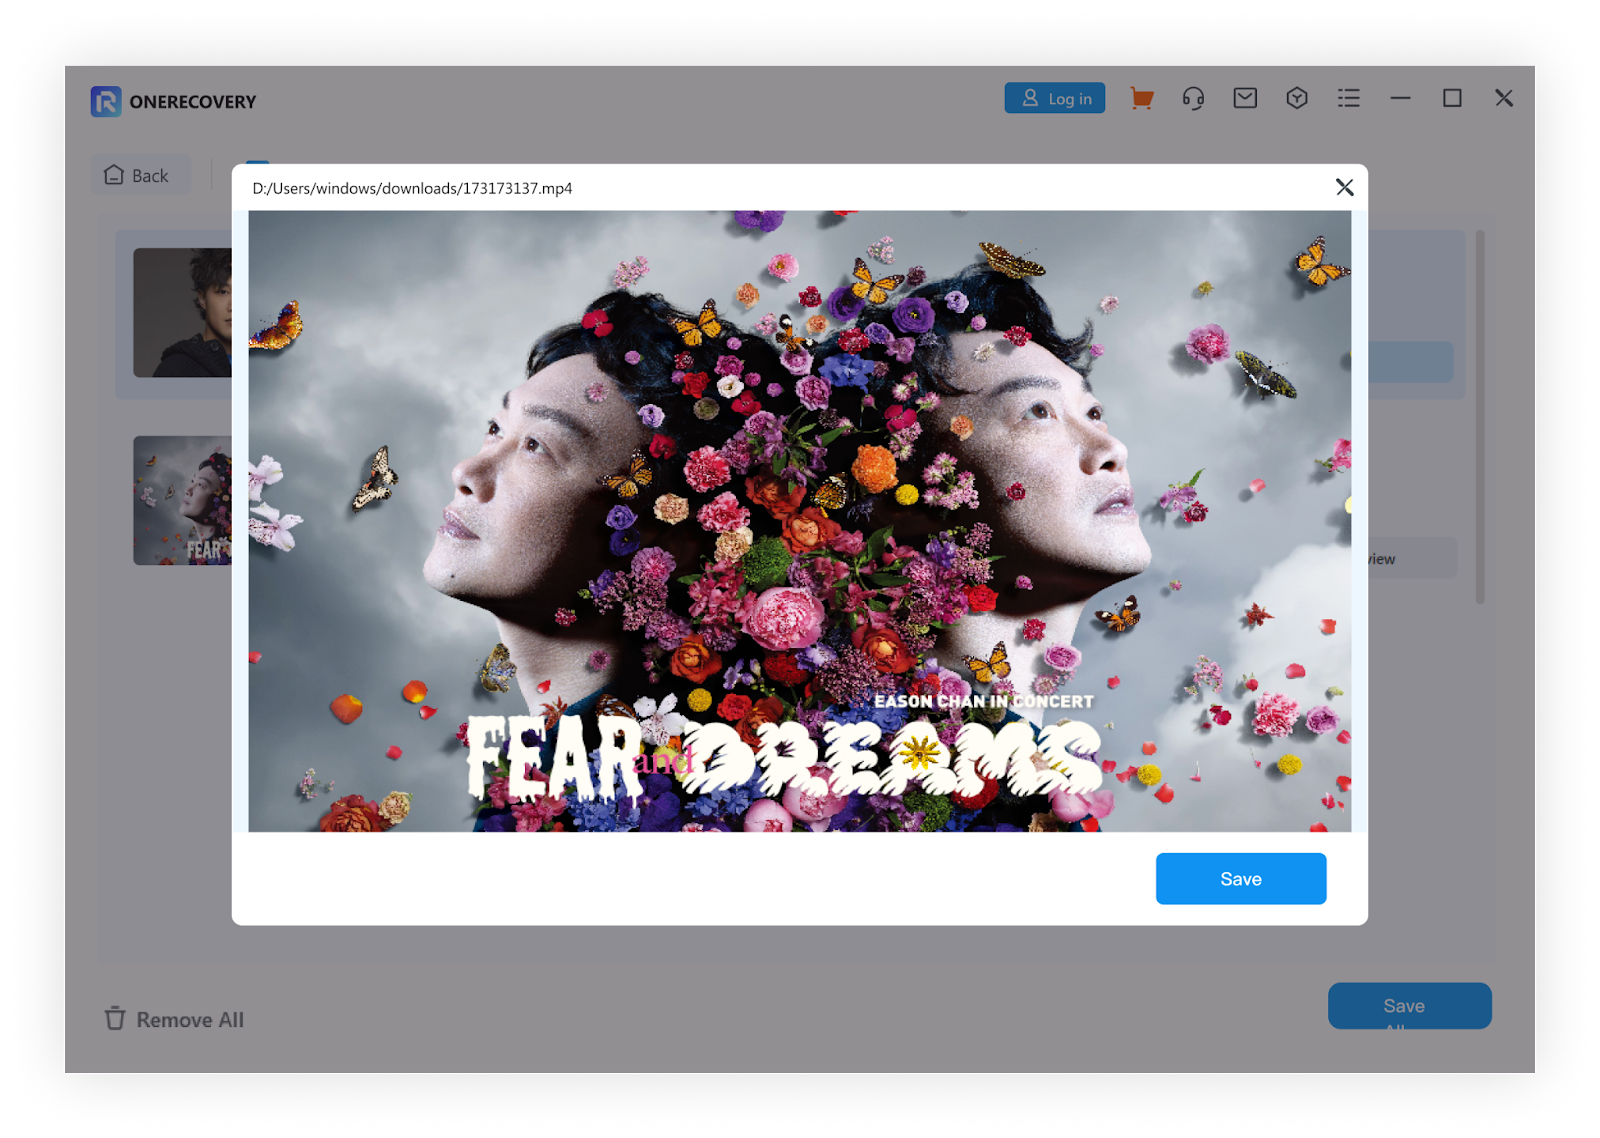
7. Finally you should choose a storage path and then press “Save” to keep your repaired video well on your device.

Exclusive Solutions to Fixing Blurry Videos on iPhone
This session will show you how to remove blur from your videos on iPhone. You can try changing video playback settings, sending videos via emailbox or editing the videos with Message app. Let’s see how this can be finished in just a few steps.
Change Video Playback Settings
When you find your video unclear on your iPhone, you can try adjusting the video playback settings to improve the video quality, to resolve the blur problem. Follow the below guidelines on how to adjust settings on iPhone.
1. Get your iPhone’s Settings app started.
2. Scroll down to choose the “Photos & Camera” button.
3. Tap on “Record Video” under the Camera section.
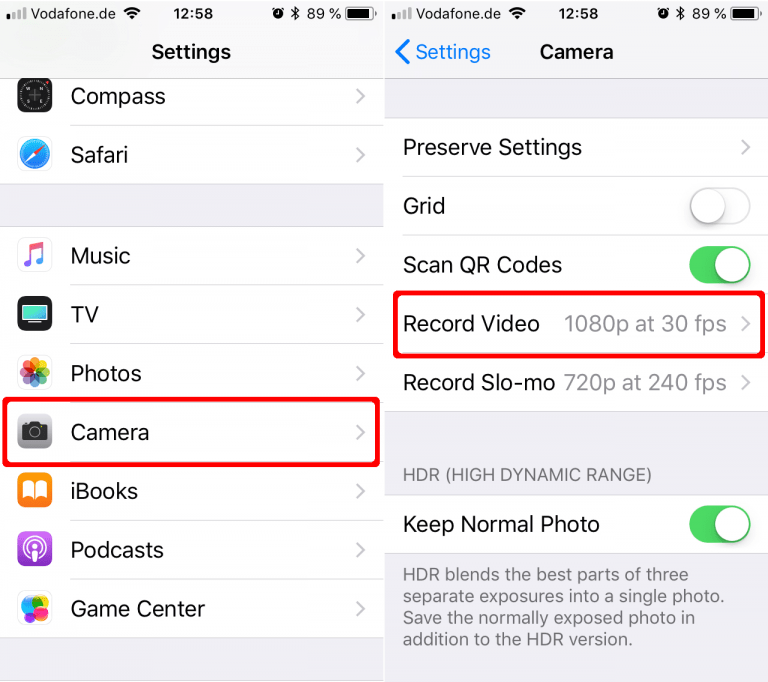
4. A list of available video resolutions will be presented to you. Choose the option of a higher resolution than the current resolution of your video.
Receive Videos via Email
Videos, photos, or documents shared via email may get blurry or unclear due to compression issues. To address this, you can send high-quality videos through a mailbox and then download them. It will help to unblur a video on an iPhone.
Edit Video with Message App
Another way to make blurry videos clear is by editing the video with built-in messaging app. This can help to enhance video quality and make it less likely to appear blurry when viewed by the recipient. Follow the steps to fix blurry videos sent to me on iPhone:
Step 1. Go to Photos app and choose the desired video.
Step 2. Then tap on the Edit button and make various changes to the video, including adding filters, changing resolution, and trimming it.
Employ Cloud Storage Services
To unblur a video on an iPhone, you can make good use of iCloud services such as iCloud, Google Drive, or Dropbox. They allow you to upload large video files and share them with others without losing video quality. You can just upload the video to a cloud storage service and send it to someone.
Take Dropbox as a specific example. You can use this file-sharing or cloud storage service to store your documents, photos, or videos in the cloud. For it to work, simply sign up for a Dropbox account and install the app on your device. Learn how to fix blurry videos using Dropbox in the following steps.
Step 1. Launch Dropbox app and click on the Plus icon to store a video.
Step 2. A new popup will appear when you select the video. Then you can choose how you want to store the video.
Step 3. The stored video can be accessed from any Dropbox app. You can also choose to download the video to your iPhone or Android phone.
Exclusive Solutions to Fixing Blurry Videos on Android
Adjust Video Playback Settings
In some cases, changing video playback settings on your Android device can help to improve video quality. Follow the steps listed below:
1. Navigate to the Settings app on your Android phone.
2. Scroll down and select the “Display” option.
3. Tap on “Screen resolution” from the menu or “Advanced” depending on the specific device in your hand.
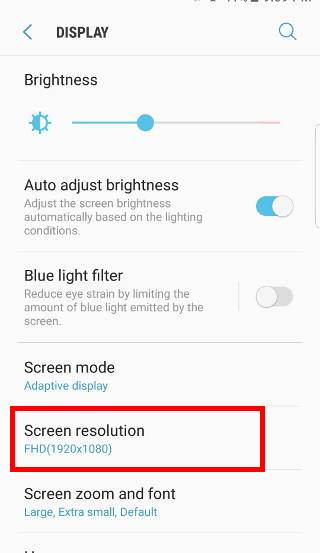
4. Now you can set a higher resolution for your video.
Open Video in Gallery App
For Android users, you can edit videos with Gallery app. Simply choose the video from the app, then tap on the Edit button. Similarly, it allows you to maker changes to the video, such as trimming it, adding filters or changing the resolution.
Troubleshoot Device-Related Issues
Sometimes, videos may become blurry or unclear due to device issues. If you find yourself in a similar situation, you can consider the following solutions.
- Clear cache and storage to get rid of video playback issues caused by temporary files or corrupted data.
- Restart your device to fix any temporary issues automatically.
- Make sure your Android phone is running the latest software version. Outdated software can cause playback issues.
Bonus Tips: Can I Repair Blurry YouTube Videos
In some cases, YouTube videos can get blurred because of poor or unstable networks, low video quality, outdated video card drivers, or other factors. However, they are of course able to be repaired well. There are two common methods that you can consider using:
Solution 1: Tweak the YouTube Video Quality Settings
When you find you cannot view a clear video on YouTube, you should first check if it is a maximum quality available in Settings. To make this change, please follow the steps below:
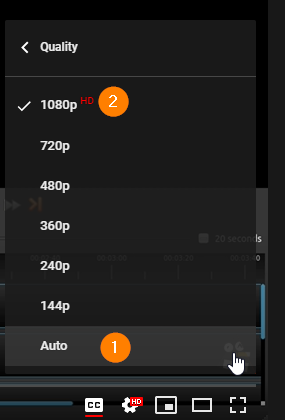
1. Click on the Settings icon at the bottom of the blurry video you are watching.
2. Select the “Quality” option from the expanded menu to see the current quality and adjust it. Generally, it is set to “Auto”.

3. Now choose a higher resolution from the list. You are allowed to select the highest quality.
Solution 2: Update the Video Card Drivers
Outdated video card drives can create bugs and then result in blurriness in YouTube videos. Under such a circumstance, you will need to make an update on the drivers to fix it. Here are the detailed instructions to update the video card drivers:
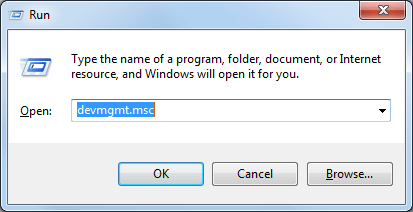
1. Open the Run dialog by hitting the Window and R keys (Win + R) on your keyboard.
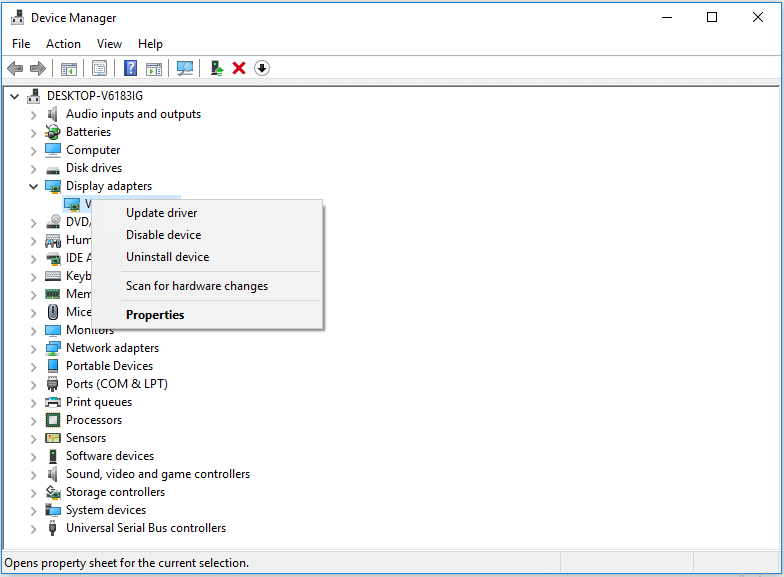
2. Type in “devmgmt.msc” and then click “OK” to launch Device Manager.
3. When you enter the Device Manger window, locate and expand the “Display adapters” option from the list.
4. Right-click on the video card under showed under “Display adapters” and select the “Properties” option.
5. Go to the “Driver” tab in the pop-up window and click the “Update Driver” option.
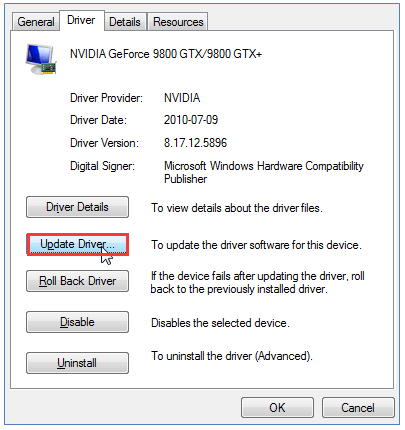
6. Choose “Search automatically for updated software” in the prompt pop-up.
7. Currently follow the on-screen instructions to finish the update process.
How to Prevent Blurry Videos in the Future
To keep a good video viewing experience, it is suggested you adopt some methods to avoid blurry videos in your daily life. There are several related helpful tips:
- You should record videos in high quality, such as 1080p and ultra HD format. In this way, your video can be compressed without losing its resolution.
- You should record videos in a well-lit place, considering that a low-light environment makes it easy to create blurriness.
- You should keep a clean lens of your camera, which enables you to capture appropriate light sources and take sharp videos.
- You should use video stabilization features. A lot of devices like smartphones provide video stabilization features to help minimize blurriness resulting from shaking. Please ensure you have enabled these features when you are about to take a video.
- You should use active filters on your camera to help you shoot a clear video.
Source: How To Fix Blurry Youtube Videos!!
FAQs about Blurry Video
How do you send a video on messages without it being blurry?
If you want to send a video via text message without causing blurriness, you can try the following two solutions:
1. Enable High-Quality Settings in Your Messaging App
This method is effective in preserving the original video quality and dropping the possiblity of compression-induced blurriness.
a. Open the messaging app you are using to send the video.
b. Make your way to the app’s settings or preferences.
c. Locate the option involving video quality or resolution.
d. Choose the highest quality setting available. Then you can try to send your video.
2. Use Proper Messaging Apps
Some messaging apps boast strong video file transmission feature while ensuring video quality, such as WhatsApp, Telegram as well as Skype. You can consider these applications to send your video to reduce chances of being blurry.
How to fix the “blurry part of iPhone screen”?
The blurry part of iPhone screen is probably caused by a software issue. Therefore, you can first restart you iPhone and then check if the problem is fixed. If not, you can work to adjust your setting through the below steps:
1. Go to the Settings menu.
2. Tap on the “Display & Brightness” option.
3. Switch between the day and night modes.
Why are videos sent from Android to iPhone or iPhone to Android blurry?
The possible reason why videos sent from Android to iPhone or vice versa get fuzzy is the density of pixels on Android and iPhone is quite different. The video pixel for Android devices is 720p or 480p approximately while that for iPhone is around 1080p. In this instance, videos easily blur due to a lack of proper compression.
Conclusion
With the right tools, fixing blurry videos sent to you on iPhone or Android is no longer a tough task. You can either employ built-in options or third-party video fixer tool. Ranging from adjusting video playback settings to fixing blurry video online, you can get your high-quality video in minutes!
Related Posts:
How to Fix Pixelated/Grainy Videos with & without Adobe Premiere Pro
[Solved] Error Code 224003 – This Video File Cannot Be Played
I am a content writer specializing in the technology and data fields. With over 5 years of writing expertise, I have produced clear, engaging content to communicate complex information to a variety of audiences. I am skilled at translating technical concepts about the latest software, AI systems, data recovery, file and video repair, and digital trends into easily understandable language for the average reader. My articles and copy bring clarity to murky tech topics through the use of metaphors, analogies, and strategic explanations.
